I am knitting the Skappel Esther Sweater and have followed the pattern correctly so far up until the neck shaping portion. Disclaimer - this is my first time knitting a sweater and I feel as though I may have got myself a bit in over my head but I am determined to figure out how to do this.
I am quite confused on the neck shaping section and I think i just need a bit more clarification regarding what it now means to be knitting back and forth but having some stiches off to the side? The first paragraph starting with “begin at beginning of round marker, knit and work ragland stiches” really confuses me. Am I supposed to put half the stiches to the side and not knit them? or what am I slipping where? What is the reasoning for knitting back and forth instead of in the round anymore anyway? Basically the entire way this is written has confused me and I I am just looking for very layman’s terms as a new sweater knitter.
Thanks to anyone in advance! I am trying to learn but can’t find any instructions anywhere else!
That is certainly confusing! Very pretty sweater, apparently notorious in Norway for having poorly-written instructions, so you are not alone in your confusion. The comments on Ravelry and elsewhere by people who have made this almost ALL complain about the pattern being poorly-written, especially as regards the neck shaping.
Someone else will be able to help in more detail, but basically you’ll be working back and forth across the sleeve and back stitches, to raise the back of the neck. The ones you’re putting on hold are across the front neck…you’ll knit or bind them off later. It looks like you’ll bind off the whole neckline, and then pick up stitches to knit the collar.
I’m leaving the rest for someone else, as I don’t understand it either.
ColoCro has given you a good basis for these directions. They would have been easier to understand with row by row instructions or a diagram but there you go.
The raglan decreases are every other round so now that you are knitting back and forth they will only be on the RS (right side or outer, public side of the sweater). The WS (wrong side or inner side) will be purled with no raglan decreases.
The directions begin with the front sts (37sts for the first size) placed on hold. You’re going to extend the back up several more rows and shaping the neck at the same time. This is to improve the fit of the sweater.
To continue: as you continue around a decrease row, stop at the beginning of round (BOR) marker, cut the yarn and slip the sts after the BOR marker up to the 37 held sts to the right needle and turn so that the purl side is facing.
Row 1 Purl across to the end of row (the BOR marker)
Row 2 K2tog or ssk, K to the last 2sts and k2tog. Work the raglan decreases as you come to them.
Row 3 Purl the row
Repeat rows 2 and 3 until you’re up to the last 7 raglan decreases (again this is for the first size). The count of the raglan decreases is 24 so that you can determine when you reach the last 7 decreases. After that work decreases at beginning and end of row, every row (knit rows and purl rows).
This isn’t an easy pattern to follow and yet you’ve gotten this far. Very well done!
Sweaters are constructed in a various ways and not all of them involve switching to working flat, back and forth, but very many do so it is quite a standard thing to work some in the round and then some flat (or flat then in the round, if constructed top down). One reason is that there needs to be openings for arms, so the knitting needs to stop at the arm hole (some construction methods manage to avoid this), another reason is that there needs to be an opening for the neck, but the fabric needs to be worked higher on each side of the neck hole to reach the shoulder, this means working one side of the neck up to the shoulder, then going back to stitches on hold to work the other side of the neck up to the shoulder. Again, some construction methods avoid this, by having a slit neck or boat neck for instance but these may not be the style you enjoy wearing.
There are advantages and disadvantages to working in the round and working flat (and the different construction methods) and the more patterns you make the more you will experience and decide if you prefer this way of working or that way of working. It might be you enjoy working soley in the round but that the shape of sweaters made purely in the round doesn’t suit you or they feel uncomfortable…and then you begin to decide what is more important, what you want out of a sweater and you make decisions about the patterns you choose.
For instance I don’t like to wear raglan sweaters so I avoid making them.
The pattern you’ve chosen is complex and you’ve done brilliantly to work it as your first ever sweater! There will likely be little bits in patterns you might not understand, but that’s OK, you can ask here and just keep on learning and experiencing different things. I believe the most important aspect of choosing patterns is something you really want to make, not necessarily something labeled easy (which often are not easy as ease is relative to prior knowledge), but something that excites you.
And don’t be afraid to come back and ask again, as many times as you need to. Sometimes we need to hear explanations phrased in different ways for something to click. We’ve all been there!
Thank you for all your help! Okay I have a few more questions
First, Am I putting the very middle 37 sts on hold, or am I putting the first 37 sts? The first 37 would seem confusing because its not the center of the sweater?
Second, when it says 24 decreases, does that means itll be another 41 rows to knit?? Since the first 17 rows will be every other, when only decreasing on the right side, and then the last 7 is every row.
It’s the front 37sts that go on hold for the front of the neck.
Also for the first size, 16 raglan decreases have been worked before the neck shaping. So for the first size as I read it, there should be a total of 24 raglan decreases. When you complete 17 raglan decreases (24-7=17), decrease every row RS and WS. So 34 rows for the first set of raglan decreases total and 7 rows for the following decreases (41rows total). But that includes the raglan decreases made before the neck shaping.
Which size are you making? Does that make sense with the measurements of the sweater especially the raglan length? Let us know because these aren’t the clearest directions and there’s more than one way to go with them.
Thank you for all your help - I really want to figure this out!
I am making the size medium. Per the pattern, I have already done 20 raglan decreases. Now in the neck shaping I’m supposed to decrease a total of 27 times, but the last 9 raglan decreases should be done every row. If I am understanding correctly, and 27 times is total (neck shaping + raglan shaping) then how does the last 9 work, since 20+9 = 29 and Im supposed to only do 27.
I’ve been looking at the Ravelry comments from savanknits (size small). https://www.ravelry.com/projects/savanknits/ester
“Did 4 rows every other round raglan dec (so 2 rows decreasing), then 6 rows of every round raglan dec, then final main color row with raglan dec.”
I believe she’s the one who made the video ColoCro linked to. It looks like she got creative with the raglan shaping and I think you may have to do that too. You might work fewer every other row decreases and more rows with every row decreases.
I think part of it also depends on how wide you want the neckline. Savanknits’ is fairly wide…I myself might do more decrease rows to bring the neck in closer. Looking at the various project photos, the necklines vary wildly!
I don’t know if it would help to try it on, and see where your neckline is ending up? A couple of people said they wished they had started the neckline later, making it higher.
Ive decided to basically wing the neck shaping. But when it comes to the neck band, what does it mean to pick up and knit stitches. What is the reasoning for binding off and then picking up? why wouldnt I just decrease until it gets to 98 stitches? Am i supposed to just take the 43 from the center that have been on hold and 'pick up" 55 from the back? Thanks for all the help!
There are lots of different video tutorials for picking up and knitting, here’s one for a neckband
The reason for binding off and decreasing around the neck is to make some shape so the neckband doesn’t cut into your throat when you are wearing the sweater. The shaping can be crew neck, scoop neck, v neck etc and the knitting for the neckband will be at a slightly different angle/direction to the main body of your knitting. Binding off also adds some strength and structure into the neckline so that stitches which go up into the neckband are not so stretched out by the weight of the entire sweater hanging off them, instead they have a firmer edge to work up from. The bind off edge helps to keep everything in place and shape the neck hole.
The stitch count and stitch pattern often change for the neckband.
Often patterns say how many to pick up in each section for the neckband but as this pattern doesn’t you need to calculate it.
The stitch count will not be 43 for the front and 55 for the back because you will need an even distribution between front and back and you will need to pick up some stitches along the shaped/curved edge of the front neck band either side of the centre front neck (the 43). You will see this in the video.
98 ÷ 2 = 49 so I’d aim for 49 stitches front and 49 stitches back. You have a straight bind off centre front of 43.
49 - 43 = 6 this means (starting at left shoulder, left as you would wear it) you can pick up 3 stitches left front neck, then the 43 centre, then 3 stitches on right front neck to reach right shoulder. Then continue with 49 across the back to reach the left shoulder and you should have a total of 98.
Look at the shape of the neck line and plan ahead where to pick up. If needed you can alter the pick up number but it needs to be divisible by 2 for the rib to work.
One thing that might help is to compare your knitting to a sweater you already have. It doesn’t have to be a raglan, although that would be easiest. Line the shoulders of your knitting up with the other sweater and measure how far you need to go to get to where you’d like the neckline to end up. Compare that to how many rows per inch you knit to determine how many more rows you need to do, and then you can figure out how often to do the decreases.
The shoulder point will be determined by where the raglan seams come together, so this may be a bit irrelevant, but front necklines are usually rather deeper than back necklines. When I draft a shirt pattern for fabric, the back neck drops 1" and the front 3" or more. The neckline is usually divided in thirds for the collar–one third for the back, one third from left shoulder to center front, on third from center front to right shoulder.
So I would shoot for 32 stitches across the back and 33 for each side of the front neck, if that makes sense with where the raglan lines are, although it may not matter so much in knitting, as the fabric is stretchy.
Good point. I was partly going by the pics which looked pretty high up in the front neck, but you’re right it does depend what the neck hole is like. It would make sense for the pattern writer to add in how many stitches to pick up in each section.
The necklines on the projects in Ravelry are all over the map, from right at the base of the neck to halfway out the shoulder. The designer definitely should have given more care to this portion of the pattern.
This is my first sweater and I have learned a lot - that being said, I think I used needles that were too small - I thought I gauged them correctly with my yarn, but compared to everyone’s photos and how mine is turning out, I think that is what is happening.
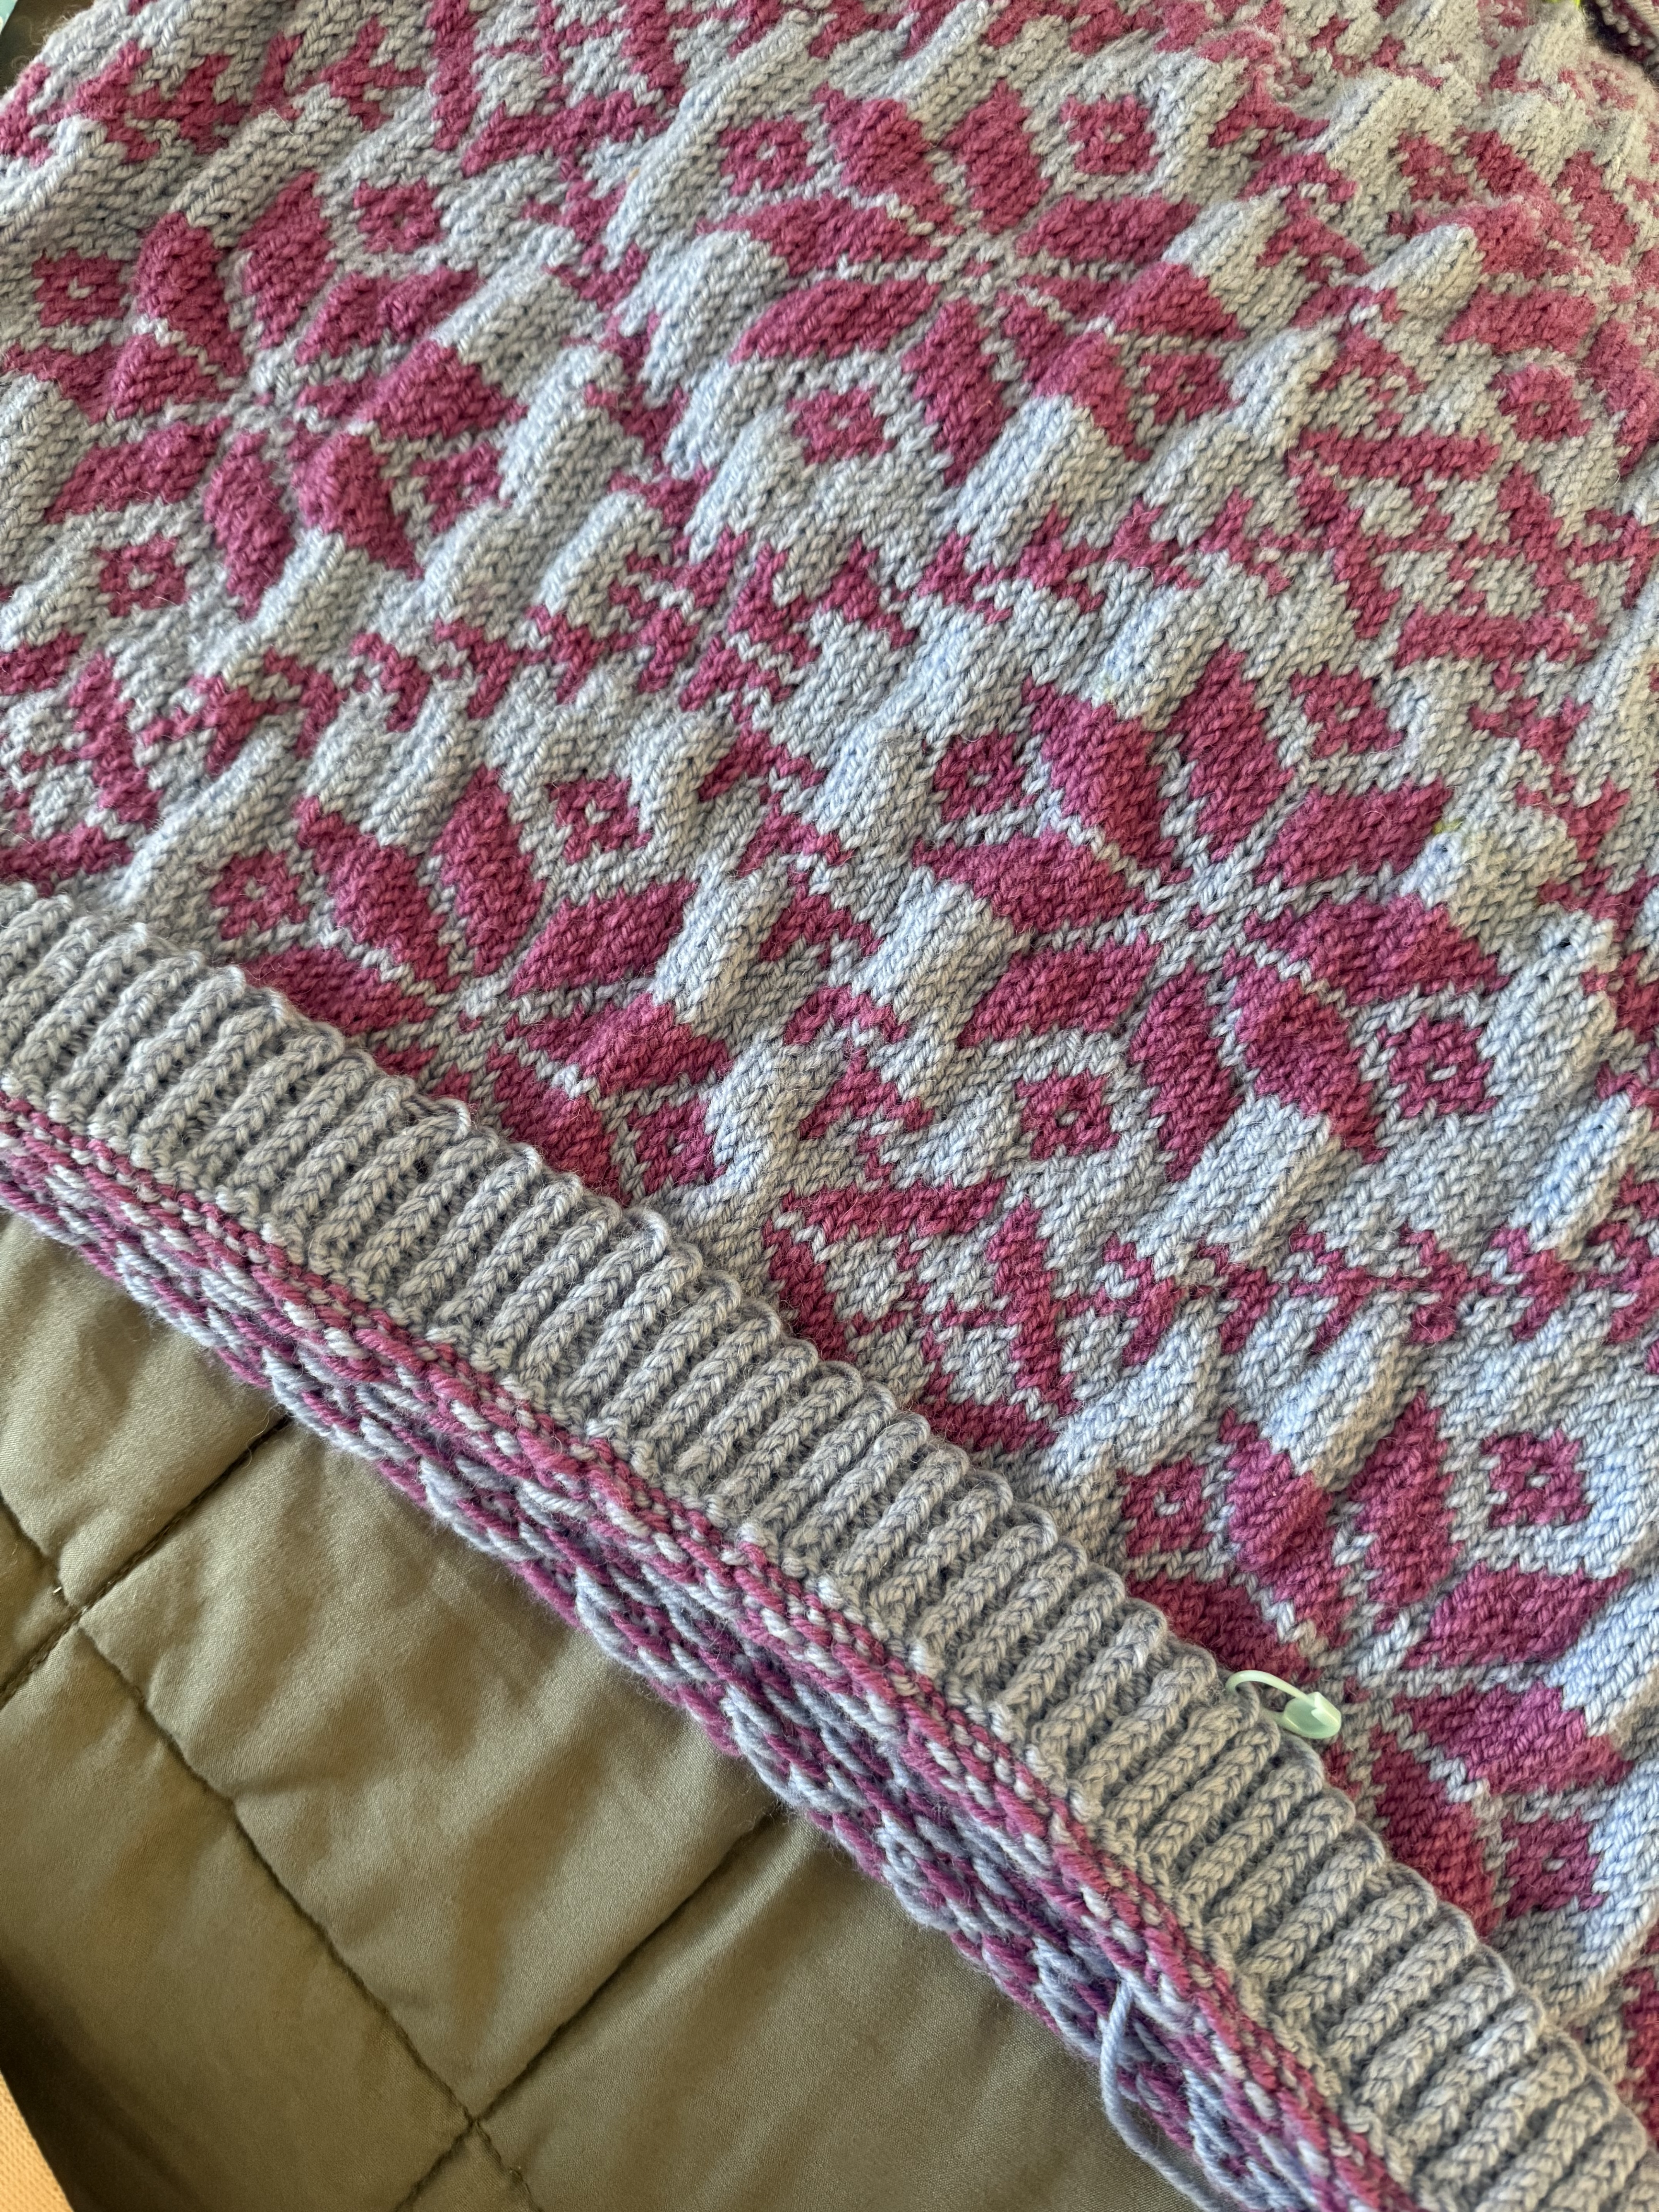
I definitely knit a bit too tight because my sweater is very lumpy - does anyone have any tips and tricks for the future when knitting with multiple colors to not create lumps from accidentally pulling the yarn too tight in the back?
Why is the bottom of my sweater flipped up (see photo) ? I’m sure there is some simple explanation in the way I knit it? I tried the sweater on to look at the neck shaping, and it will not lay flat. Anything I can do here or just accept defeat?
Thanks again for everyone’s help - A bit personally frustrated because I am not sure if this sweater will be wearable, I think its a bit small for me (I was hoping for it to be oversized like in all the photos - hence the first point) but I am learning a lot thanks to all your help!
Also - anyone have any easier sweater patterns they suggest? I really like a fun color pattern, but the style is quite complicated. Not that it wont stop me, but I’d like one that’s maybe more at my level.