Hello lovely knitting angels
You will be pleased to know that thanks to your kindness and practical advice I am the proud owner of a complete pair of homemade socks, complete with heels and EVERYTHING! I am going hiking next week and I am going to wear them
I have now started knitting this sweater… It’s Mud Season (again)! – Elizabeth Smith Knits
It is my first top down raglan sweater. It is in fact my first sweater of any description. I am in love with the yarn and knitting on size 6 needles is a pleasure too…
However, I didn’t have to go too far before I encountered questions!
I thought I had mastered KFB really well but I am now noticing holes in those places, suggesting that I have not in fact mastered it. I am going to tink (my speciality) while checking out some more YouTube videos to try to work it out.
Yay for the complete sock knitter!
Classic sweater which should be an enjoyable knit. It looks like there is lots of support along with it.
The conventional Kfb does tend to leave small hole but since it’s often part of a line of increases, the regular appearance becomes part of the design. There is an alternative Kfb that doesn’t stretch the stitch so much and is worth trying out. (It won’t work on increases every row but on increases every other row it’s fine.) https://www.youtube.com/watch?v=oCXRl3urNXU
Have a great time on the hike.
I just want to add that the “alternative KFB” is actually a Left Lifted Increase (LLI) delayed by one row. Instead of picking up the parent stitch, as in the lifted increase, the parent stitch is saved on the needle and knitted on the following row. So here is one way more to do it:
Thank you so much everyone. Once again, so helpful. I seem to be getting better at making the increases and the holes seem smaller on some areas than others… no idea why… the beginning of round marker area seems the worst. Who knows? Anyway, I think I can live with how it looks and what you have said about the yarn relaxing after washing is also hopeful - if I ever get to the point where I am washing it , I fear there may be all sorts of trouble ahead Thank you all! I am going to try that alternative increase at some point. It looks doable! Would it be noticeable if I switched to it mid pattern?
I think the increases are intended to make a little detail on this aren’t they?
I wouldn’t change mid sweater, it will likely be too noticable. Better to accept the small hole…is this either side of the raglan? Because all the pics have a little hole detail there where the increases are, they are not invisible.
I have been using yarn over increases which I like, you might try that out one day in the future. The yarn over goes in on the row where the increase is needed and is worked through the back loop on the next row. Roxanne richardson has a tutorial about leaning increases which I found helpful, the yarn over leans left or right to make mirrored increases. Nice.
Best not to switch part way through, as that will be noticeable.
May I ask what kind of markers you are using? Once I was given some markers that were quite thick. This was perhaps the first time I used markers, and I found my stitches looked funny near the marker. I realised after a bit of knitting that the style of the marker was causing a problem.
I don’t usually like the little purl bump wrap from the normal kfb and always k in the front and then slip the same stitch in the front, which gives you a tiny slope-y stitch but no horizontal addition; unless you positively want to incorporate the purl bump as part of the design. Maybe that’s what some of the links are saying, haven’t checked. It’s so much easier simply to slip the second part of the stitch at the front, especially when working with tiny needles, and I’ve never ever seen a hole as a result.
I absolutely love the Clover lockable markers, they are so easy to lock and unlock, and so lightweight. Markers don’t interrupt the stitch if they are in the right place, do they? As long as I have them at the back if the next stitch is a purl, or in front if the next one is a knit, I never find they get in the way (I knit Portuguese style, so it’s perhaps different for more ‘normal’ (!) knitters??
They do if they are tall enough – they create a little “wall” that the yarn has to go over, which ends up as unwanted looseness in the strand between the stitches before and after the marker.
Think of a doughnut-shaped piece of card, like you use for winding a pom-pom, and the yarn having to travel further up and down each side to traverse it.
Luckily, most markers aren’t like that.
Edited to add: The first link in my post shows the troublesome type.
I’ve used those type, kushami, and found them more fiddlesome to get on and off than the Clover ones, definitely, but haven’t actually found any trouble with the yarn going over; it’s possibly because I knit Portuguese style, so the yarn is always at the front of the work…??
Thanks for flagging this up kushami. It could be an issue. I am using pieces of different coloured yarn at the moment.
I bought some of those little lockable ones (not Clover, some cheap ones) but I found that they just slipped off the needle all the time so I lost the place. I am not sure what I am doing wrong. Is it that I am not supposed to put them on the needle but on a stitch? I wouldn’t know where on the stitch to put them to be sure of the place, if that makes sense!
I know what you mean by the “wall” adding extra yarn with certain markers. Even the thickness of the marker can add a gap between stitches which is larger than the other gaps.
I prefer the little skinny wire type like a safety pin, I find they don’t cause so much of a problem.
If you have become used to yarn markers then a plastic or metal marker is likely to be frustrating for a while because they do slip off if you don’t remember to angle your needle up or make the following stitch immediately.
I almost never stop at a marker, I work the next stitch, even if it was the beginning of the round marker and I needed to change to a different stitch or yarn or chart for the next round, I’d still work the next stitch before stopping. I also use a stopper on the needle end if I put my knitting down or away.
When I come back to it, I might need to read my pattern, tink that single stitch and work the stitch it should be. I just find this way my markers fly off less frequently.
If you prefer yarn or thread you might try loops of embroidery thread, they have the “stickiness” to stay on the needle more often but are thinner than a kniting yarn so will cause less of ngap between stitches.
The beginning of the round area may well be stretched out a little more than the rest due to this being the place where you stop for a break or put your knitting away. The 2 needle ends are moving around and able to pull at those couple of stitches which may distort them more than the rest of the round where the tendency is the just keep going, these stitches never get pulled on by open needle ends, they are always arrived at and worked needle point to needle point.
It is something I’ve seen in my own knitting when stitches at the BOR marker are a bit distorted from being put away. If they don’t look rmight to me I tink back several stitches and redo them.
It’s one of the (many) reasons I am not all that keen on working in the round. I do work in the round but over all I like it less than flat.
Oh, and usually the marker goes on the needle. Some patterns tell you to mark a stitch in which case you put the marker through or around the stitch. Some knitters don’t like markers on the needle so mark the fabric instead putting the lockable marker on a bar between stitches on a lower row.
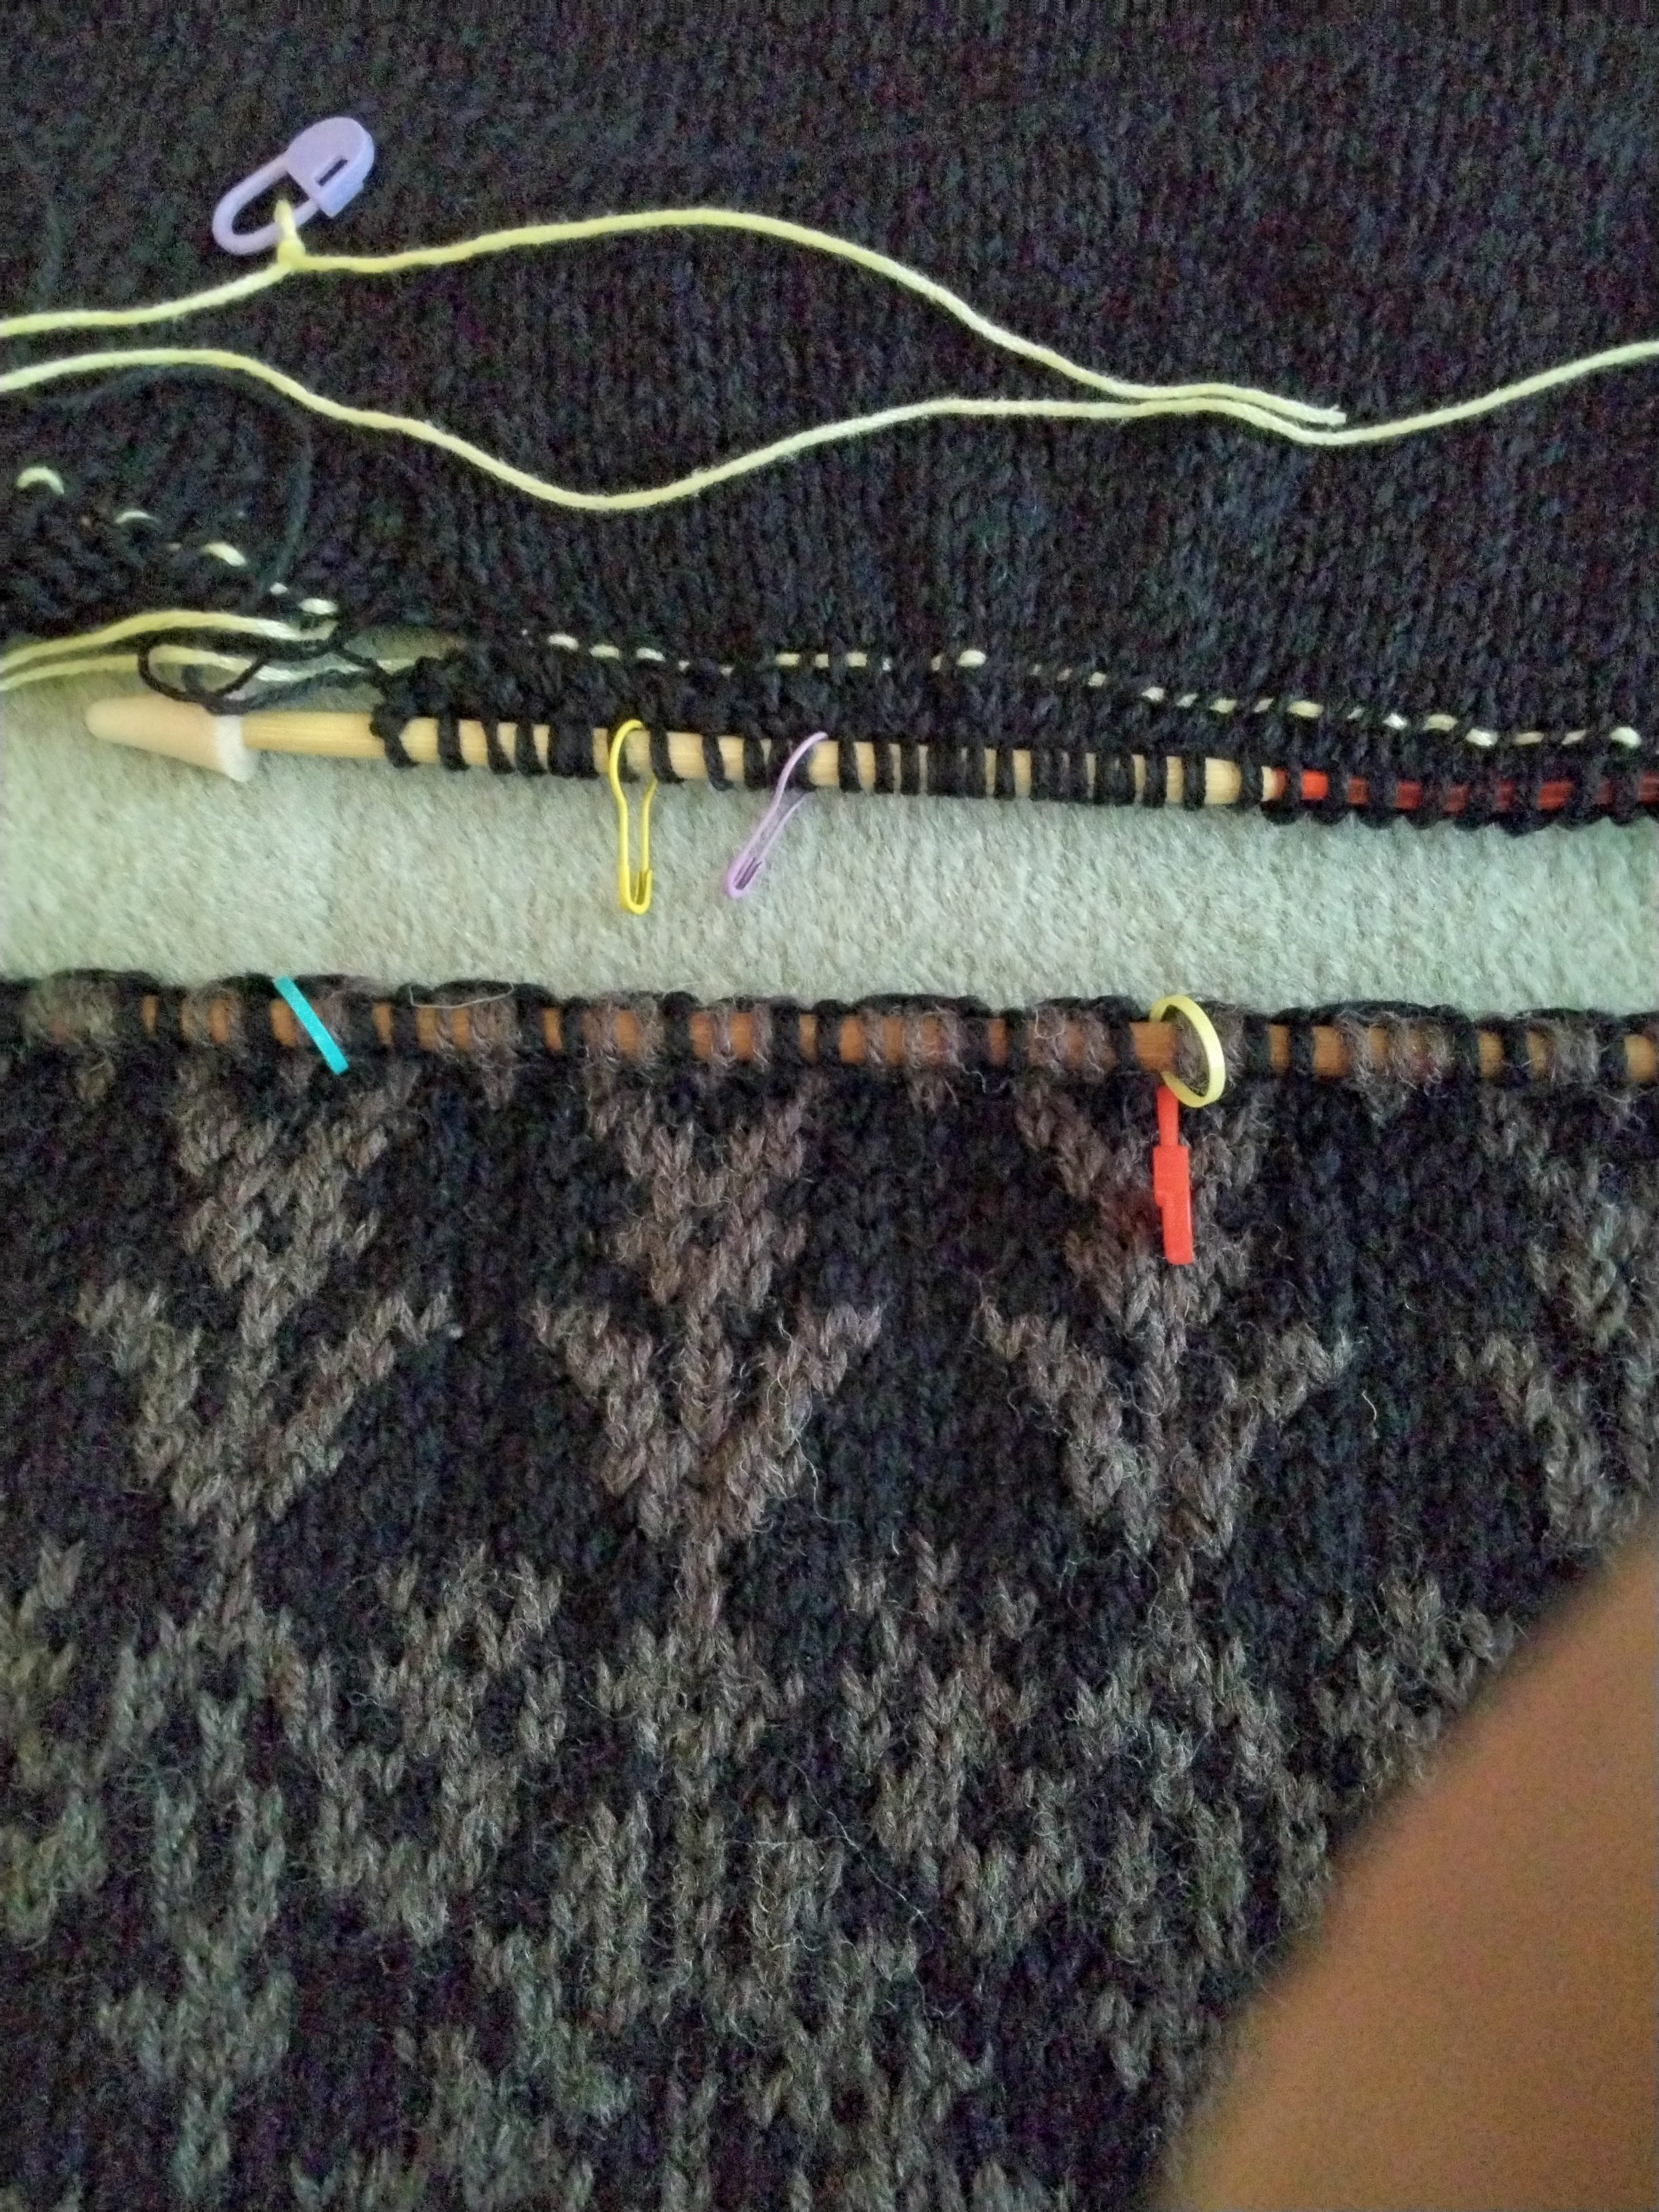
Here is an example, not a great pic as I am working in black!
On one I have thin wire markers on the needle, they are removable markers.
In the other I have non removable markers on the needle. I have added a red removable marker between the stitches a few rows below to demonstrate where to place a marker that is not on the needle. I would always miss it or not know exactly where it aligns to if I had mine there but some people like a marker on the fabric not the needle. Roxanne Richardson marks the fabric, not on the needle as she says they get in her way when knitting. She puts them on the needle for demonstration purposes but doesn’t like to work that way.
I’m a bit late to this party, but I want to congratulate you on finishing your first pair of socks. Some folks find sock knitting addictive. Ok, I am addicted to sock knitting. They’re small, quick, easy to take with you, and you or someone you love has toasty warm toes all winter!
About those stitch markers. I got sick and tired of the plastic ones popping off the needles and going missing while knitting on buses or trains, where it was next to impossible to recover them. But I have plenty of yarn, so a length of contrasting yarn tied around the needle came in handy. I still have some locking markers I’ll use sometimes, as I am now for my first top down sweater, but honestly, anything you can get around the needle will work. I’ve even used those small plastic hair ties. Choose what you are comfortable with.
I’ve seen a novel idea for stitch marking that doesn’t go around the needle at all. It goes between the two stitches where the increases (or decreases) are made and is anchored in the previous knitting. Take a length of thread long enough to go from the bottom of your knitting all the way to the point where you no longer need the marker. Every second or third row lay this length of thread between the stitches where the marker belongs. The thread will travel vertically up the knitting, so nothing is in danger of popping off, as it is inside the stitches so to speak. When the marker is no longer needed, just pull the thread out of the kitting. Because it’s just yarn, it leaves no holes. I’ve never used this technique myself, as I don’t fancy having several extra lengths of yarn to deal with, but I assume I could get used to it if I really wanted to. I think it might be an alternative to markers when knitting lace, hence my hesitation about all the extra lengths of thread all over the place. It’s just another suggestion for you to consider as you look for the best alternative for your knitting style.