I’m really having trouble with this pattern, as some of the parts of it aren’t making sense to me when it comes to working off the long lace edging.
So I get that the lace edge is to be made in one thin long piece, then the borders are made ( 4 individual ones?) and then a center square is made and it’s all sewn together.
Where I’m struggling is I don’t understand how to pick up for each border panel ( of 4) along the lace edge, do I pick up 200 stitches 4 different times? And seeing as the one 1st panel will be attached and worked up off the long lace edge, how do I pick up for the other 3? Just start with whatever the next stitch is?
I hope I’ve made sense. I just really can’t visualize any of this in my head.
If anyone could help I would really appreciate it
Thank you so much
Hello
Others may have a different idea but here’s how I read it.
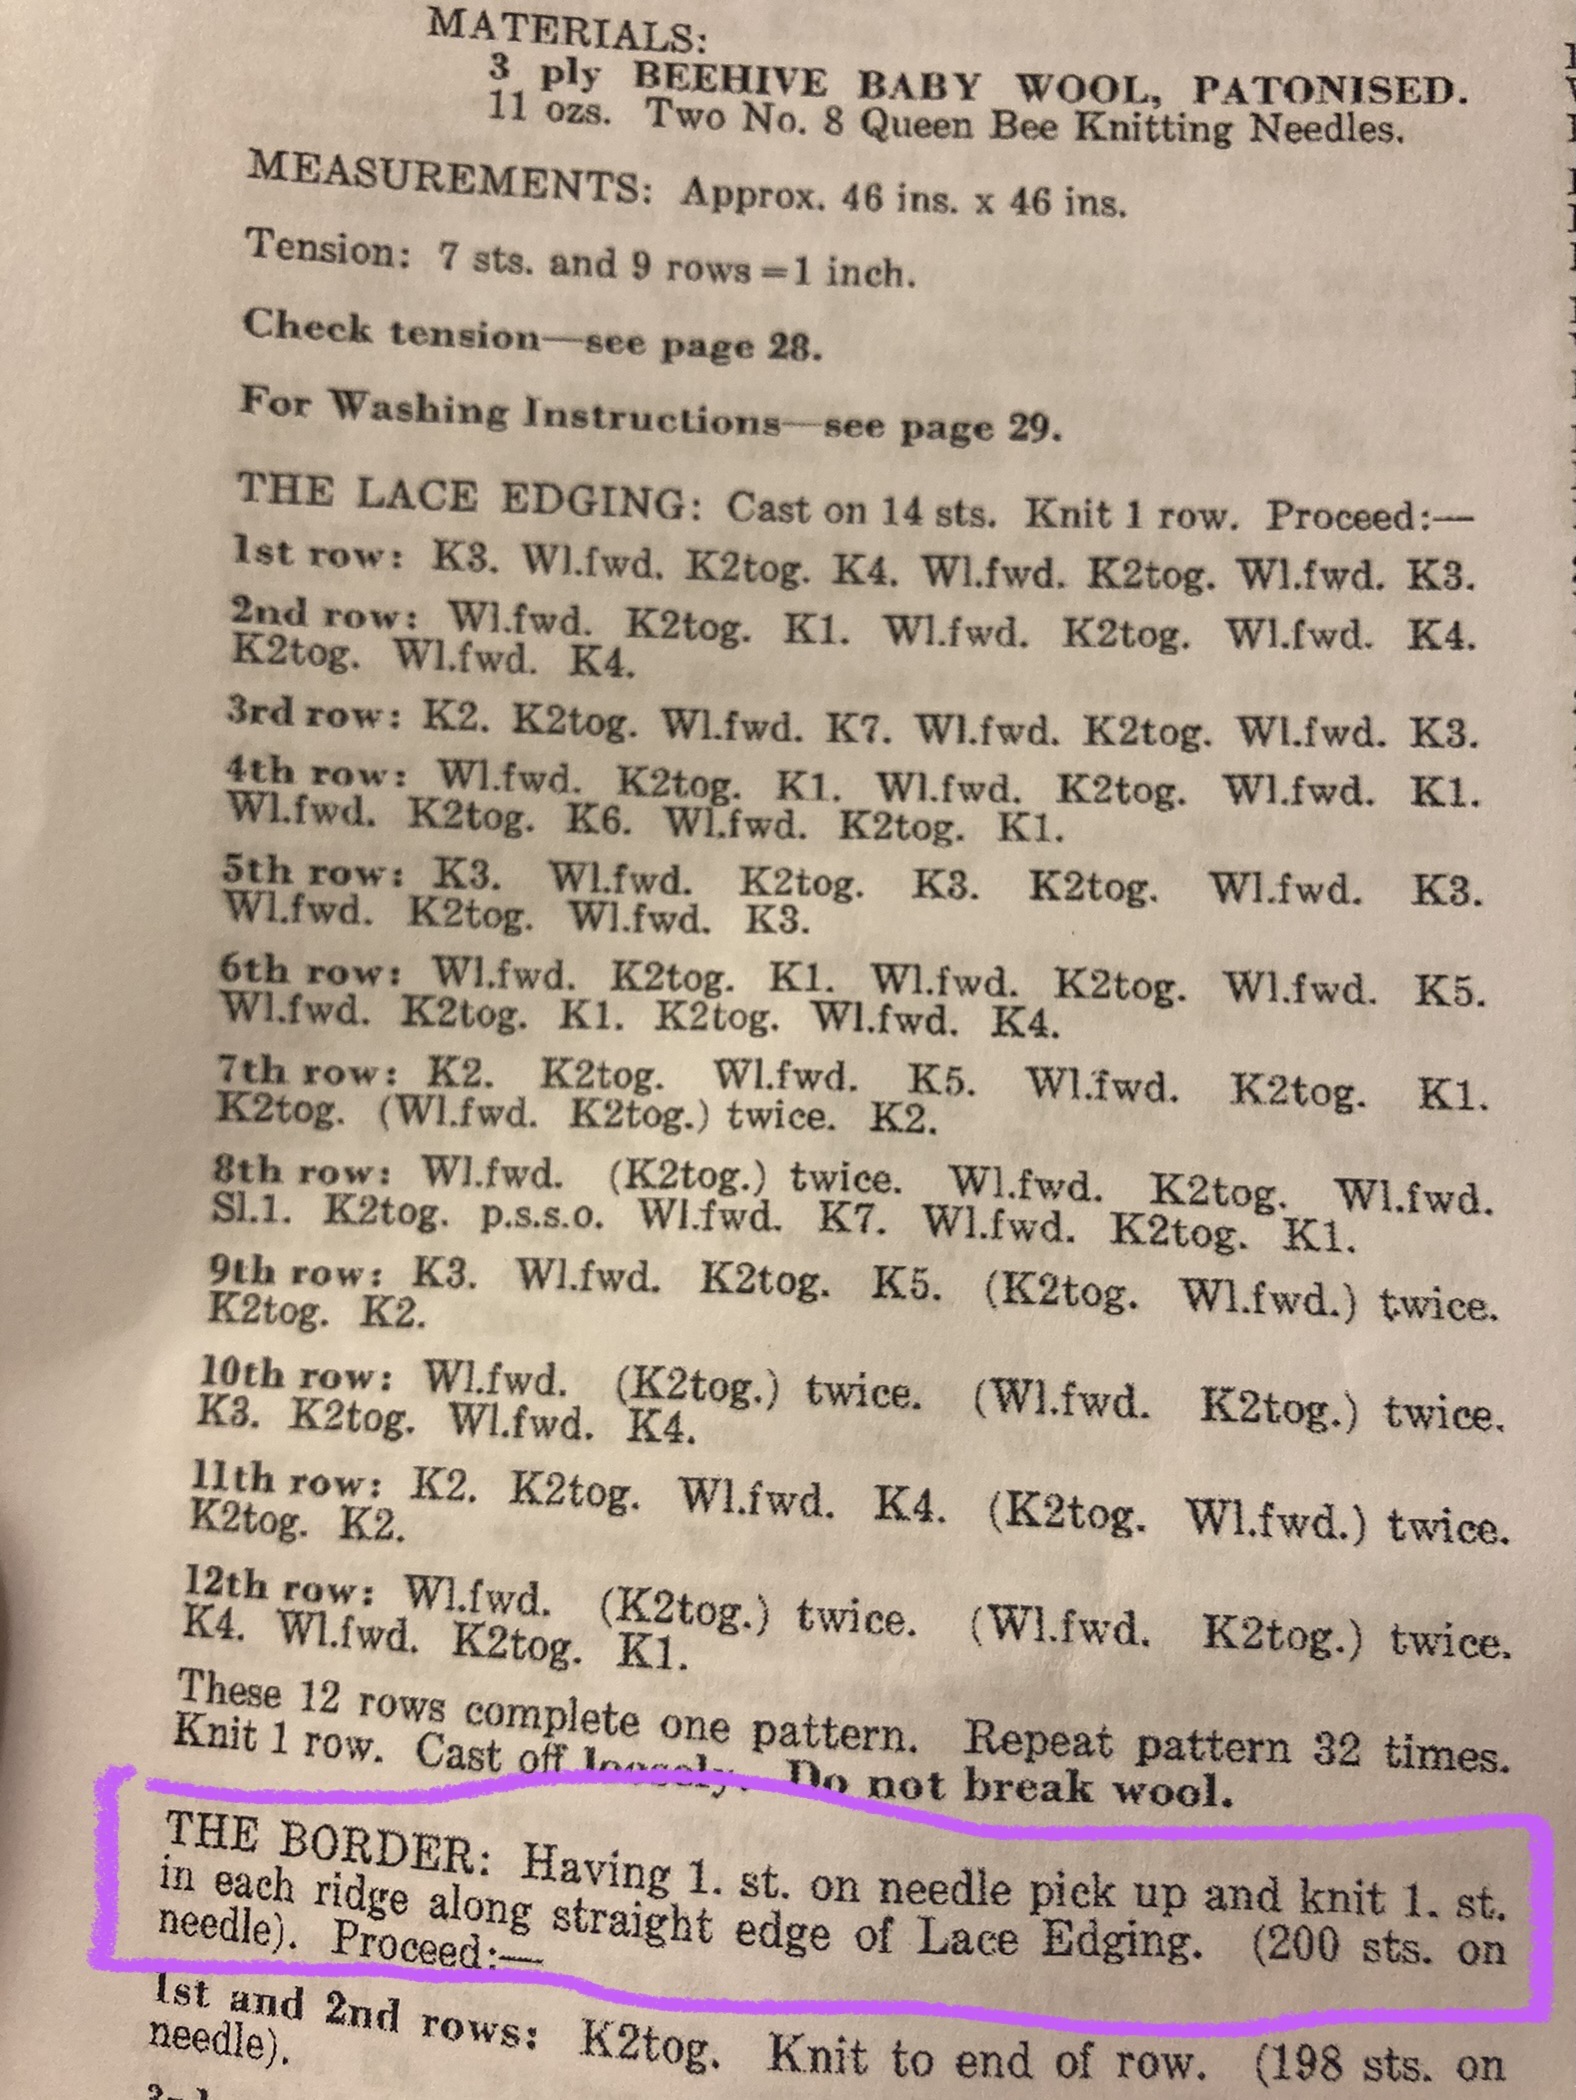
A lace strip is worked, this is 14 stitches in width.
When this is bound off a single stitch (stitch 13 which has passed over stitch 14) remains on the needle. This is the first stitch of the border.
The border is worked immediately by using that same strip of lace and that same single stitch. The lace is turned so that the long straight edge is positioned horizontally in readiness to pick up and knit along this edge.
The lace strip has
12 x 33 = 396 rows
A stitch is picked up every alt row end (every ridge)
396 ÷ 2 = 198
As a stitch is already on the needles 198 +1 = 199
And my assumption is 1 final stitch in the cast on edge of the lace to make it fully to the end of the strip
199 + 1 = 200 sts on needle
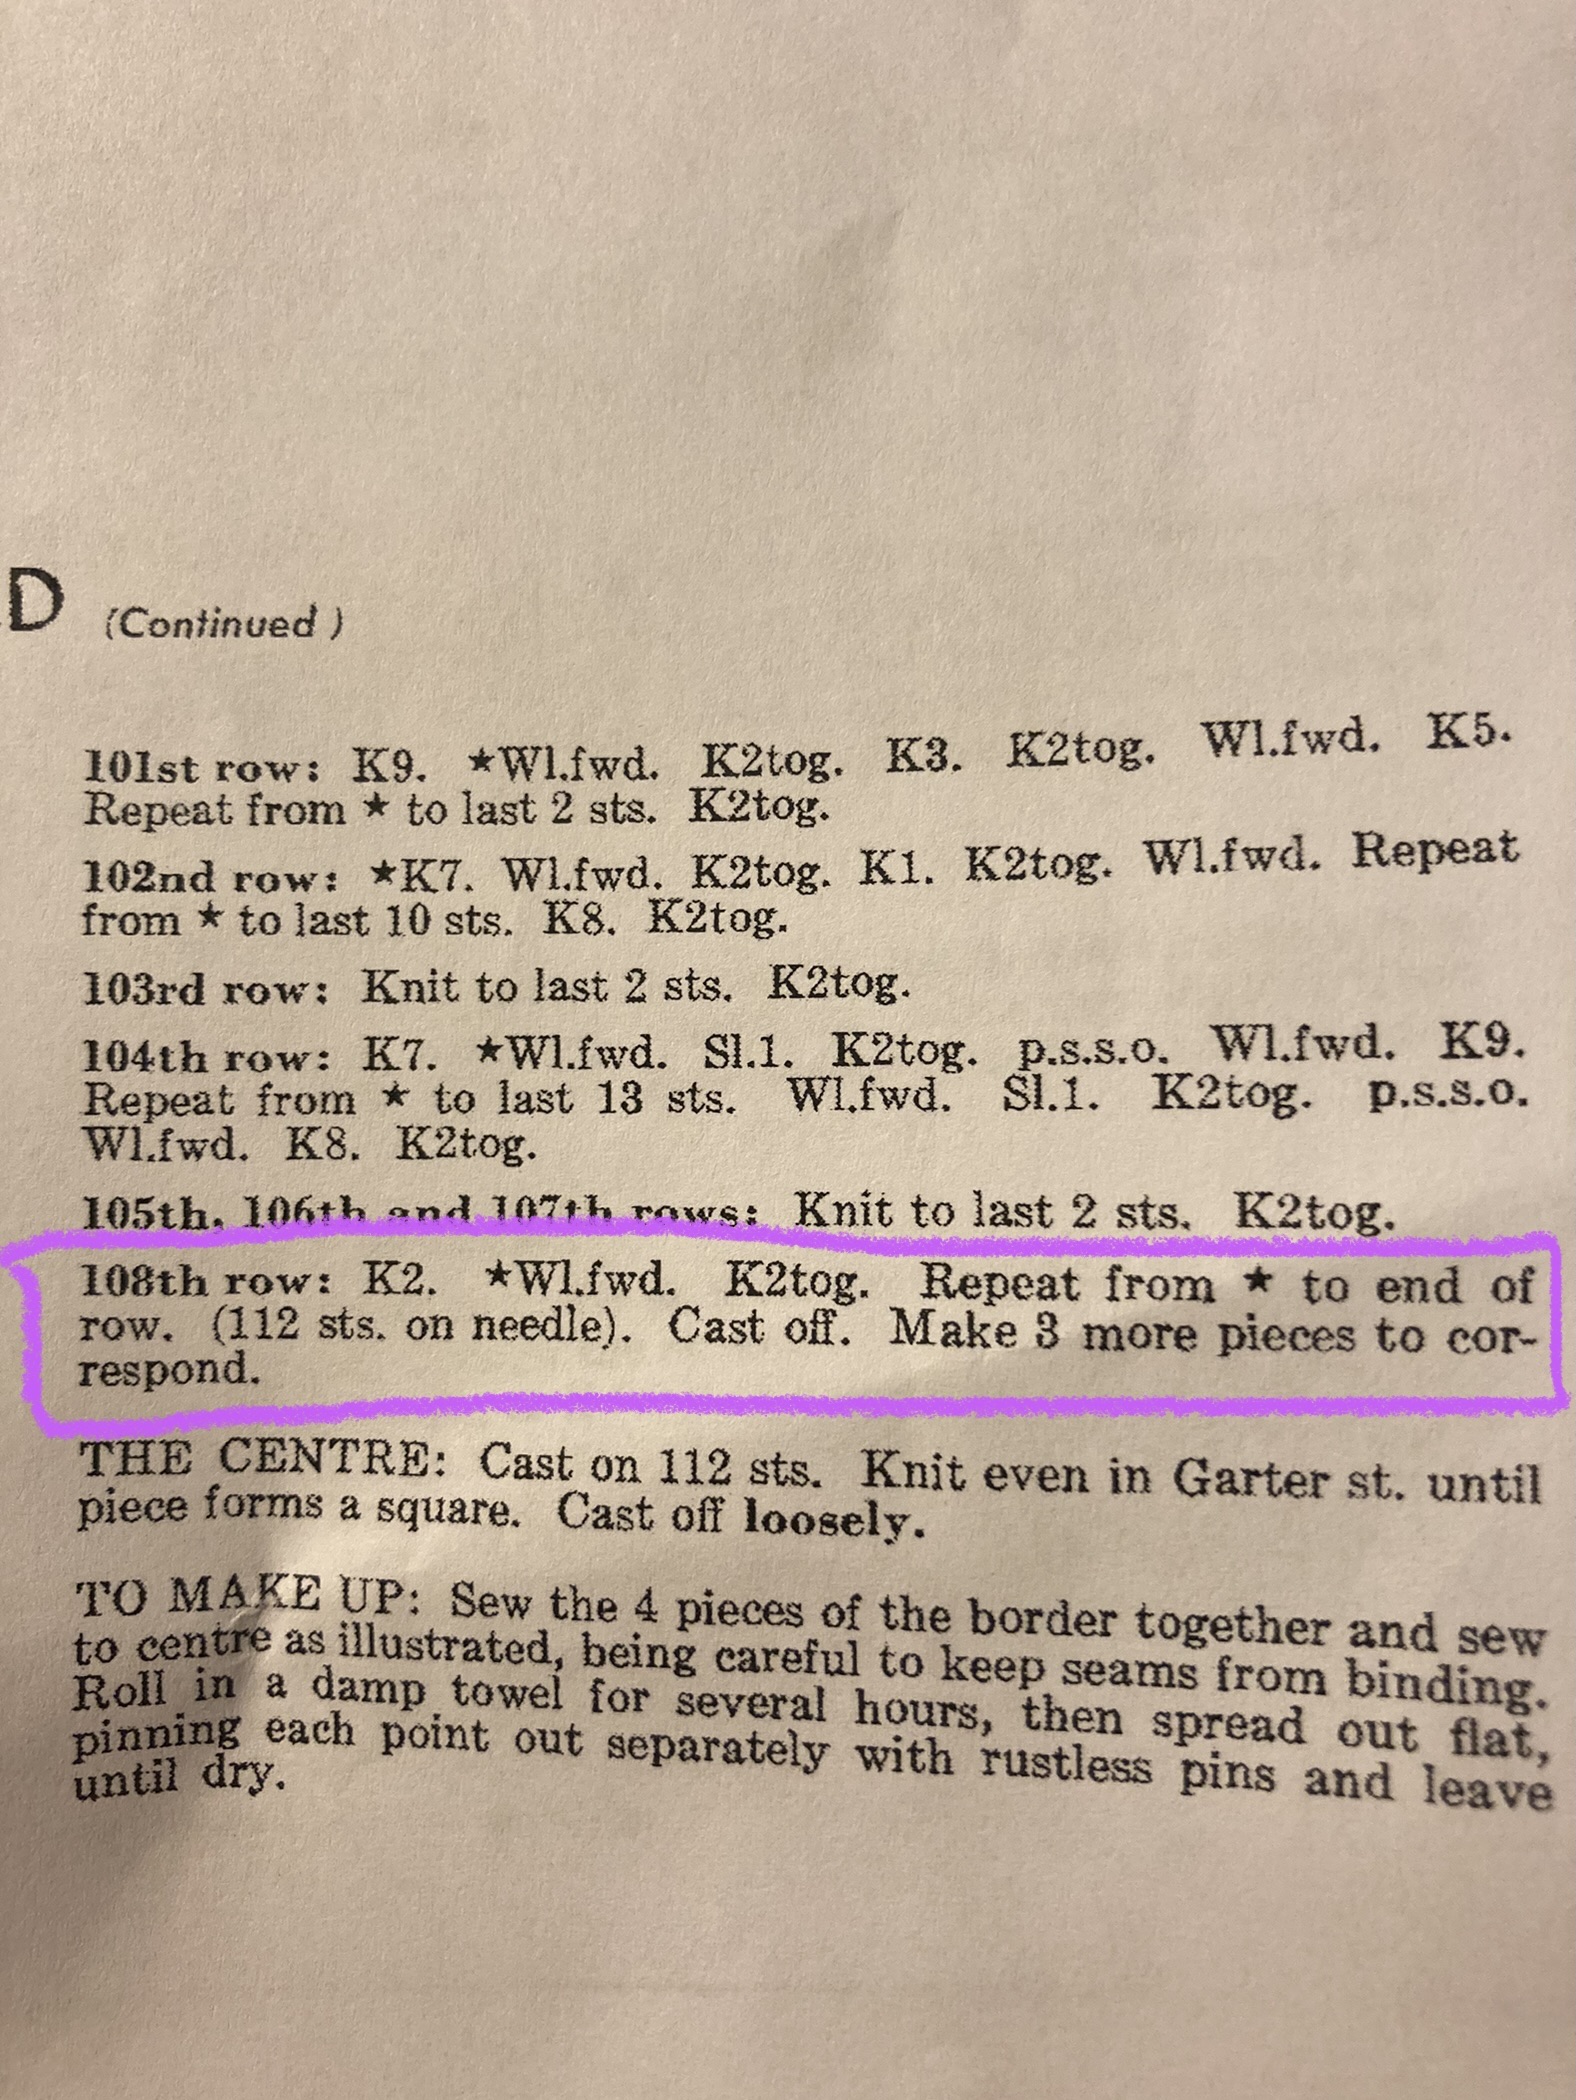
The border is worked up from the lace to finish the the first lace and border section. This is bound off.
The whole thing is repeated, lace strip, pick up 199 + 1, work border, bind off. That’s 2 borders done.
Repeat 2 more times.
4 pieces made.
Centre Square is worked separately.
The lace and border pieces are then seamed to the centre and to one another.
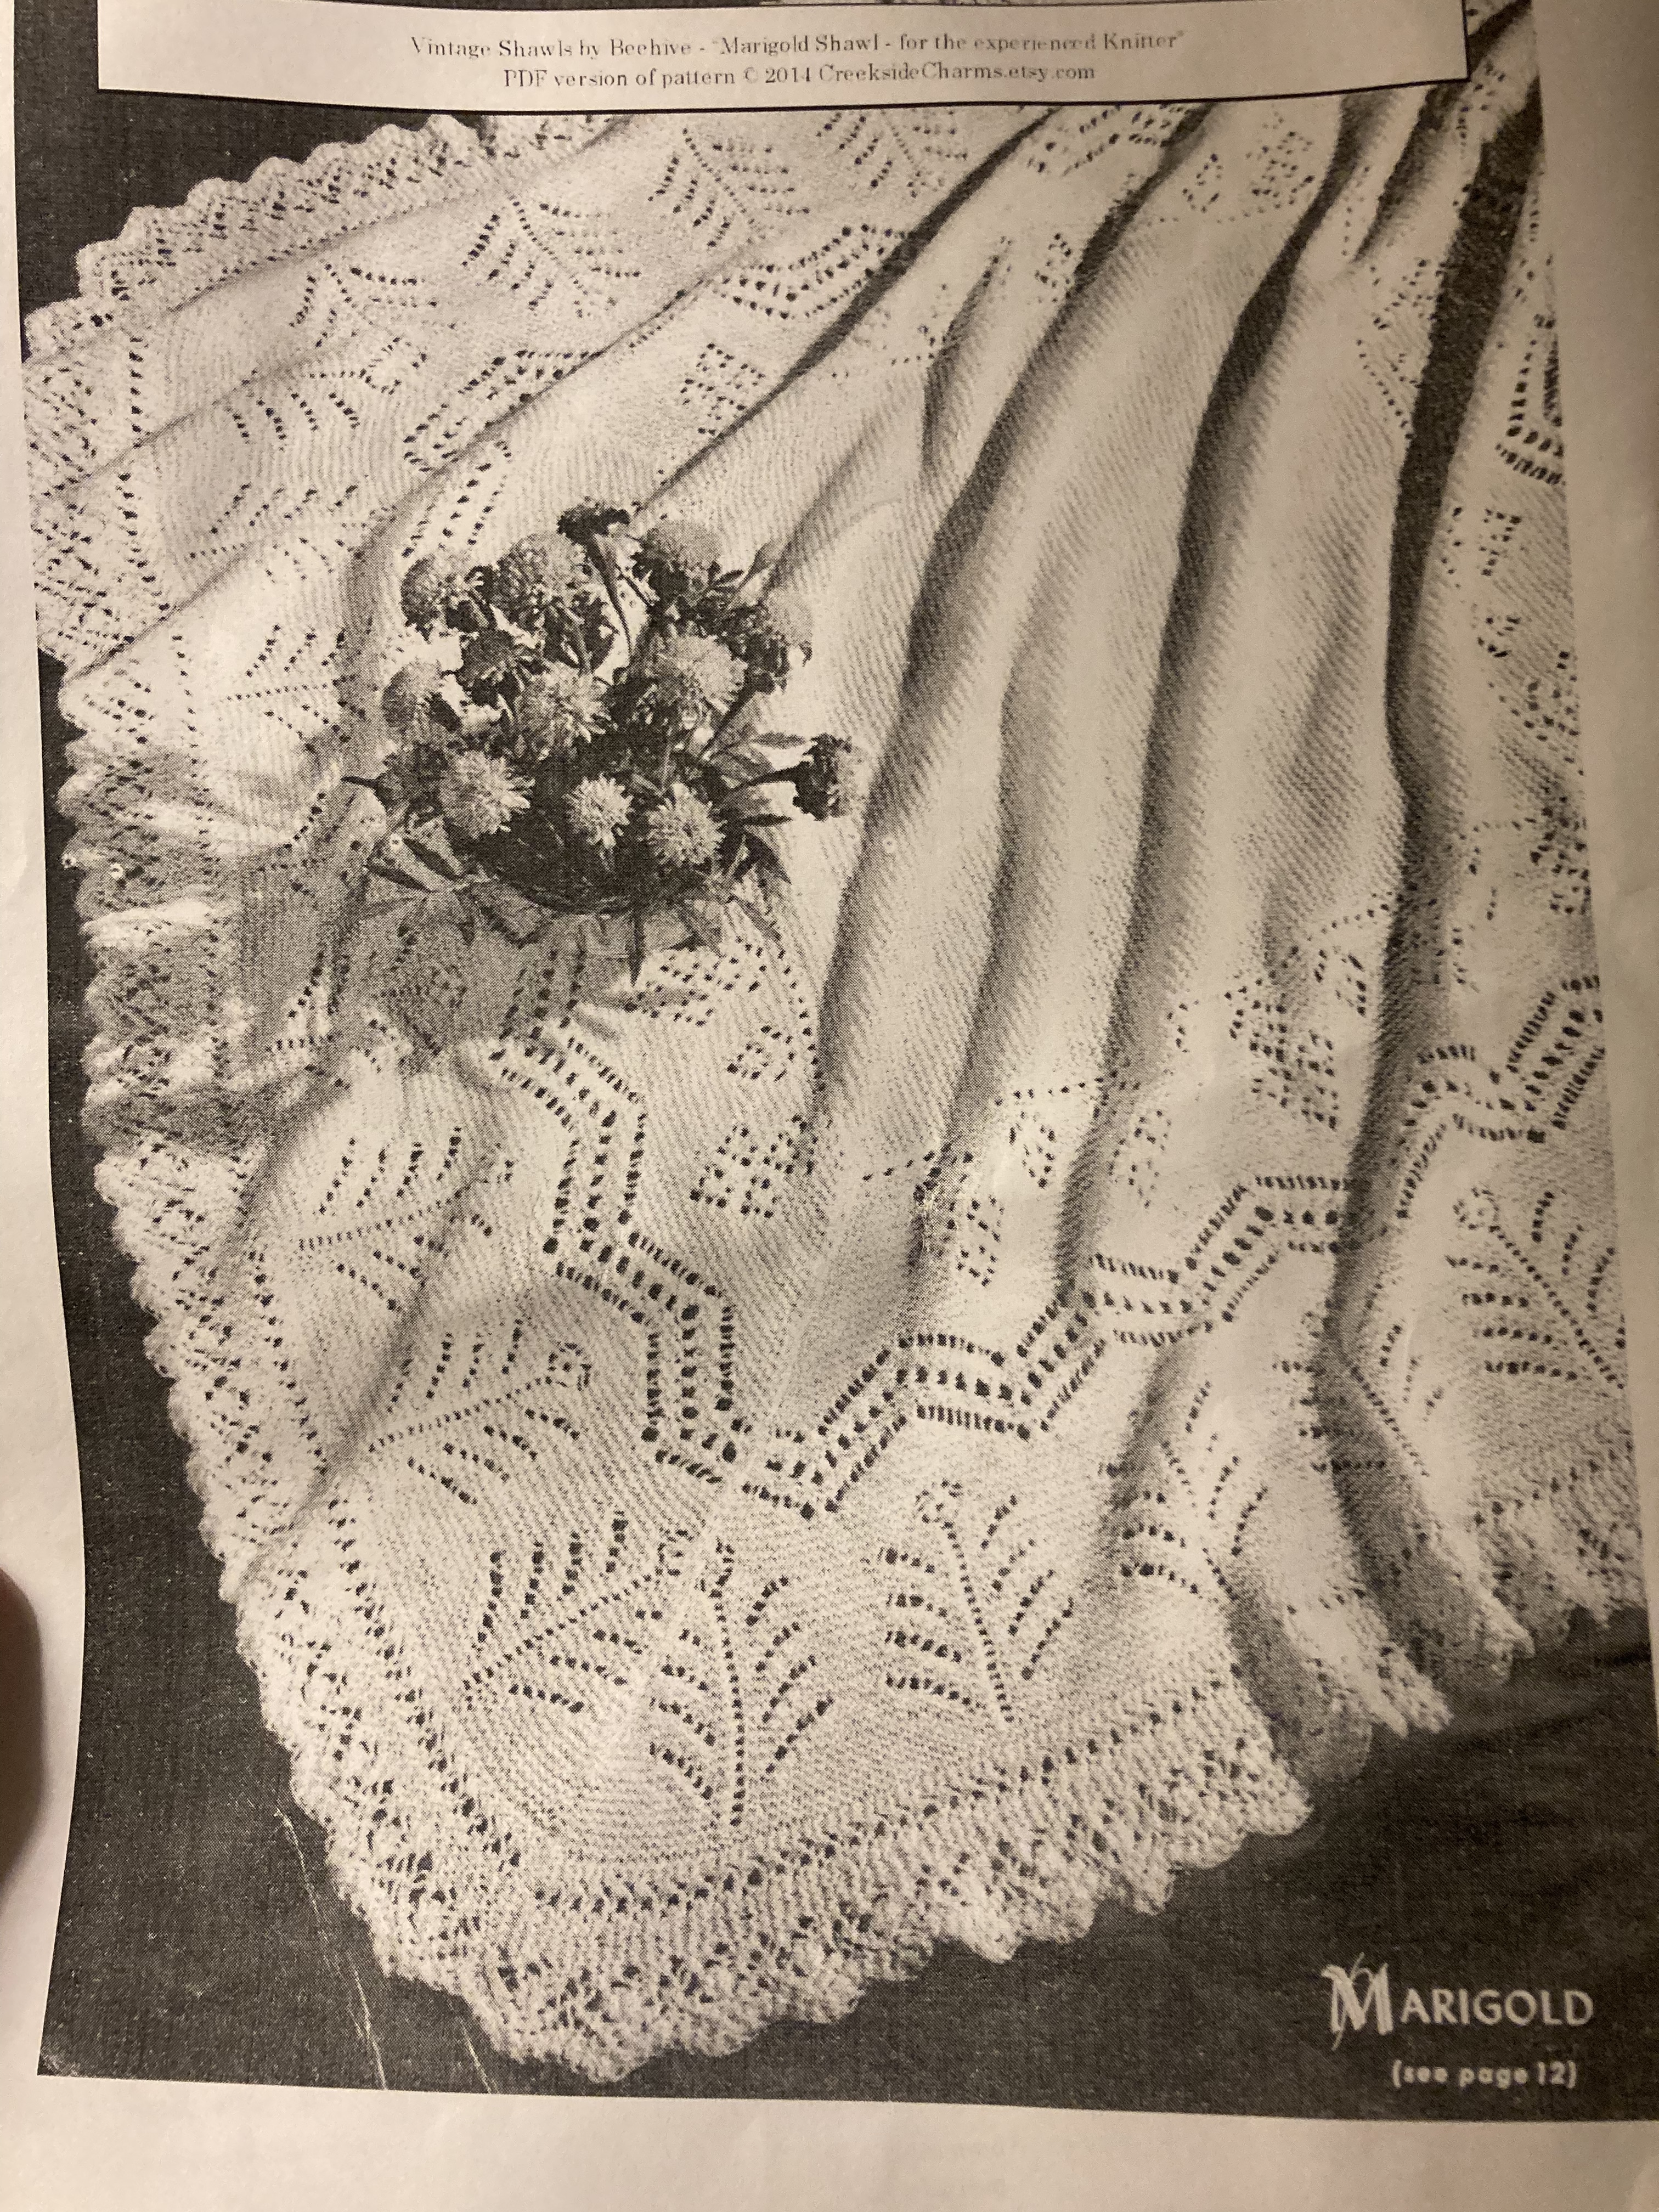
The seam is a little messy compared to modern expectations and can be seen in the photo. You might find a better method for seaming for a nicer result. Possibly by adding a single selvedge to each border and flat seaming with a tapestry needle, or perhaps a sewing/grafting method. I would want to try it out on a sample before knitting the whole piece to decide how to treat the edges and if I wanted an extra stitch each edge. If it was mine I’d probably omit the first and last eyelet motif in each border as they are cut off by the stitch decrease up the rows to make the mitrered corner. The corners would then be what looks like garter stitch (I didn’t read all the pattern so could be wrong) or other plain stitch and would seamnup very nicely with a flat seam method. That’s me though, I’d be bothered by the interrupted motif.
I hope this is helpful. I’m no expert on vintage knits though.
1 Like
wow, first of all thank you so much for taking the time to not only figure this thing out but reply in so much detail to guide me. When I posted it I really thought it would never make sense but now I have a much better visualization of it. I think I am going to make a small bit of lace edging and practice picking up stitches along it just to get myself comfortable with that and my tension, and I agree with what you said about the sewing together, the seams do not look very neat in any of the photos I’ve seen of this vintage pattern. That was also one of my concerns but I was trying to take one thing at a time because before posting this I couldn’t even hardly look at the pattern without a headache lol.
Thank you so so much again kind online person/ friend 

2 Likes
You’re very welcome it’s nice for me to be able to help where I can.
It’s a great idea to work swatches and samples, it’s quite a large project and having a practise swatch will be super helpful. On the full size you might find it helpful to place some removable markers, safety pins or thread markers maybe every 20 rows so that as you pick up and knit along this long edge you have a way to check your progress, 10 stitches every 20 rows, so you can back track and redo that section right away if needed rather than reaching the end and not having enough stitches.
Looking again at the seam edge, I think the untidy look is due to the eyelet pattern not being complete, not just in that first motif as I previously mentioned but also in the zig zag section, they must have made the sewing very difficult. You could omit a few eyelets near the edges (stopping at the end of a “zag”) quite easily and have a much easier time of the sewing and a more modern consideration of the design.
That final part of the border has been designed to fit very nicely where each motif sits above the zigs and zags.
However you decide to work this pretty shawl it would be great to see photos of your progress.
I have used a technique called Join As You Knit.
Purl Solo has a basic tutorial showing joining knit squares https://www.purlsoho.com/create/2022/12/13/join-as-you-knit/
and Bonnie Dean has a video Neck Edge with Knitted Join https://www.youtube.com/watch?v=fnW82LqImic.
I have just used this method to join the front bands on a baby’s cardigan and to add a lace border on a stroller cover. I first used it on a christening shawl. Practice on samples and swatches like Creations suggests then once you get the hang of it use it on your pattern. Happy Knitting.
I stumbled across a page for vintage knitting terms.
It contains 10 pages of terminology that has been used.
I don’t know how to copy it to the forum other than to copy The site that I found which was labeled Type Pad Basic Introduction to knitting abbreviations.
https://poopshebear.typepad.com/files/knitting_abbreviations.pdf
As you scroll down there’s a page that has a similar abbreviation.
Hope that this helps.
1 Like