I am looking for a pattern for a sweater with a straight front hem and a longer back hem (I think it’s called high low but correct me if I’m wrong) with a slight curve on the back hem, no split sides, so the curved back begins at the side seam.
I’d prefer bottom up. Basic stockinette or colour or lace or cables, I don’t mind. Preferably DK weight but if it’s another weight I don’t mind.
If anyone knows of one please let me know. Thanks.
If you have a pattern you like except it doesn’t have the curved back hem you can use short row shaping to add the curve and make it longer than the front. If you’re doing cables or lace you’ll need to consider how many rows of additional length you’ll need to accommodate repeats. I start a stitch or two from the side for the first turn on short rows and work following short row turns however many stitches seems right before the last turn. That allows flexibility if I decide it’s long enough or needs to be longer. I hope this is at least as clear as mud.
Thanks GG. Is this working top down, or bottom up? I think I can visualise it top down.
I’d prefer to work bottom up if possible. I have been thinking maybe I could begin with a smaller number of stitches for the back hem, then increase each end of the row to create the curve to end up the same width as the front. I’m not sure though.
You’re on the right track with the increases to round the hem. Take a look at the photos for this pattern which show the details of the hem. You’d like to avoid the slight buckle at the rounded corners by adding extra rows in the edging but otherwise the look of the rounded hem is there.
I was thinking perhaps if I began with no rib, bottom edge with a straight section then did a M1 one stitch in from each edge on every row or every alt row to the full width of the sweater, meet with the straight front, seam the sides then go back later to add a rib. What do you think? I could pick up the rib in the round perhaps, or work it separately and sew it on.
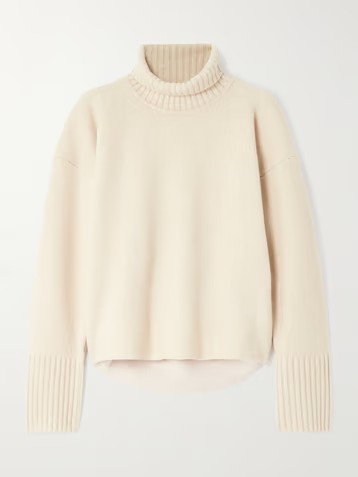
I have a shop bought sweater with the shape I want, it’s not a deep drop at the back, the curve is subtle I suppose. Just can’t find any like it in patterns. The closest I found is net-a-porter, not a pattern. Not an easy colour to show the back curved hem against the white.
Actually I did see a couple of top down sweaters with a similar curved hem but I didn’t like the really over sized body and my modification skills are not clever enough to reduce the body but still work the hem shape so I think I’m probably better off trying to shape it myself.
I’d probably start with just the width needed for the back, minus some, then work however many rows you need for the depth, increasing at both edges. Which I guess is what you said…? I think adding ribbing later would work.
Boy, that Plymouth pattern definitely needs more rows to fit the curves! You might need to pick up one and make one for every edge stitch through the curve. I know that when you crochet a circle, if you start with 8 stitches, you need to increase by 8 stitches on every round to keep the circle flat. If you start with 12, you increase by 12. So you need at least twice as many stitches around the curve to start with. You can’t really keep increasing in ribbing, but starting with more stitches should help.
I’m just the opposite. If I can come up with a cast on count for the back neck I’m all set to knit a sweater. We’re all different. I think you can lengthen and shape the back curve with increases - I think both you and salmonmac posted about doing it that way.
Thanks, it’s good to know that double the number of stitches would be needed for the curved part. I would probably try the rib a few times, maybe swatch sized pieces on the curve to see how it looks and to calculate the total number.
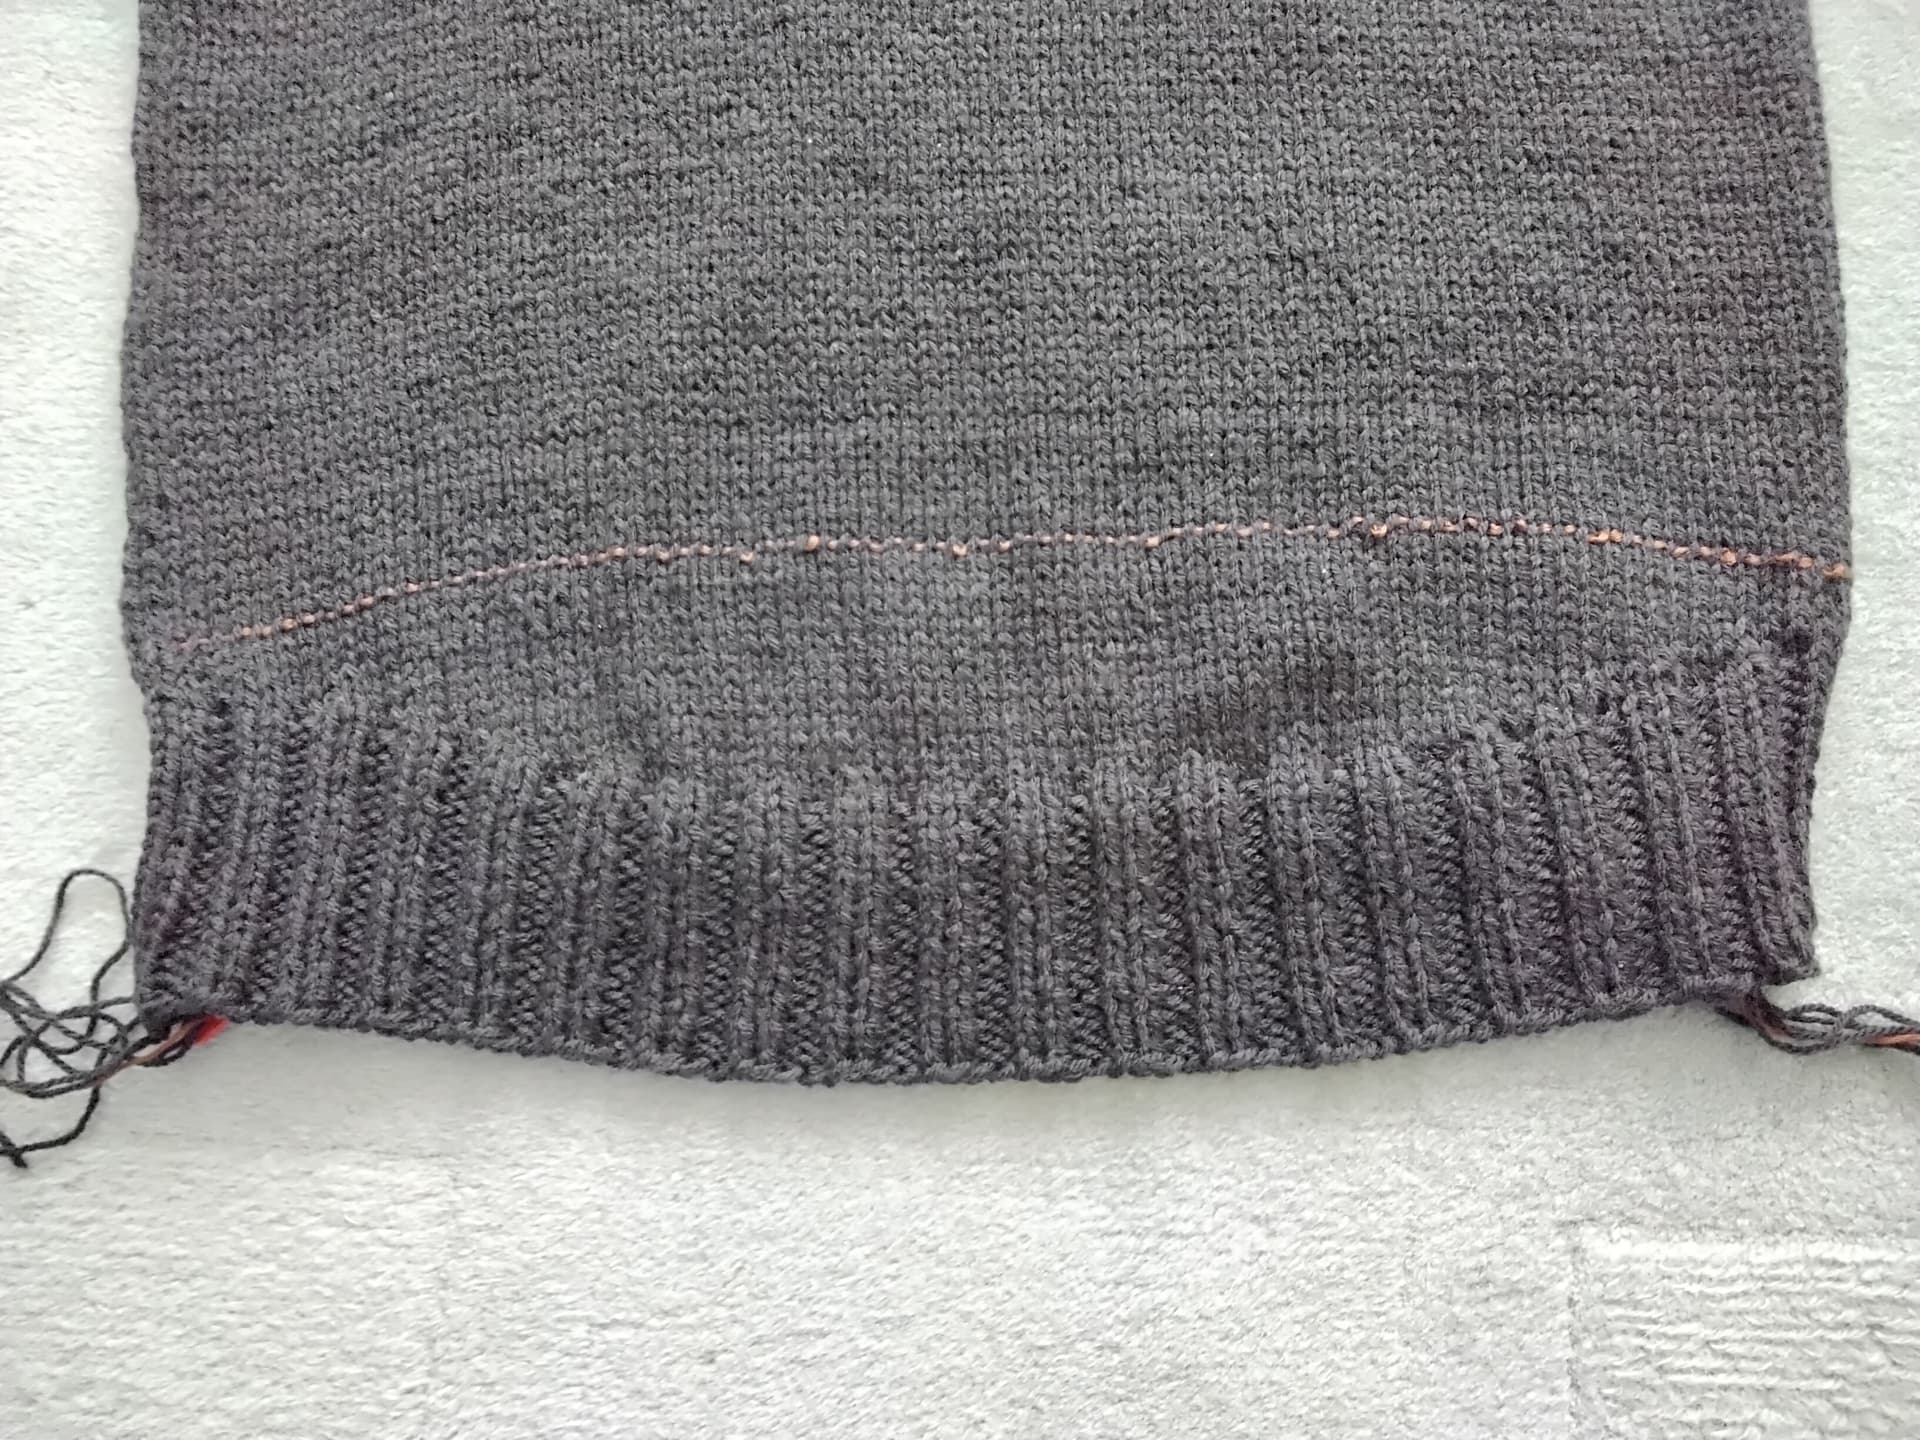
I didn’t think I’d be doing this shaped hem quite so soon, I was planning on the next sweater, but realised I could try it on my current sweater. I worked bottom up but started with a provisional cast on because I was not sure what hem I wanted. I realised I needed to add a bit of length and not just ribbing so I’ve gone ahead and worked out ‘top down’ short rows for the back and worked it. I will tentatively say it looks ok although I can’t be sure until I have finished the front rib and seamed the bottom part. Not far off. I’ll post a pic when that part is complete.
@salmonmac I’m glad you brought my attention the buckled rib, @ColoCro thanks for the tip of working 2 stitches for each curve stitch. So far I think I’m OK without increasing the rib on the curve, it’s a slight curve and might be OK… or it might buckle when seamed to the front. I’ll find out soon.
@GrumpyGramma it was your mention of top down that made me realise I could give it a go on my current sweater. Thank you. At the moment I really feel it’s a big improvement on the overall look and fit of the sweater and I’m so glad I tried it. Honestly I didn’t think I had the ability to work out how to do the short rows but my knowledge must have improved as it was reasonably easy!
Whether you’ll need to increase in the ribbing will depend partly on the depth of the curve, but also on the width of your ribbing. The wider it is, the more likely you’ll have to increase again at some point.
I’m glad it looks like it should work for you! True confession: I eyeball things, think about how many rows I should need to add, and take a number for the stitches between short row turns out of the air. Usually works for me but I’m not one for sticking to a pattern religiously. Nothing fits me so I had to work out what works for my situation.
I was slightly concerned about possible buckling on the curve when I came back to this thread but it’s turned out OK, I think.
There are plenty of imperfections, a row of inconsistent tension where my provisional cast on was which is showing up, maybe it will even out with washing. There’s a bit of a questionable row where I had only just resolved my short row wraps and transitioned right away to rib, would it have been neater to work an additional row after the wraps were resolved before switching stitch pattern?
Well, here it is with a life line still in (you can see where the provisional was a few cm higher than the life line) and my ends dangling. What do you all think? Passable without increasing stitches on the ribbing?
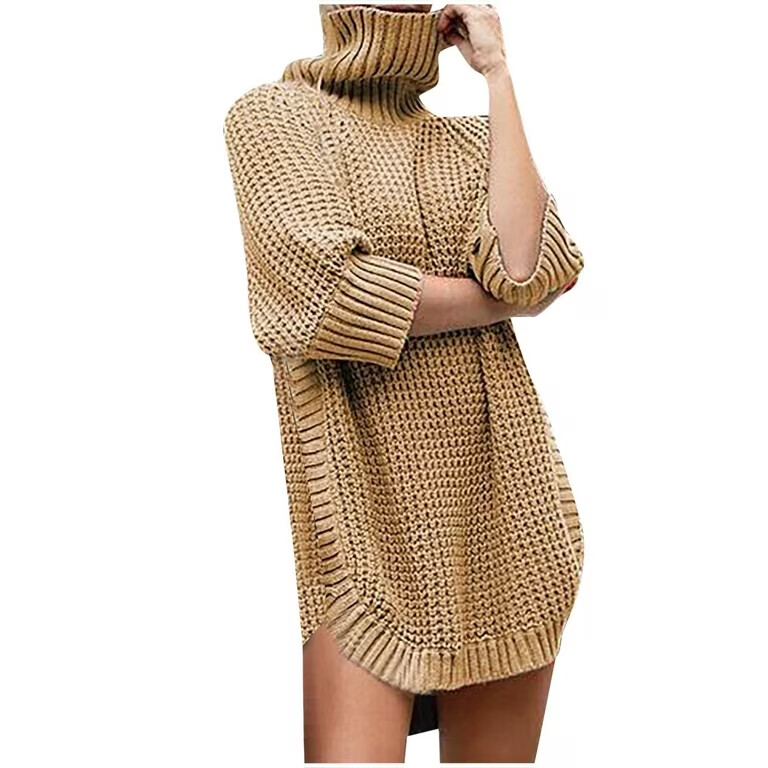
I think that looks fine! I was thinking you were doing tighter curves on each side, to bring the long back hem up to the level of the side seam, more like this:
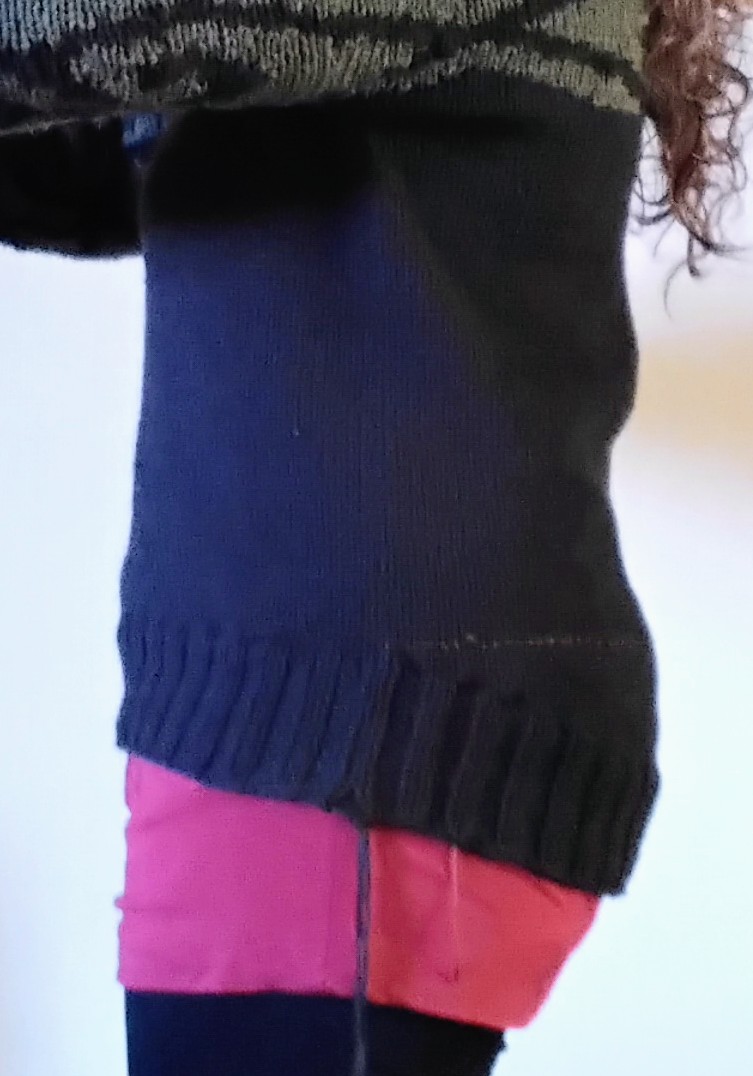
Thanks GG. I know you use short rows confidently and I am a novice. I see the left (of the photo) is neater than the right. Maybe this was due to resolving the wraps on the other side of the fabric?
Could be. I abandoned w&t for German short rows because they’re easier for me. Theoretically the result should be pretty much the same whichever method is used but since I don’t use w&t I can’t say from personal experience. (I have done w&t and there is the odd occasion I’ll use it now but it’s just not my usual.) Have washed it yet? I’d be interested to know it blocking improves it more to your liking.
eta I wonder if what you’re seeing on the right side could be chalked up to tension somehow. Either the wrap itself or the tension of the wrapped stitch. Just a thought. My tension issues are extreme and yours always looks so good.
Oh, yes, I should have remembered you use German short rows rather than wrap and turn.
I think you’re right, it’s just a slight change in the tension. No, it’s not washed yet as it still has no neckband (made one last week and frogged it, i worked the curved hem whilst thinking about what to do with the neck as the first attempt wasn’t to my liking). I’ve had a closer look and I think it’s just slight tension change on the wrap resolution and the switch to ribbing. I think it will even out when washed (and the more it’s worn and washed the less it will show) but have also decided it doesn’t really matter, it’s so slight and I’ll be sitting on this part most of the time anyway! It’s just the bottom back after all. There are other parts of the sweater which are less than perfect that I am accepting, the worst is a dip in the row where i grafted shoulders and sleeves, not sure if that will ever wash out but I’ll live wih it.
I haven’t used German short rows yet, I just looked at my written notes for the short row hood I made on the last sweater and followed those instructions for wrap and turn and didn’t think much beyond that.