The pattern says, after the rib, knit SS until work measures x, put in a marker for the armhole, then continue straight u til it measures y, then start shaping neck and/or shoulder. I have followed these instructions, and my tension is pretty much perfect to the measurements.
I come to join the sleeve, and discover that if I start with the middle of the sleeve top to the shoulder seam and place the sleeve evenly along the front and back, that the sleeve falls a couple of inches short of the armhole marker on both front and back. In total, the top of the sleeve is a good 4 inches short of the length required to meet those armhole markers. I would have to “pucker” the front and back to make the end of the sleeve top reach the markers.
My instinct says: ignore the sleeve markers. Match the centre of the sleeve top to the shoulder seam, and join the sleeve without puckering either it or the front/back - that will give the best result.
What do you think?
What is the name of your pattern and designer?
A few questions: What is the measurement from marker to marker on the body? What is the measurement across the sleeve top? How do these compare to a similar sweater that you have?
If the measurement across the sleeve top is wide enough for a comfortable sleeve fit at the join to the body then go ahead with the join. The thing to avoid is a sleeve that is too tight at the cap.
2 Likes
Knowing your pattern will show us what type of sleeve this is. Are the fronts and backs knit straight, with no armhole shaping, and the sleeve is a tube attached for x distance down from the shoulder? If that’s the case, your solution should work as long as the sleeve is big enough to go around your arm with at least 1 1/2" of ease. I would probably “pin” the sleeve to the body with markers and try it on to check that I could raise my arm.
1 Like
Sounds like a substantial difference rather than just a little off. I’d put some time into investigating where the discrepancy arose before jumping in with seaming.
Did you end up with the correct stitch count at the top of the sleeve?
Does the ratio of sleeve stitch count work with body row ends for seaming (3 sts to 4 rows) if you count them? If so it would unlikely pucker but rather the seam could stabilise the body some, if for instance it is stretching out too much.
Measurements and armhole shape, as previously mentioned, need to be considered as well as size.
@Salmonmac the pattern is James C Brett JB860. The top of the sleeve measures 46cm - I had the right number of stitches, and the predicted dimension based on the tension is 45.6cm, so I’m happy with that. Between the two sleeve markers via the shoulder seam is 58cm. There is no armhole shaping, and on a sweater I have of a similar shape, the sleeve top is 44cm. This suggests that the “just sew it in” method should produce a wearable sweater!
@Creations I don’t understand what you mean by this 3 to 4 ratio, can you explain a bit more, please?
Based on the checks you’ve made I’d also agree that sewing it in will work out fine.
The 3 to 4 ratio is a tip from salmonmac, when picking up for a sleeve or buttonband etc along the row edges it often works out really well to pick up 3 sts for every 4 rows, I often use this same ratio when seaming stitches to rows (like a drop shoulder sleeve the style you’re making) and the fabric sits really nicely. I recently changed a sleeve based on this ratio as the sleeve top was going to be way too many stitches for the armhole size using the pattern numbers.
Well, what do you know?? I pinned one sleeve in each of the two ways and tried it on. The one which is done to the markers doesn’t look puckered, and my friend said that is the one which is sitting better.
So - it’s not a problem or a pattern error, it’s the way it’s supposed to be!
3 Likes
Oh that was a good idea.
I frequently seam with embroidery thread as a practise run, it gives a great idea how it will turn out but slides out easily to undo it. Maybe you could try that and try on?
Excellent! That’s good news.
We’d love to see a photo of your sweater when you finish.
Beautiful colors and sweater! The sleeves have worked out very neatly. Enjoy every cozy minute wearing it.
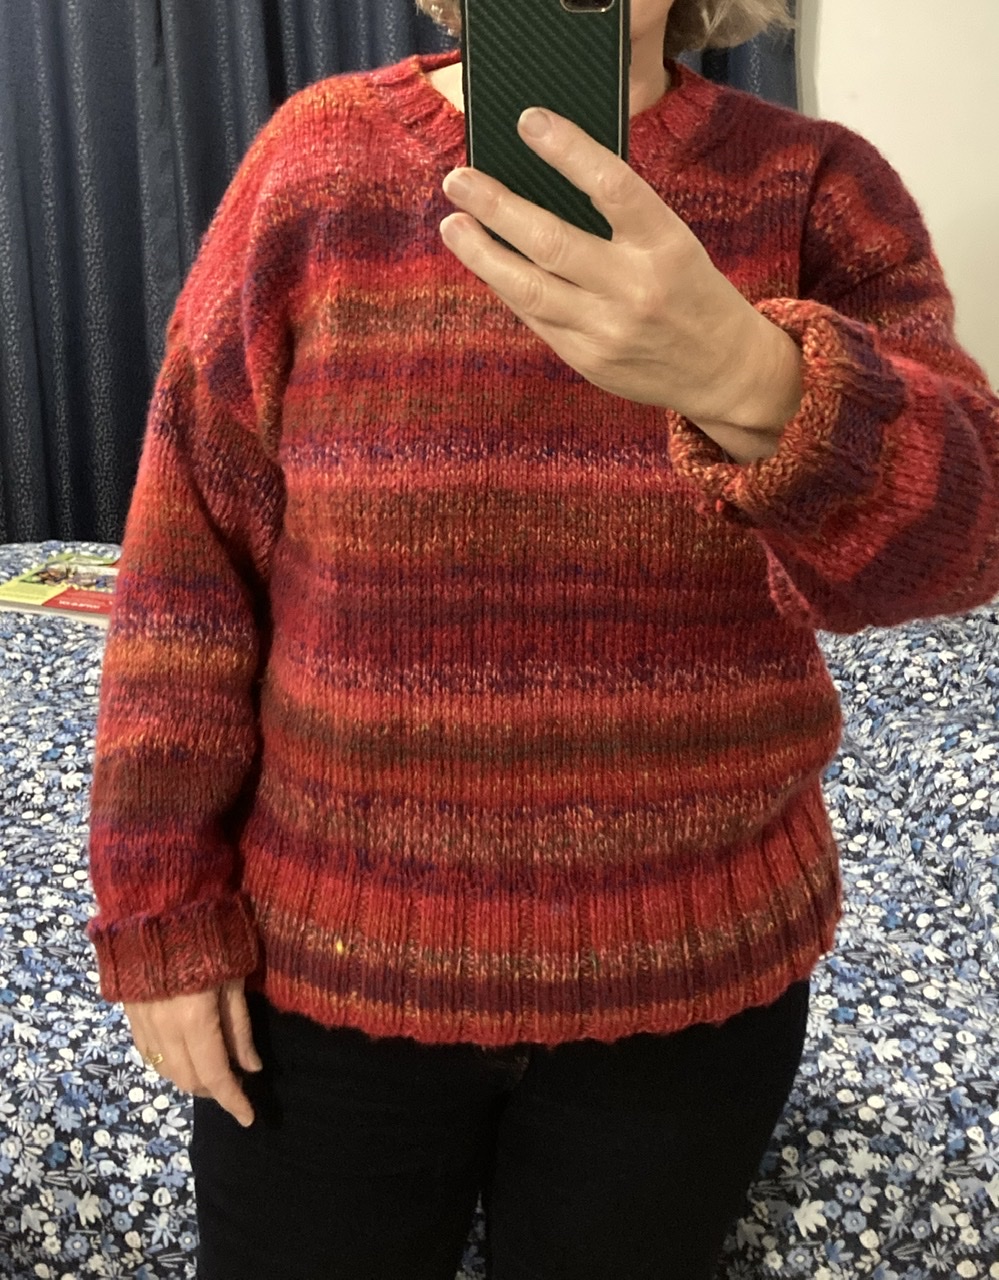
The sleeves are too long for me so I’ve had to turn them back (even though I made them to size) and the body is shorter than I would ideally like, even though I made it 1cm longer than the pattern. Sigh.
But I finished it!
1 Like
Looks great!
I make every pattern significantly longer than the pattern (I get extra yarn to make sure I can get length) and I love the longer sleeve. Long sleeves are very fashionable just now but I’ve always loved extra long sleeves so for me they are timeless.
If you are unhappy with the sleeve length and they annoy you though, you could look into sweater surgery, cut the cuff off, reduce length, reknit cuff.
One method of measuring for sleeves when you have a drop shoulder top is to take a tape measure from one wrist, up your arm, across your shoulders and back and down the other arm, this gives the total length cuff to cuff. Then on the pattern look at how wide the shoulders are (because they are not just your shoulders but also make up some of the sleeve length), bit of maths to take total length needed, minus sweater width at shoulders equals 2 sleeves. Divide by 2 to get length for a single sleeve. I’m just sharing what I’ve learned for myself in case it’s any use to you.
I really like your sweater fit and wouldn’t change a thing.