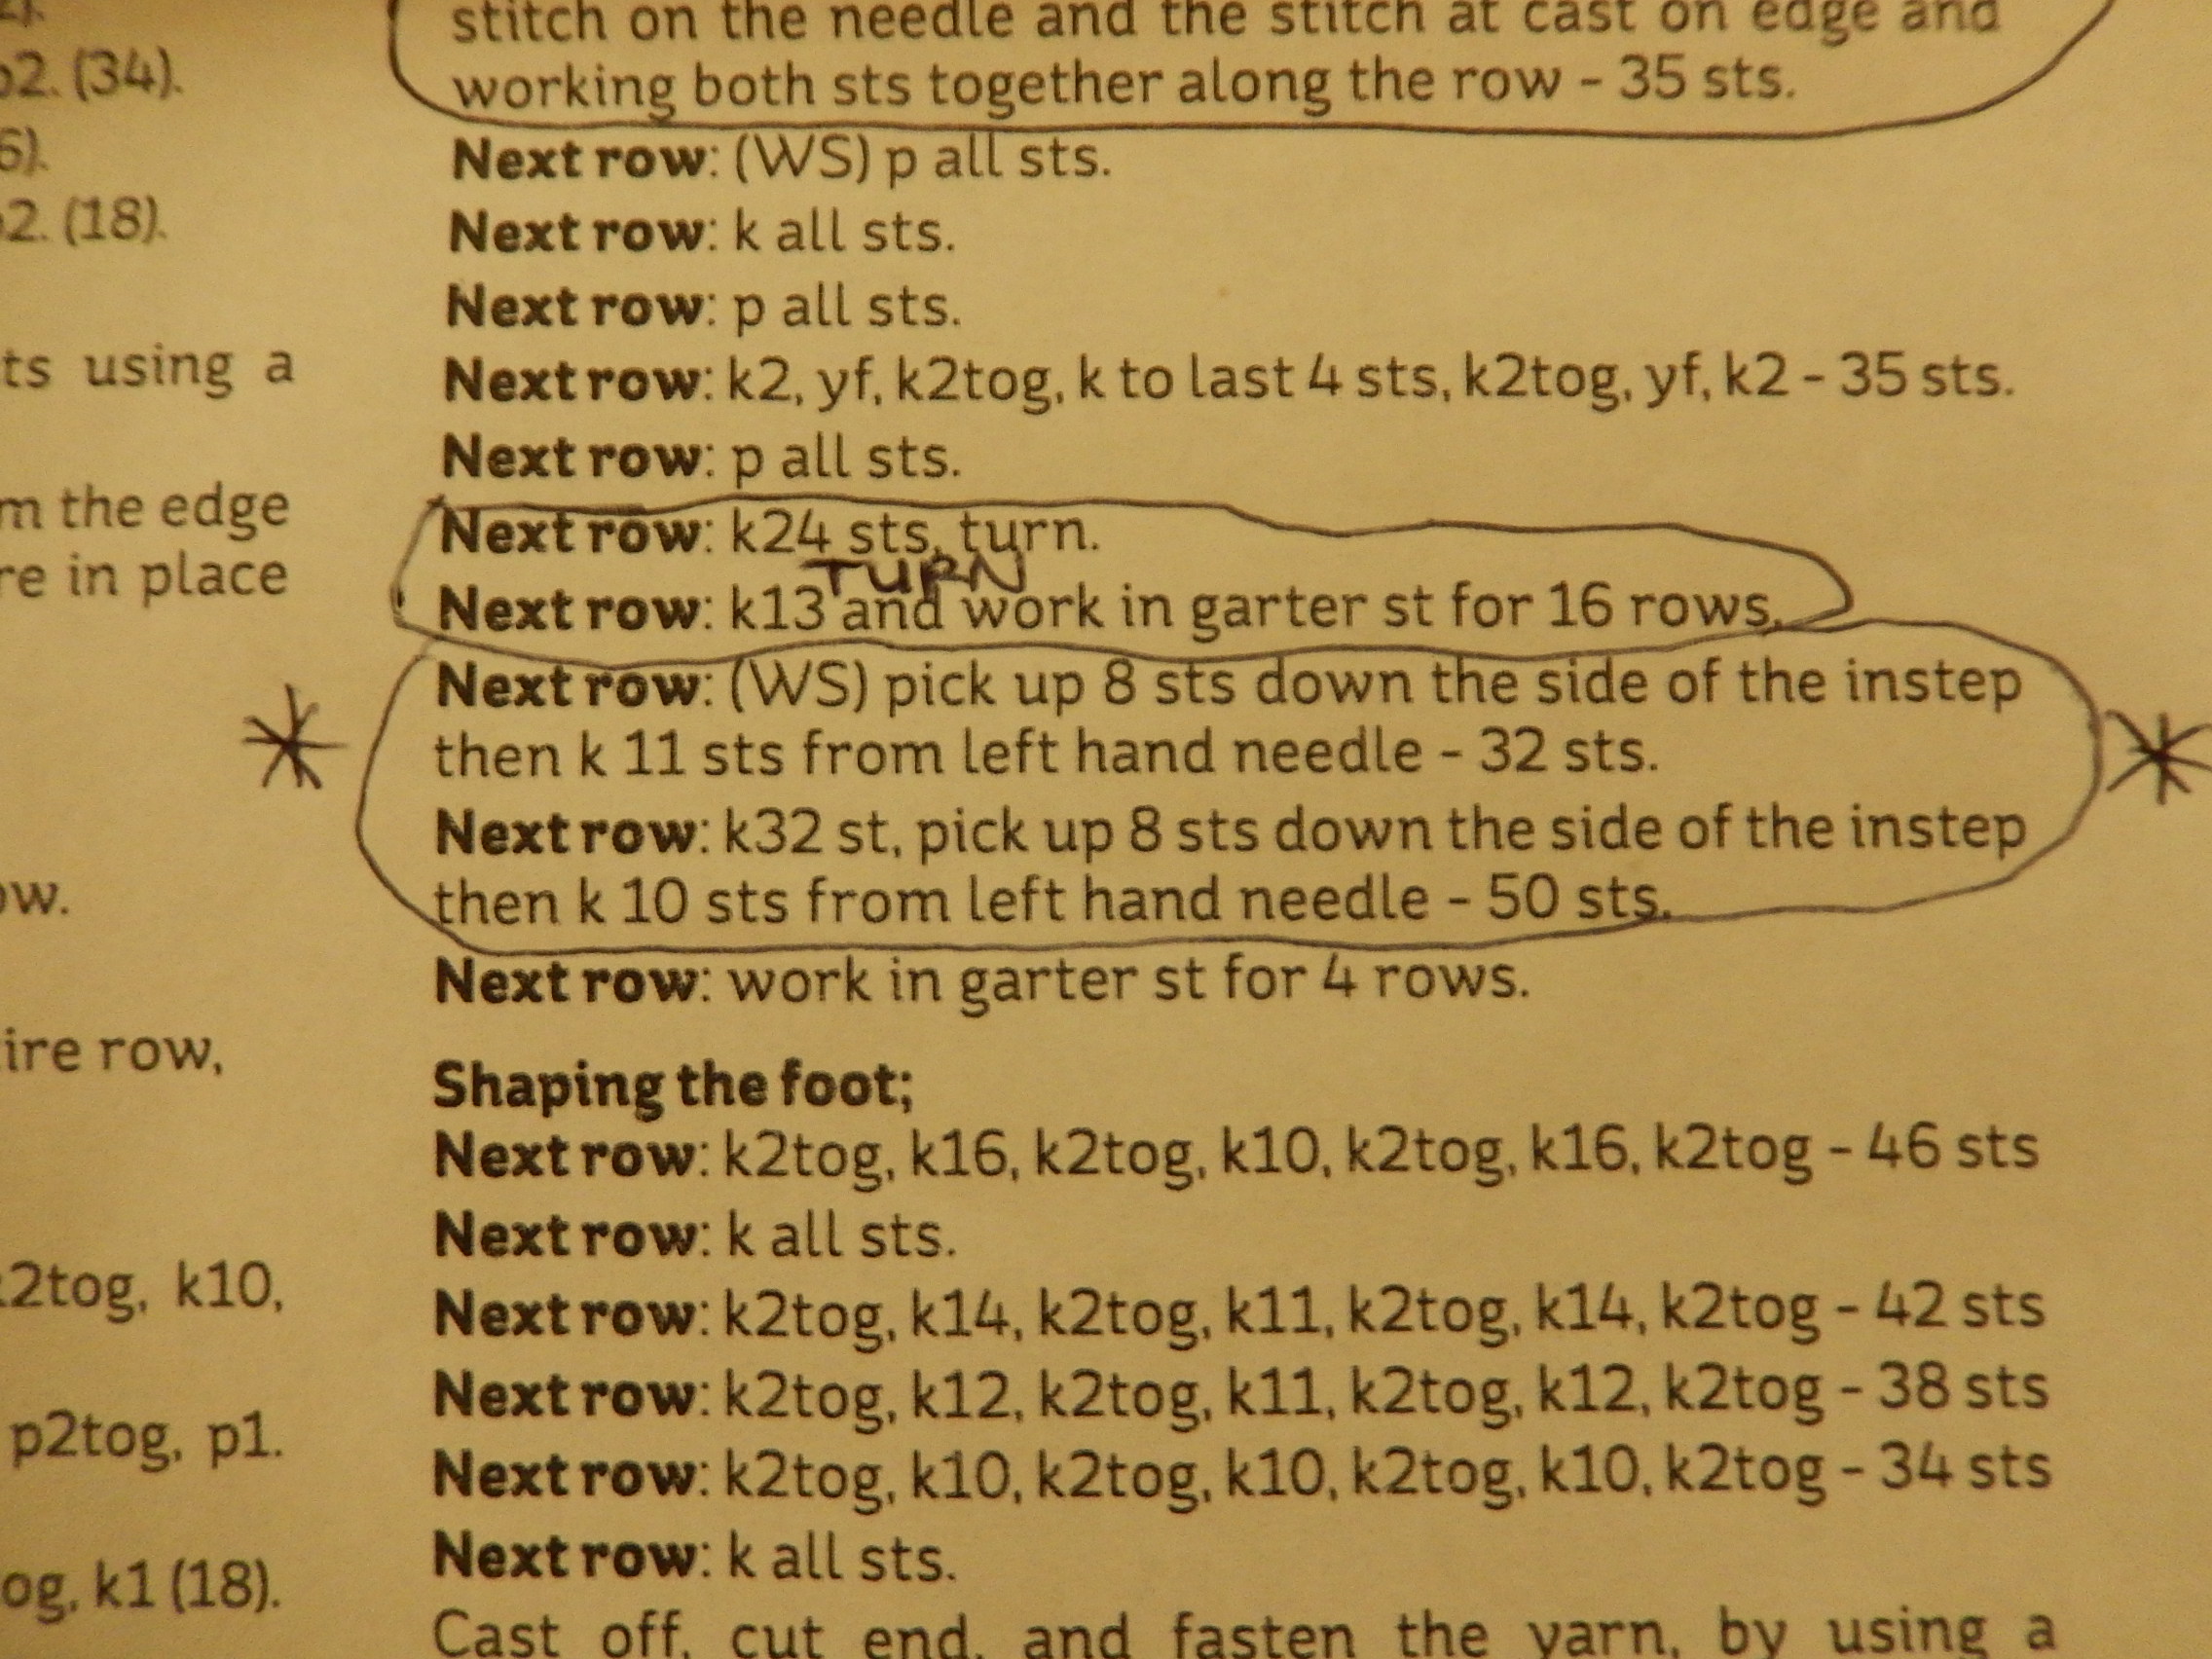
Didn’t expect to have to come back so quickly! So, looking at the wrong side (photo) if I pick up 8 sts (which I can do) with the left needle (as due to the angle it’s almost impossible to pick up with the right) and then knit 11 sts from the left needle by my calculation I’d still have 8 sts left on the that needle and 35 on the right needle (not 32) so this obviously isn’t what’s required, unless the pattern is wrong again…aaargh! If I can just get through this bit, looking ahead the shaping the foot bit looks relatively easy in comparison. Thanks for your continuing help…


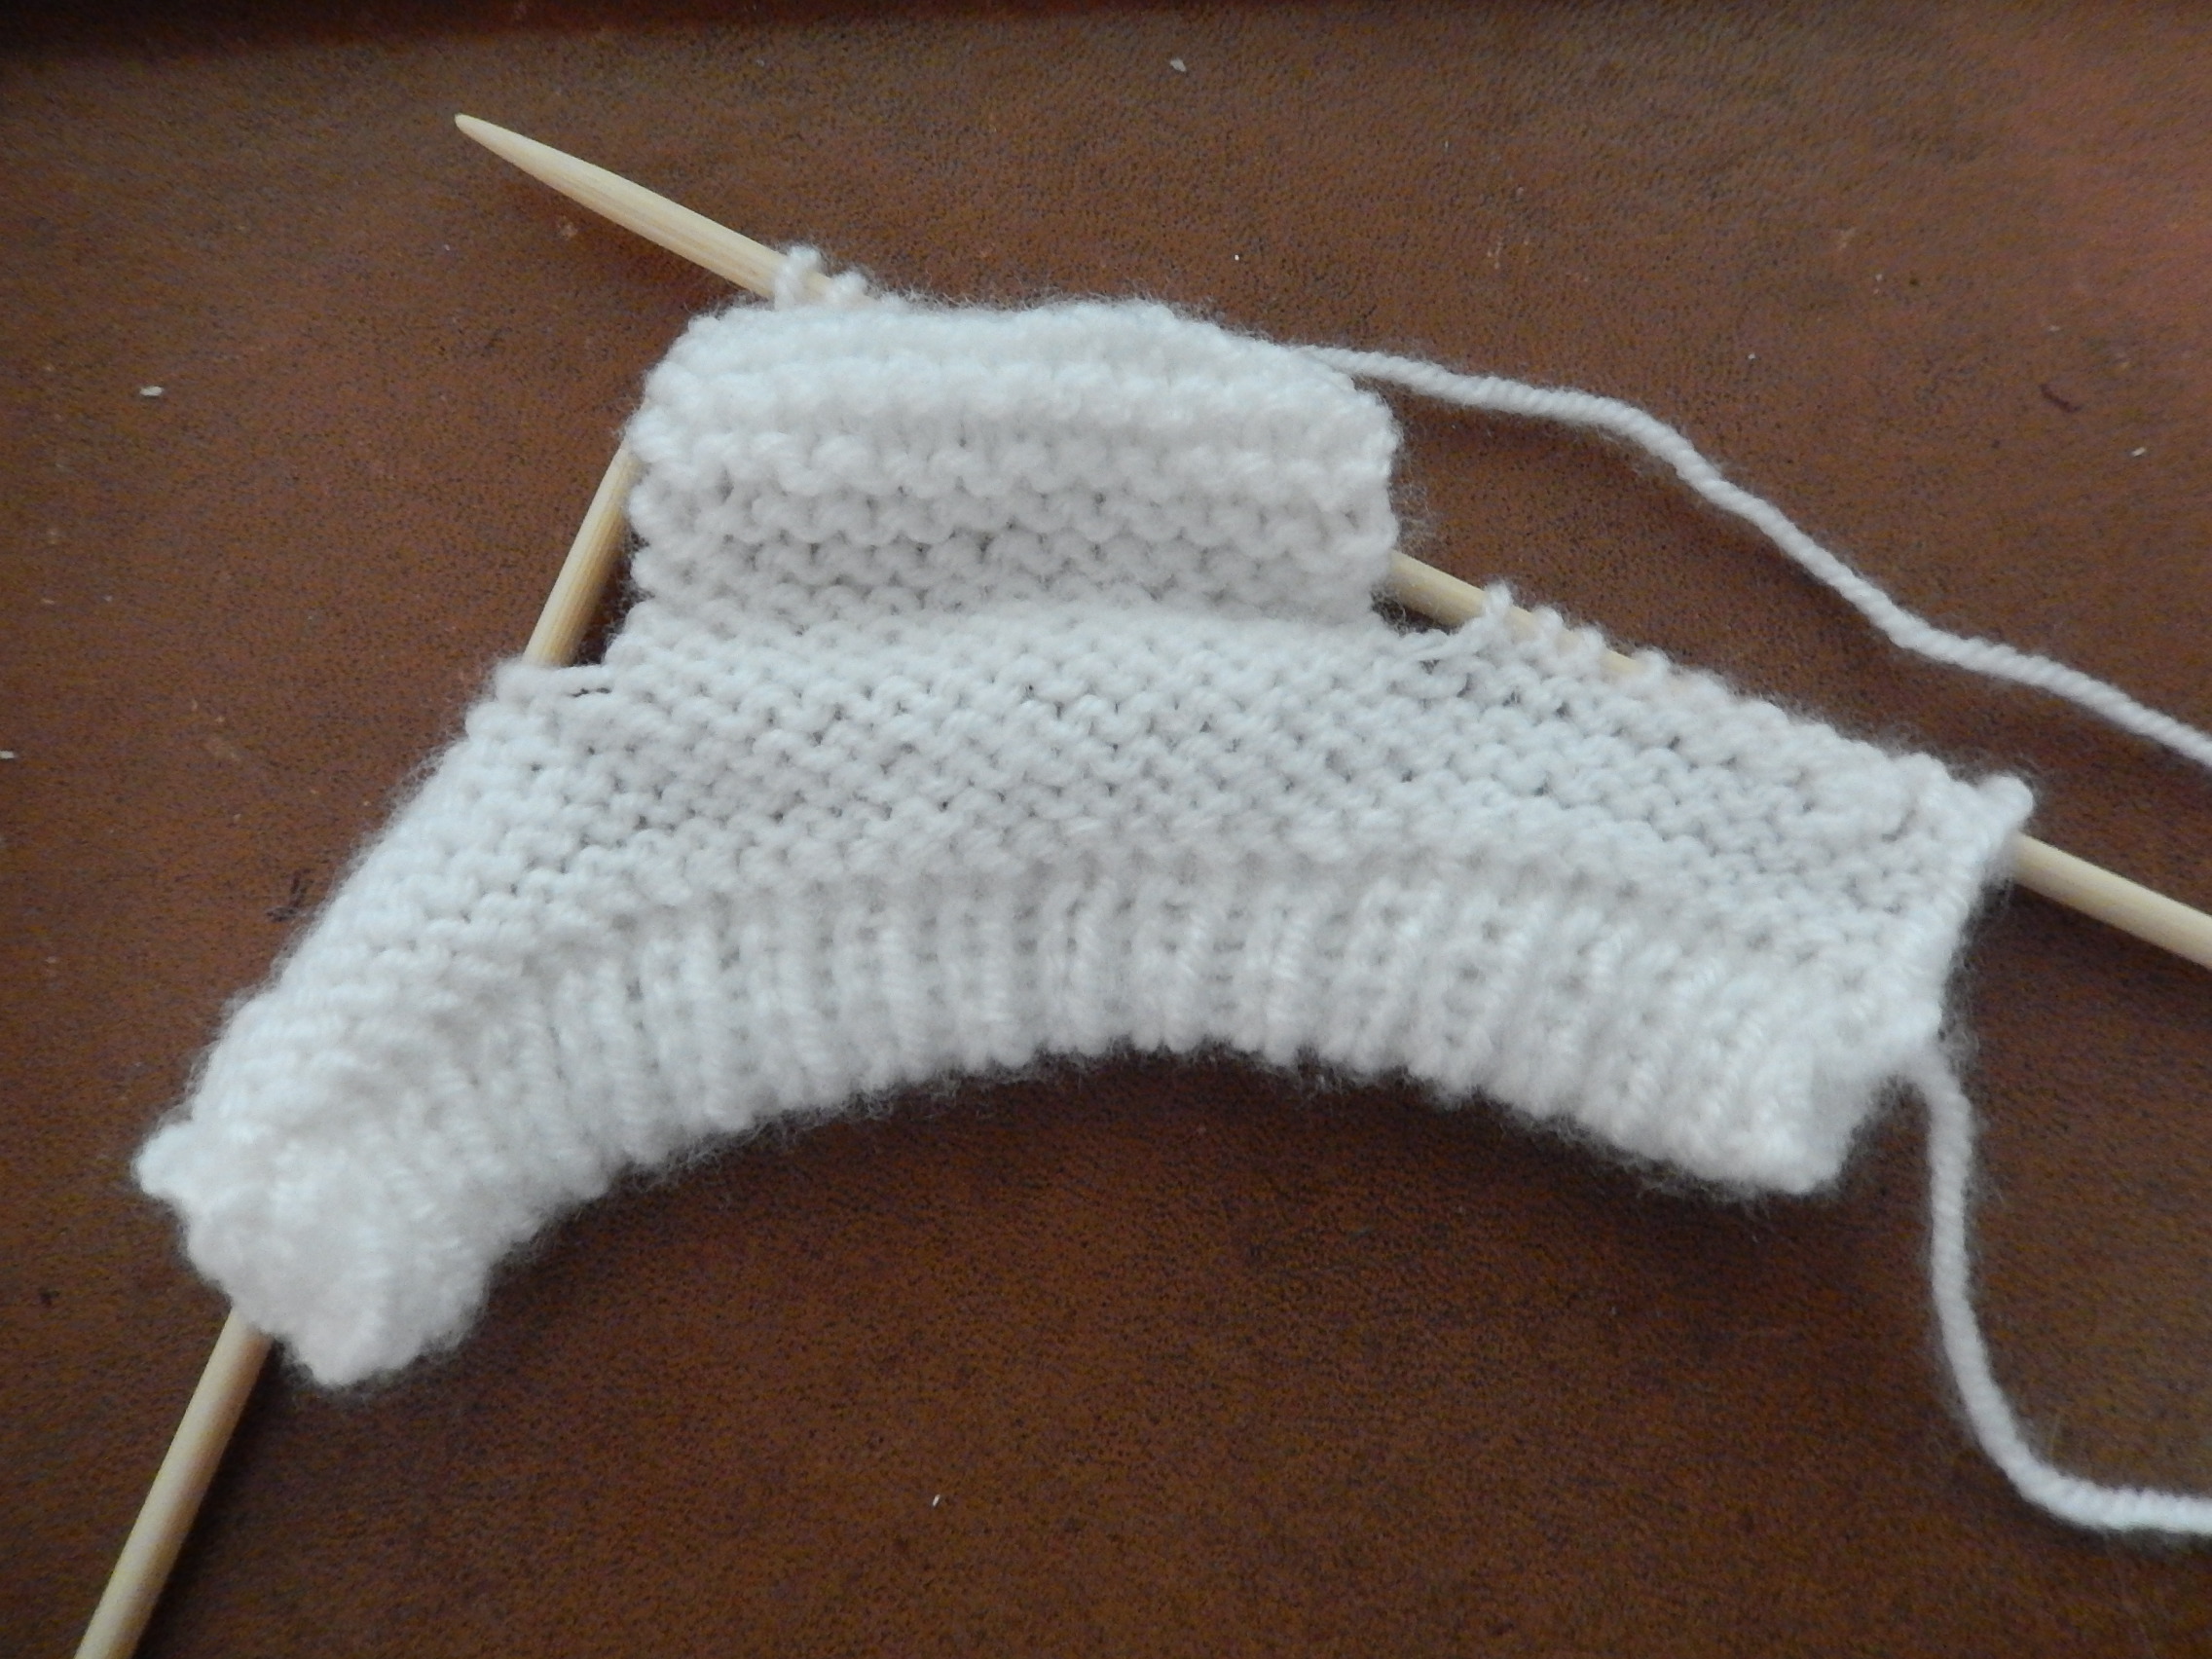
Your working yarn should be at the tip of the right hand needle. You can use a spare needle, a crochet hook or that right needle to pick up the 8 sts. (If you use the right hand needle it’s a little tight to pick up the first couple of sts but just work with the sts as close to the needle tip as you can without dropping one.)
I would pick up these sts with the RS or public side of the bootie facing me. That way the small seam the forms is to the inside of the bootie. You’ll have 13 + 8 + 11 or 32sts with an extra 11sts hanging out on the other side. Once you pick up the second set of 8 from the other side of the instep you’ll have 51 sts (32 + 11 not 32 + 10 as the pattern states).
Looks good so far! This is usually the oddest part of knitting a bootie and as you say, the rest is relatively easy.
I’ve now finished them but there’s a lot NQR about them, thanks to that next mistake in the pattern! As you correctly said there were 51 sts after this step not 50 sts as stated. I then wrongly assumed I should have 50 sts for the foot shaping (should have worked it out in advance!) so decreased by a st in the 4 garter st rows. When I came to shaping the foot I then discovered I was a st short of course but carried on regardless as I was losing patience by this stage. I shall let Hobbycraft know but I wonder, do patterns often have mistakes?
1 Like
I’m sure the bootie will be fine even with the decrease and subsequent increase to compensate. So frustrating. At least you have a chance to work the second bootie with the correction. Letting Hobbycraft know is a very good thing to do which benefits the community.
Patterns in general have been tested and edited so the mistakes are at a minimum. Ravelry is a very good source to use to troubleshoot patterns. The project notes often bring up corrections and work arounds. Good to check there first if possible. That said, there are patterns (I’m thinking of Vogue Knitting here) that are notorious for errors. To their credit, Vogue quickly publishes online corrections once alerted to them.
There are frequently posts on the forum about patterns with mistakes but that’s at least partly due to the fact that the mistakes generate the questions.
Hello again,
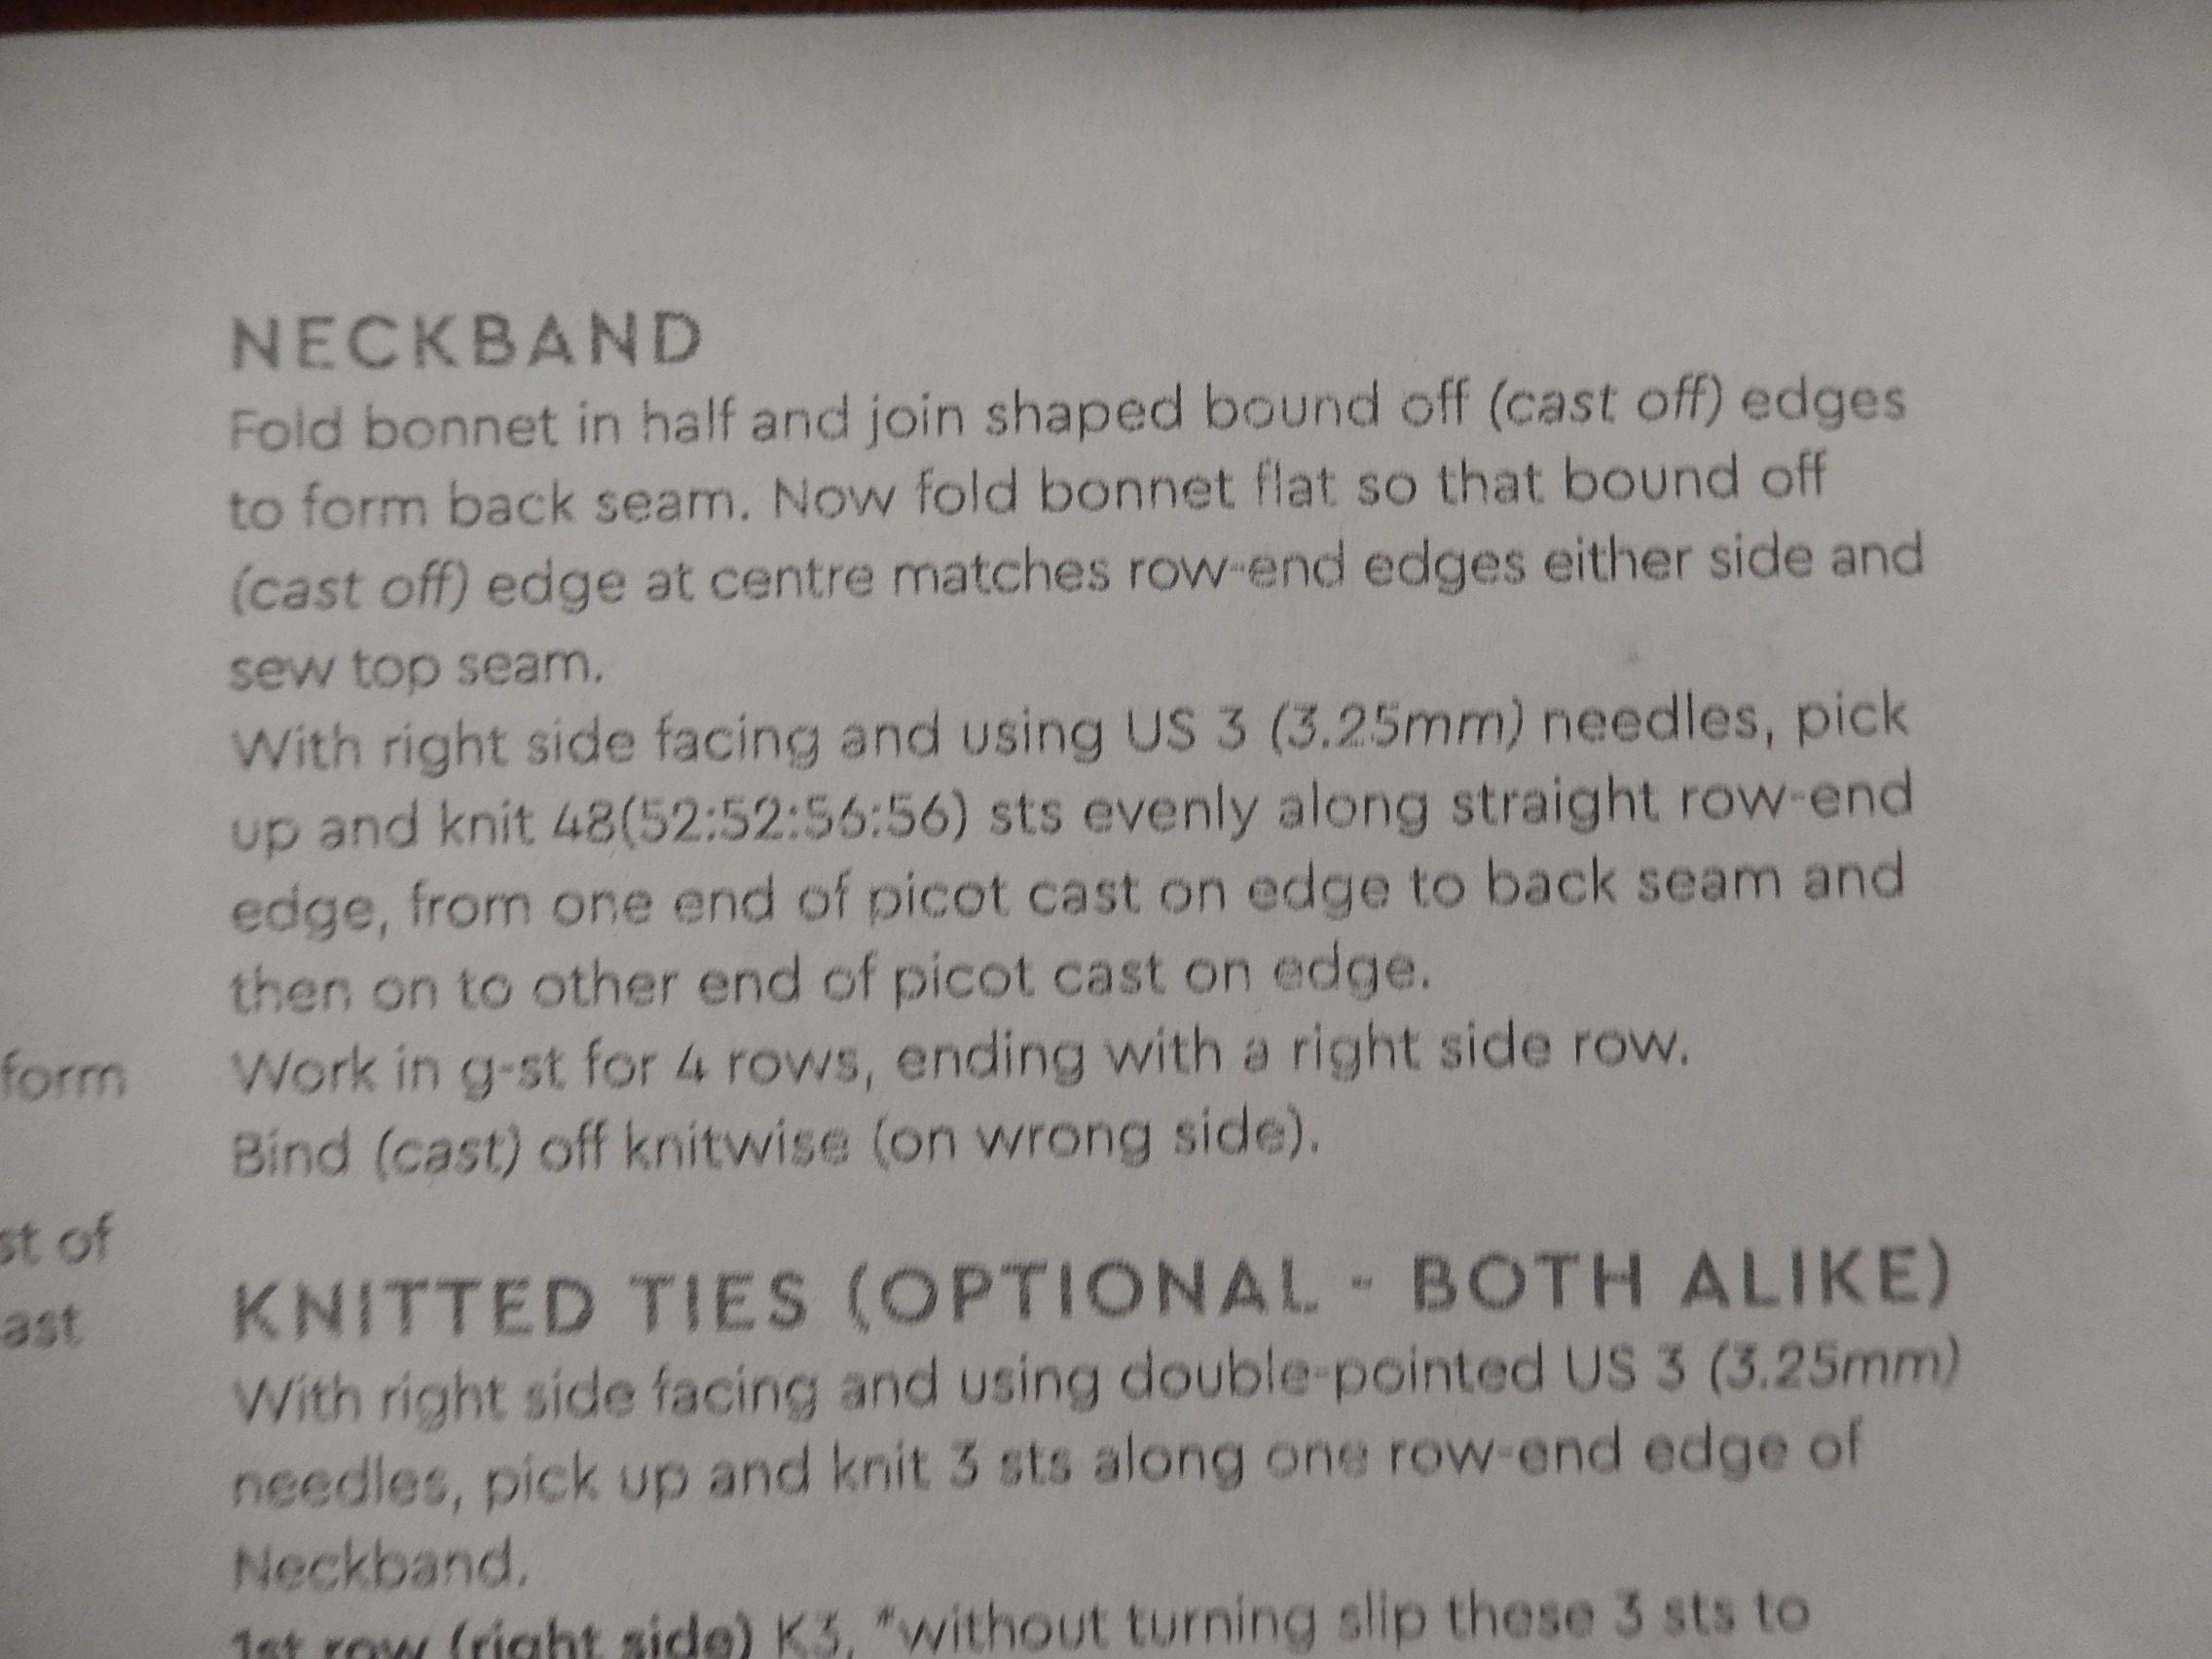
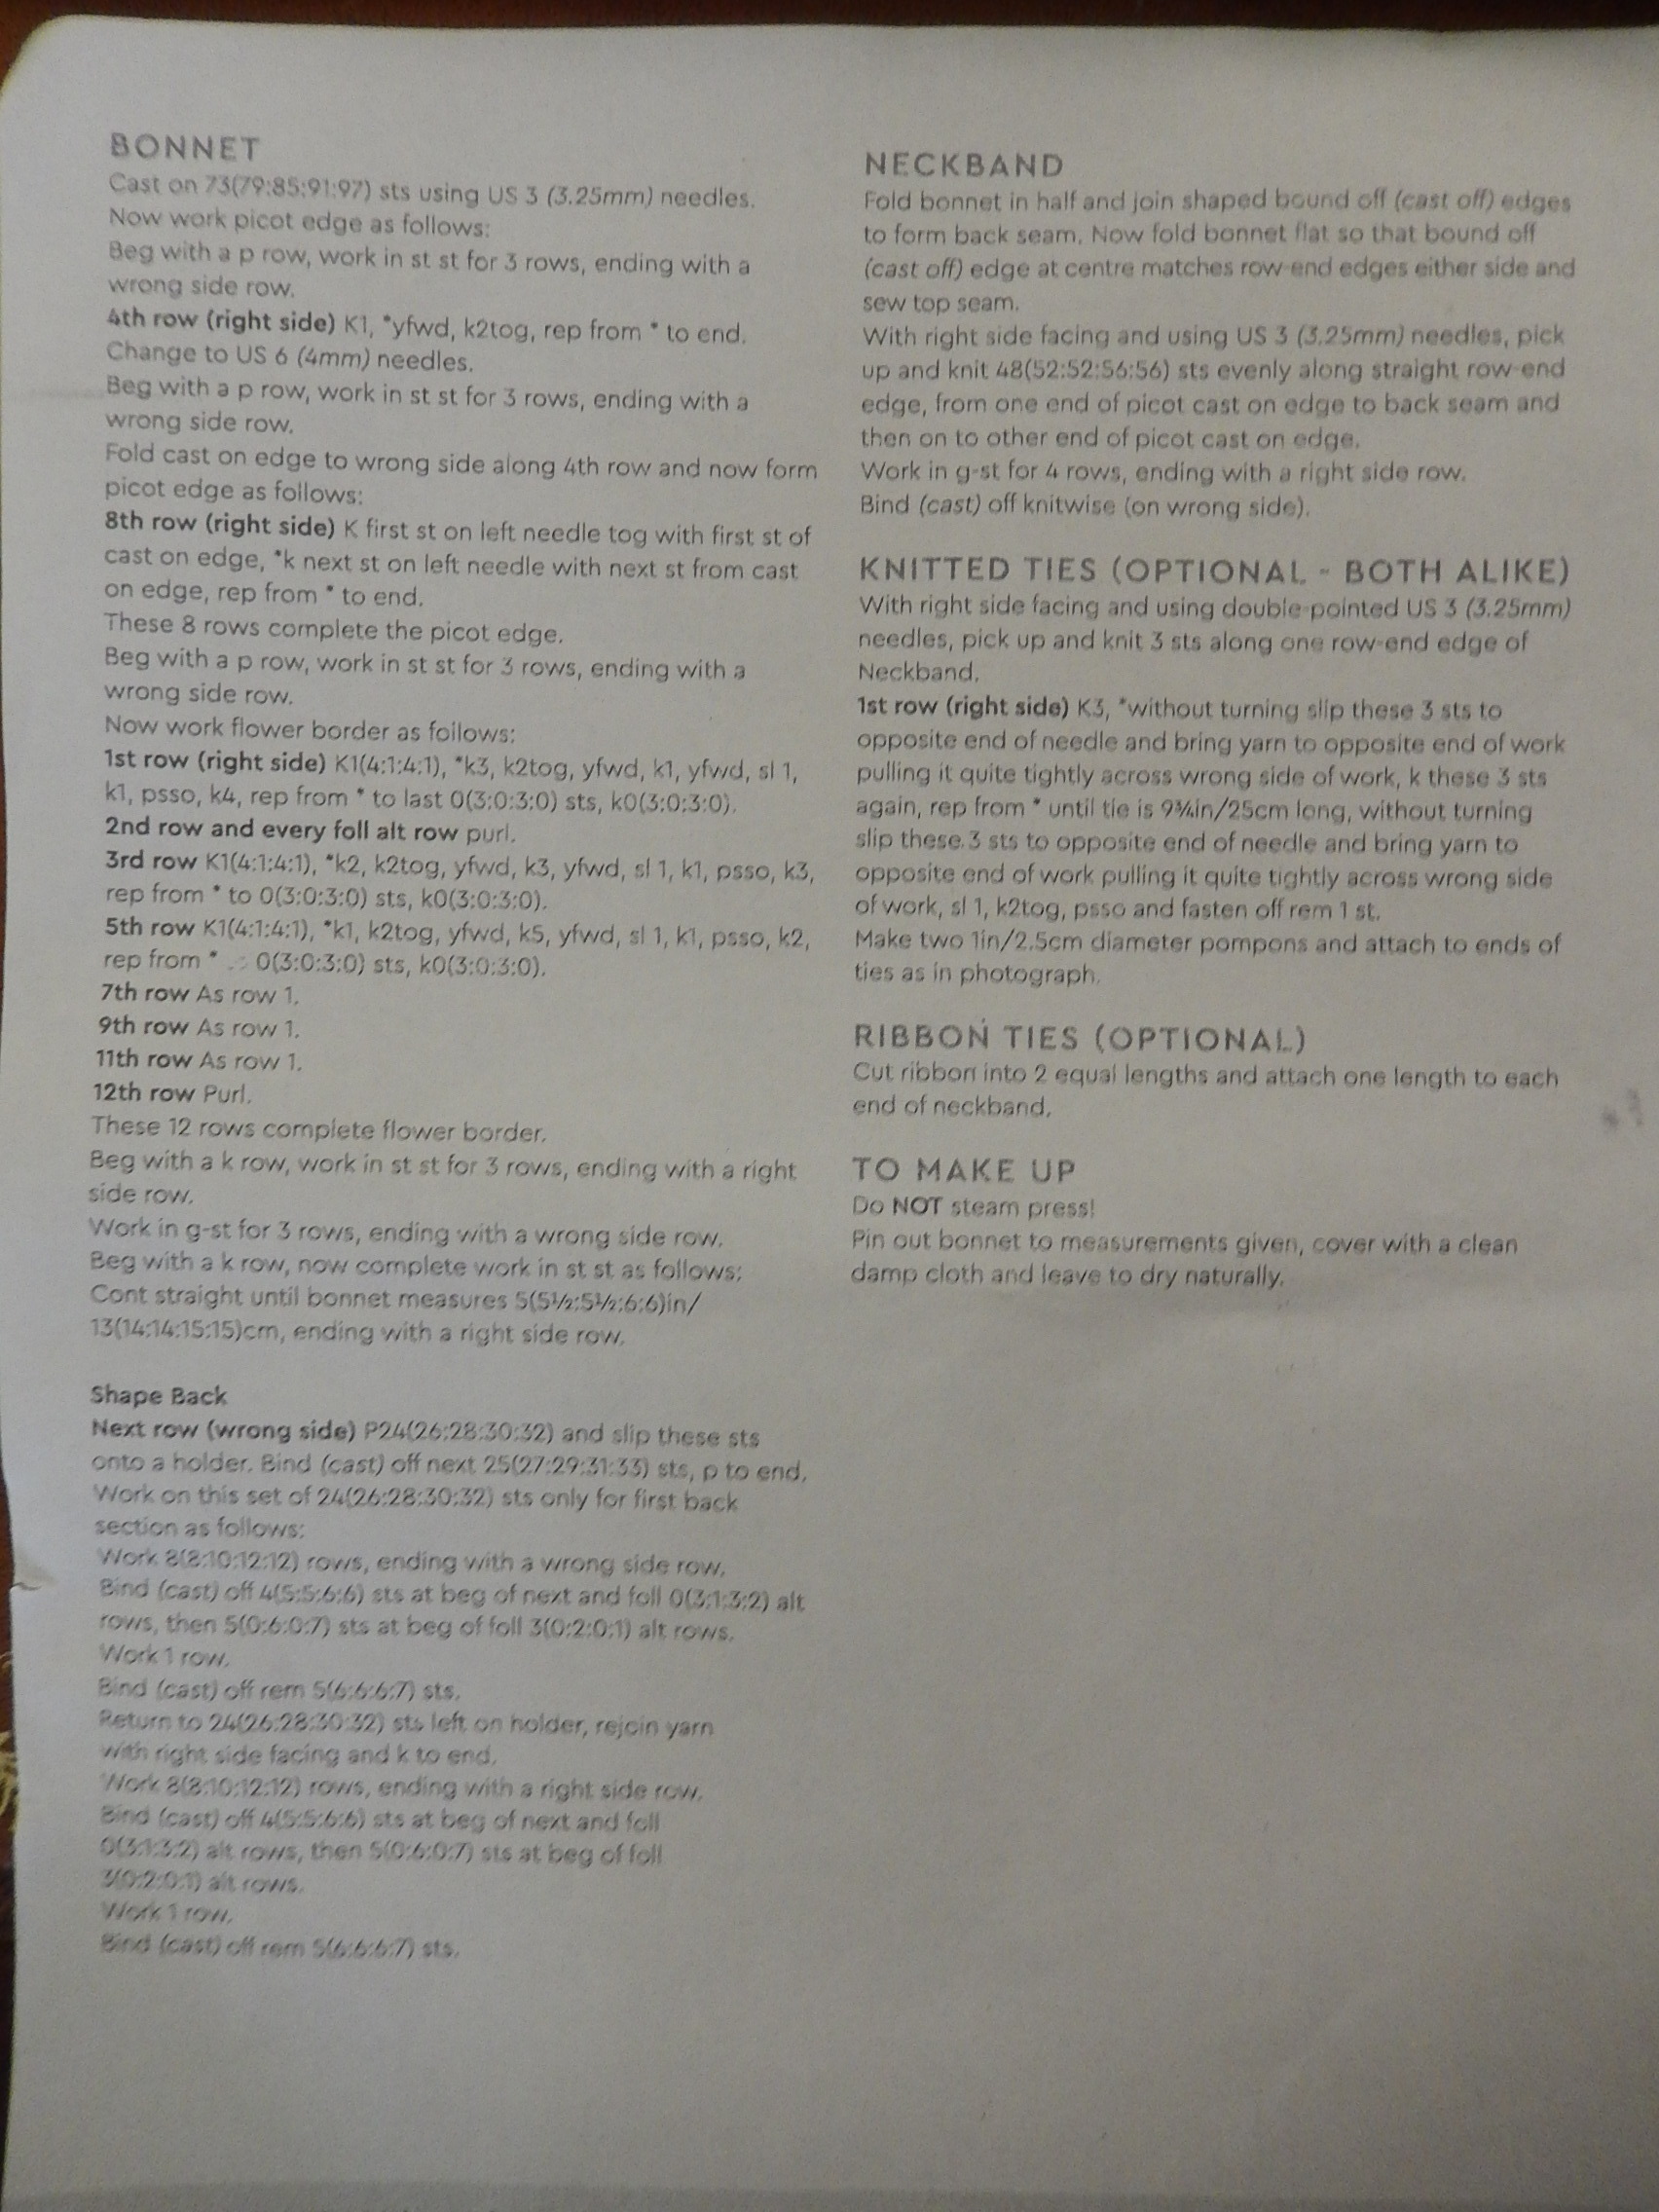
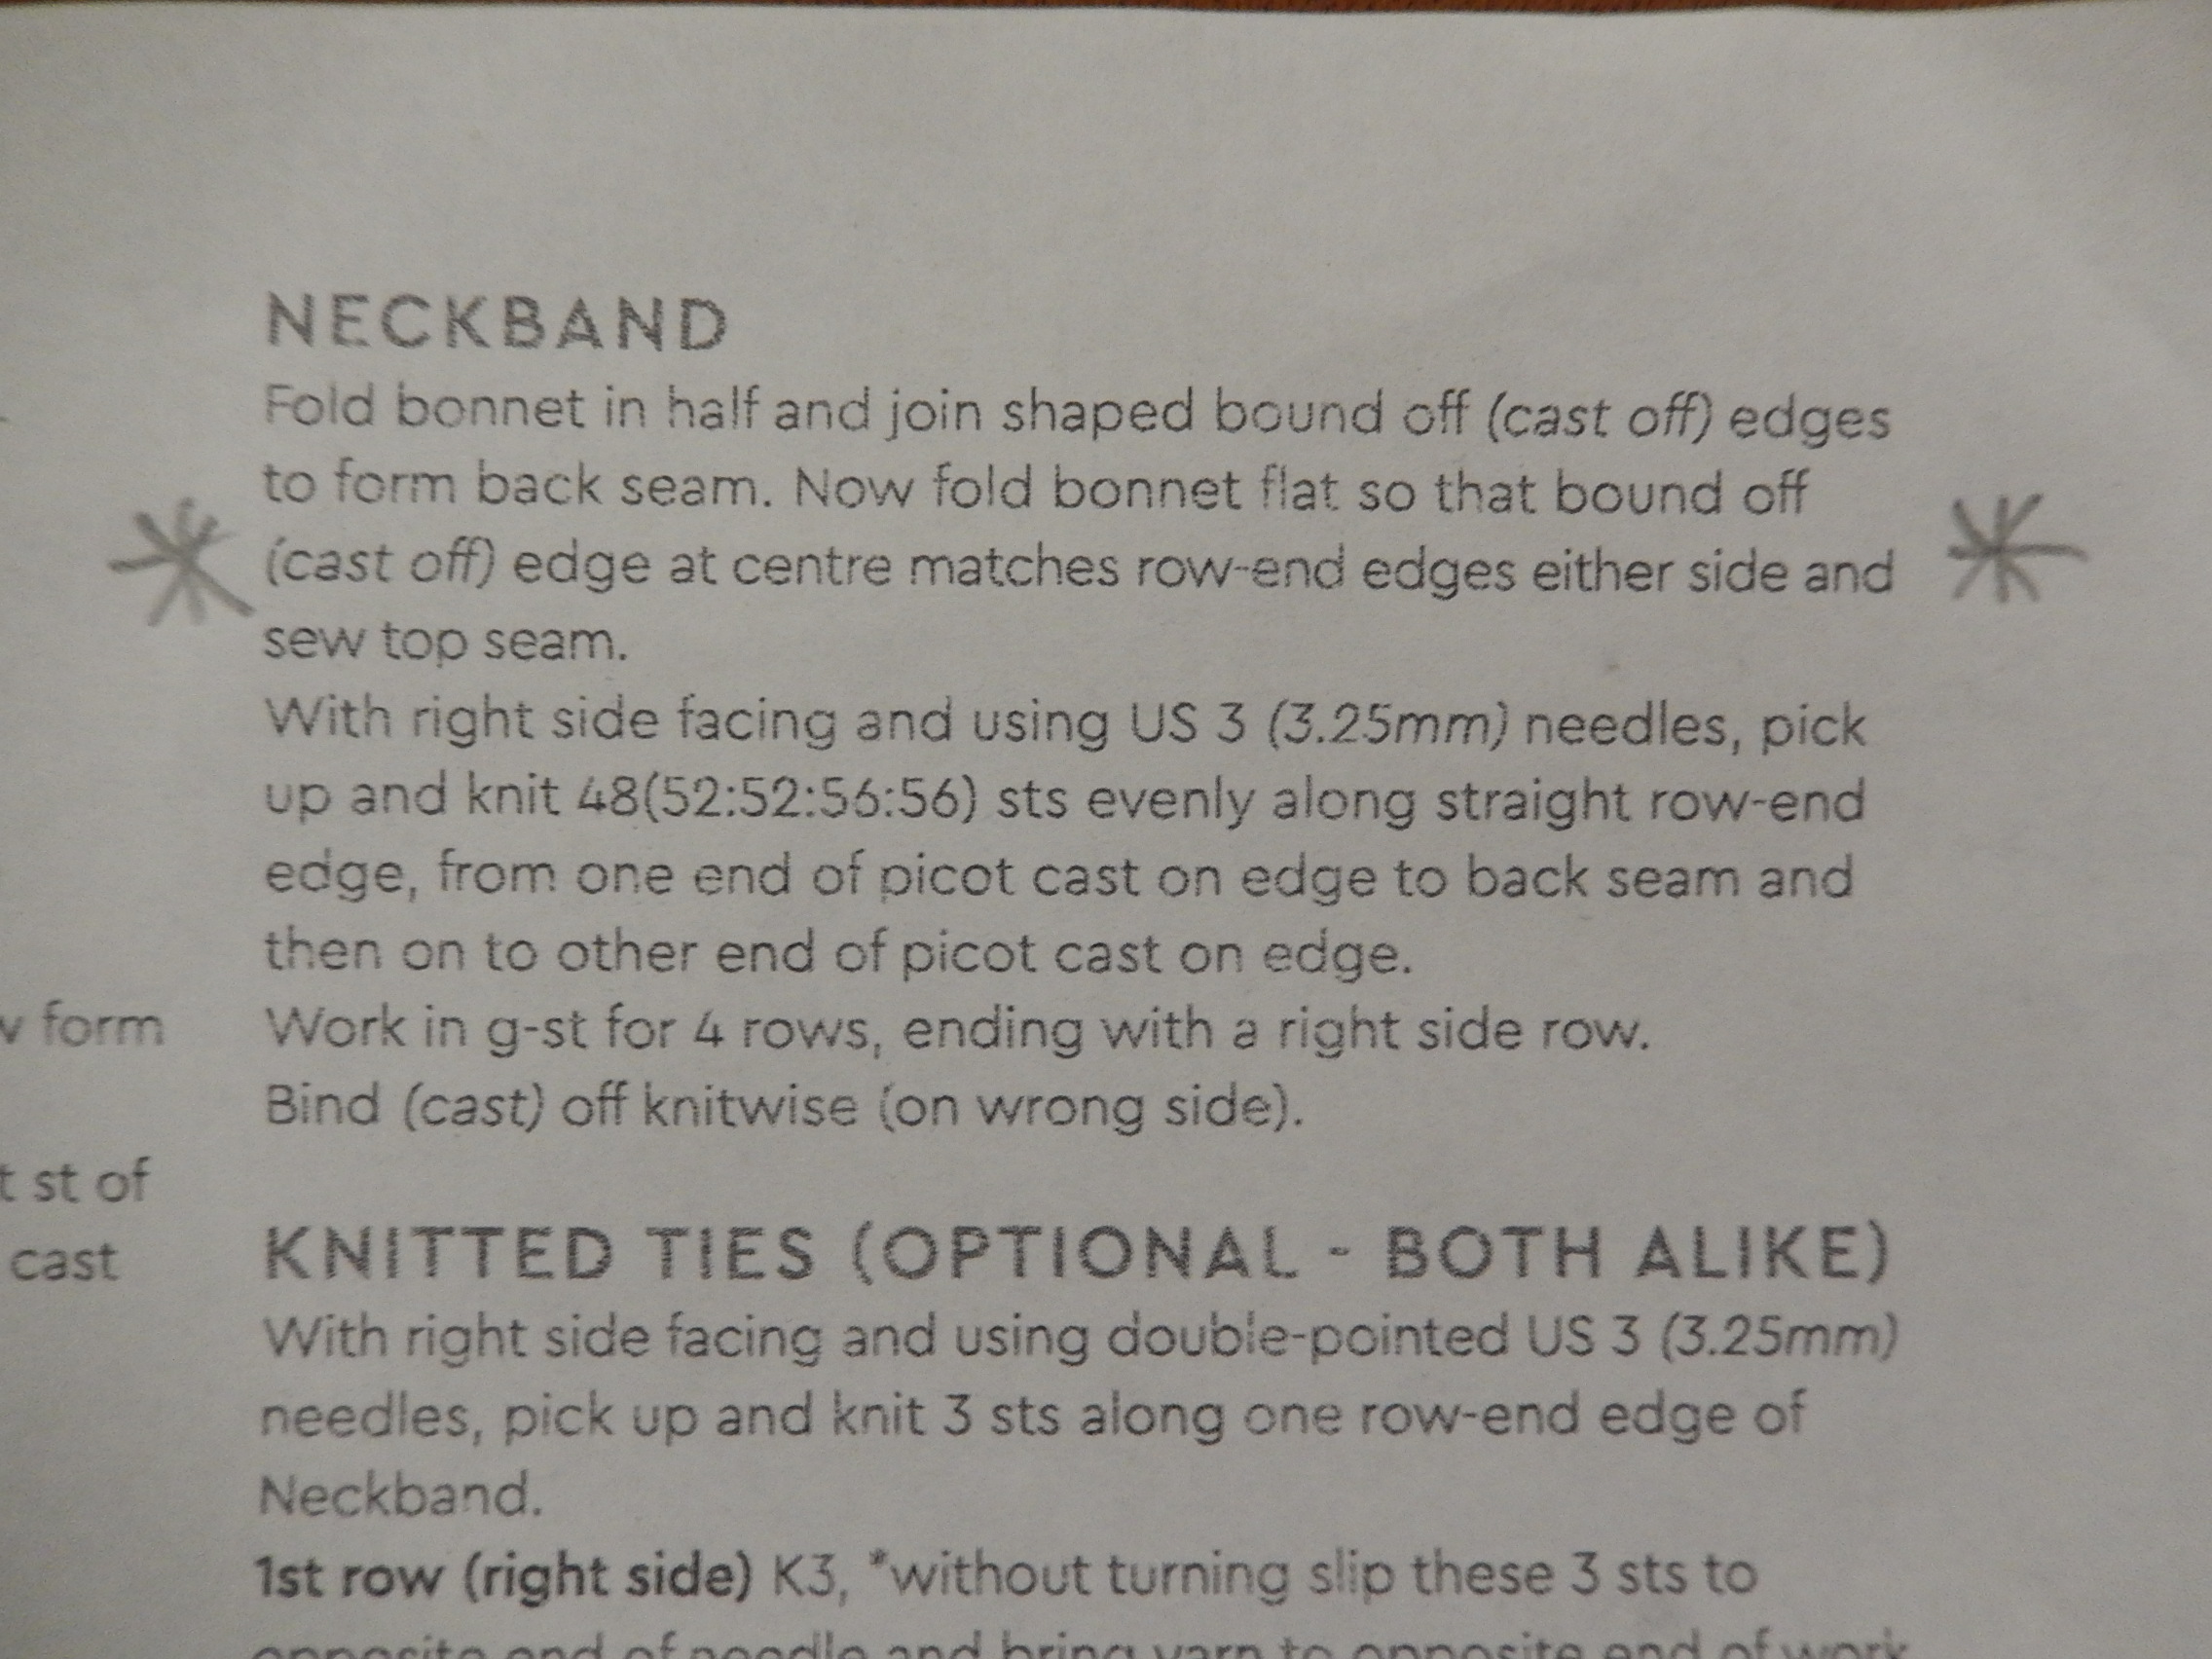
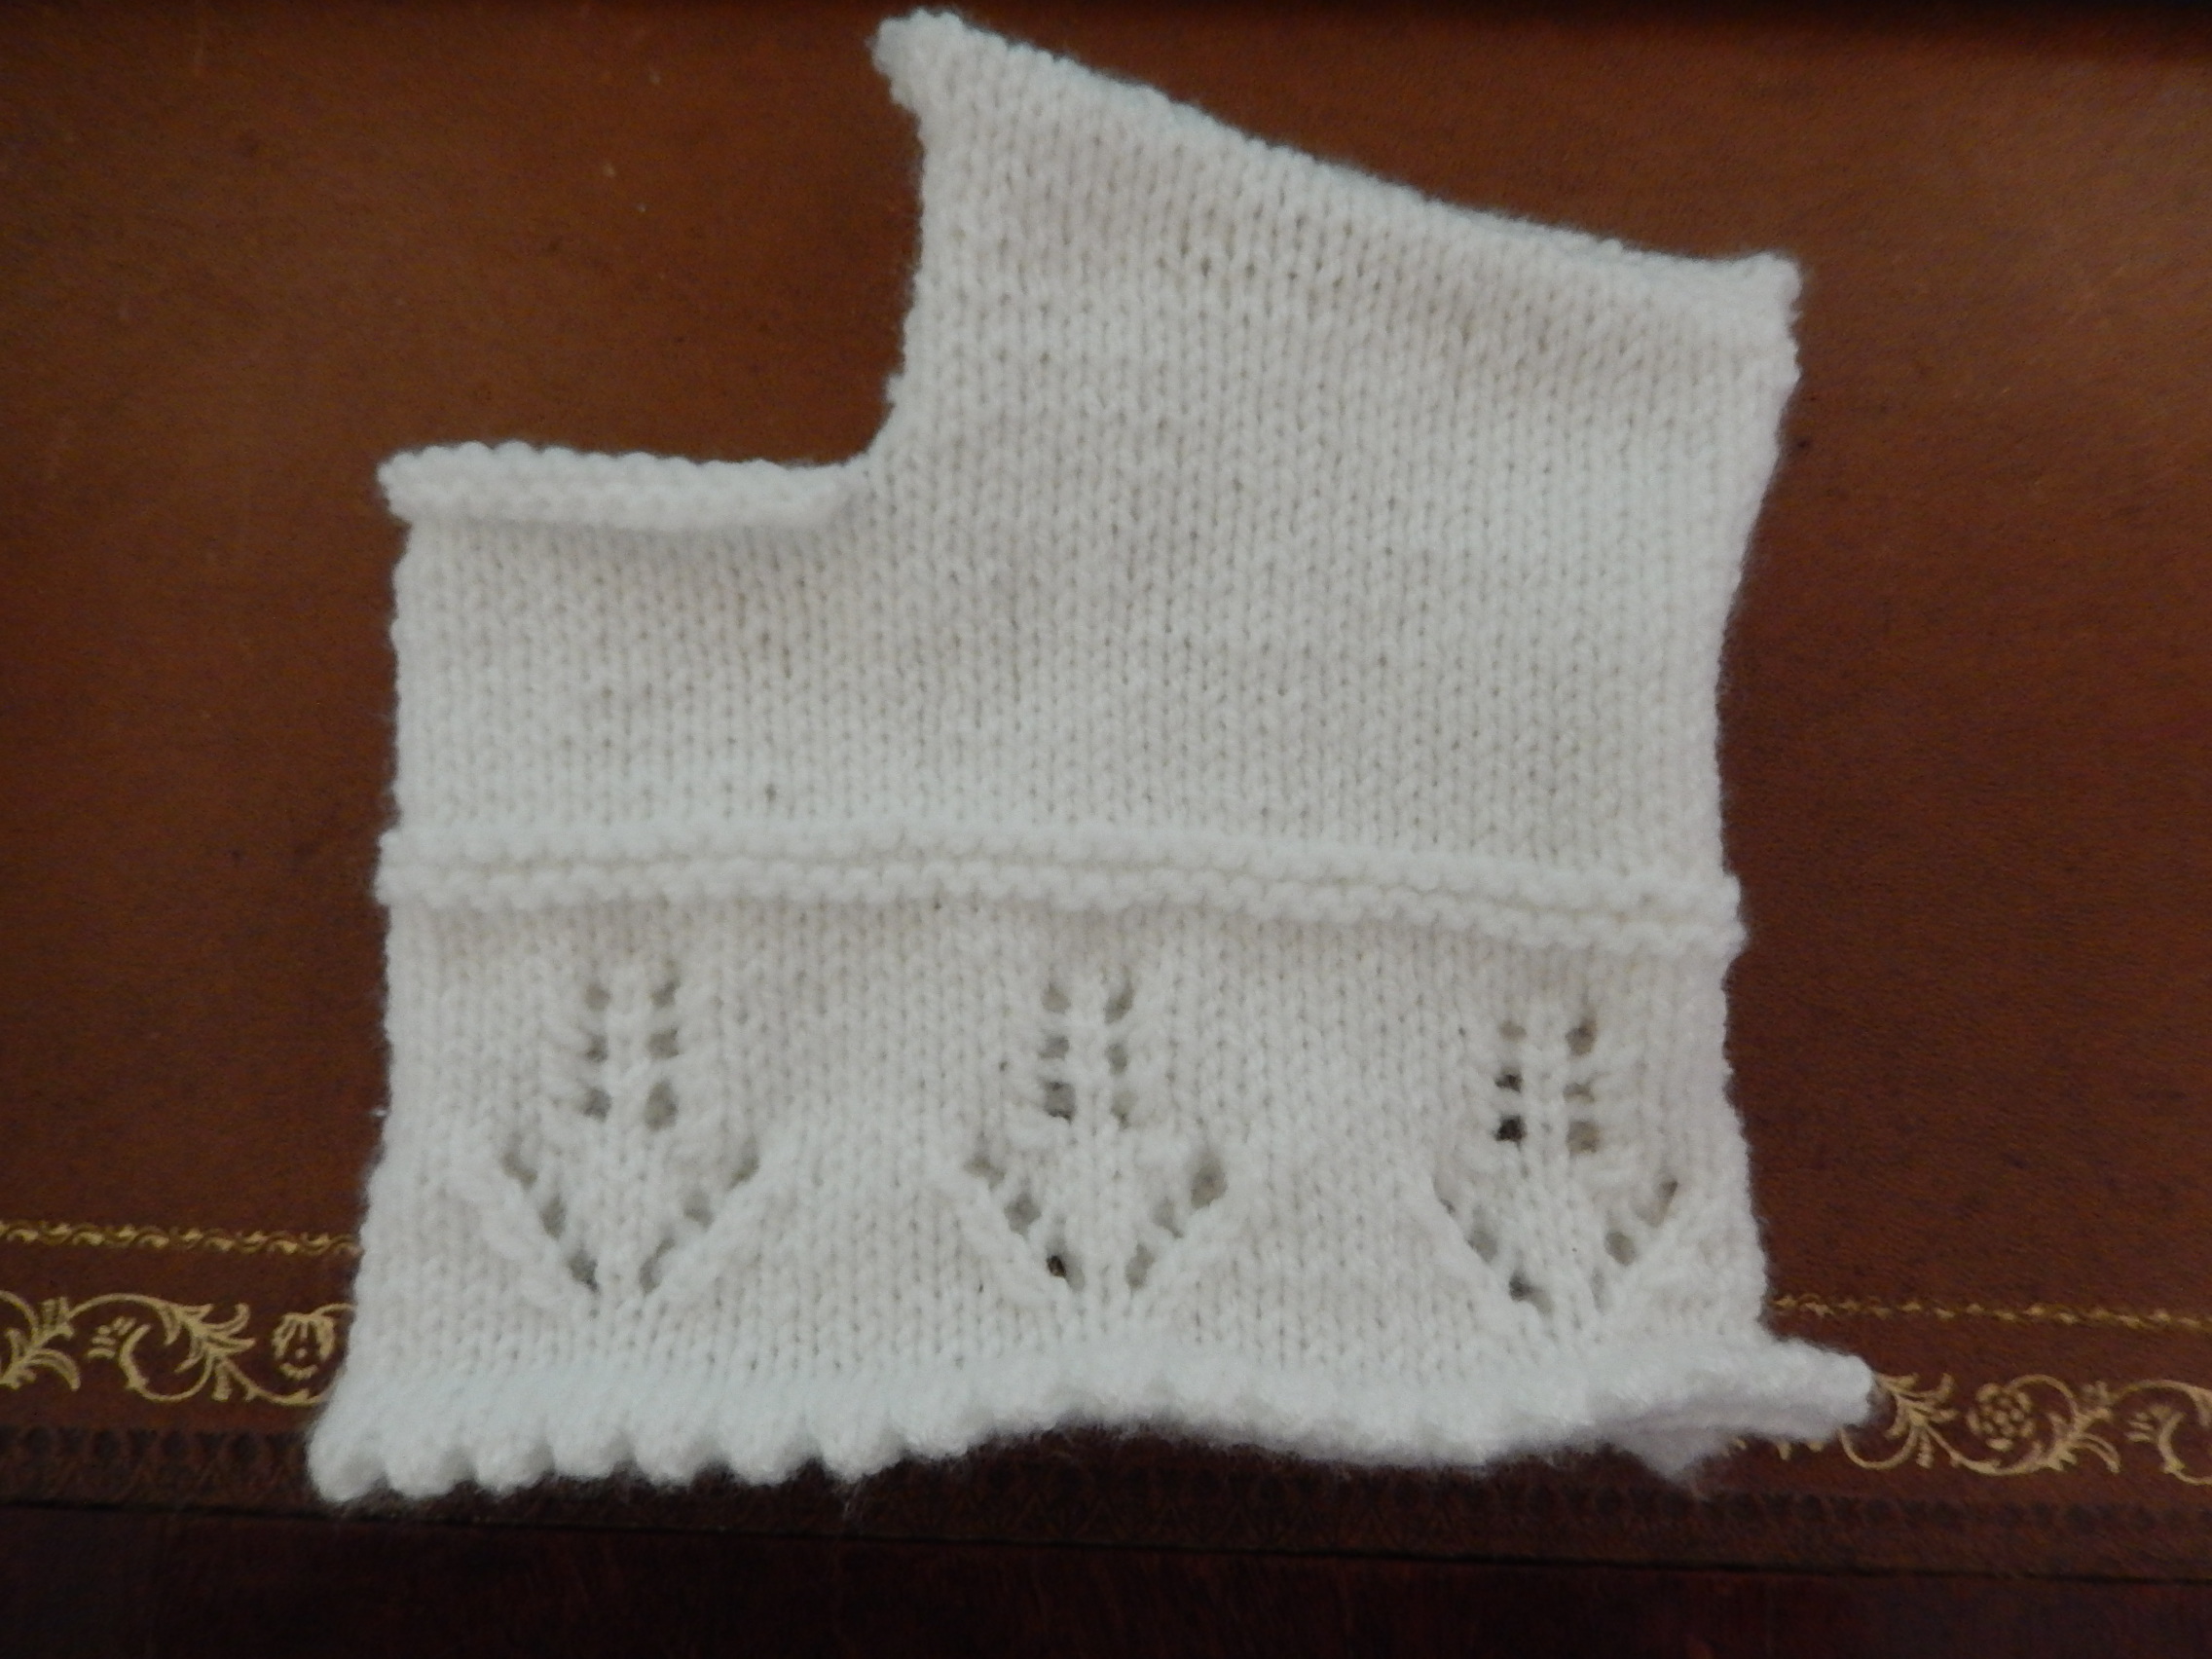
Booties got finished although I didn’t really enjoy doing them as the pattern wasn’t the best! I went on to an heirloom bonnet and this was going great, even though intermediate, as instructions were clear and everything worked out well…until now that is! Have got to the section labelled “neckband” and am completely stuck again as I just don’t understand what to do next. I’m even wondering if this bit is accidently from another pattern as being a bonnet you wouldn’t expect a neckband? Also, reading on to the end there’s no mention of what to do with the slipped stitches on the holder that occurred whilst shaping the back. Any help please, much appreciated…also, please can you let me know if I should be starting a new thread for each question or is it ok to carry on here?
Hello
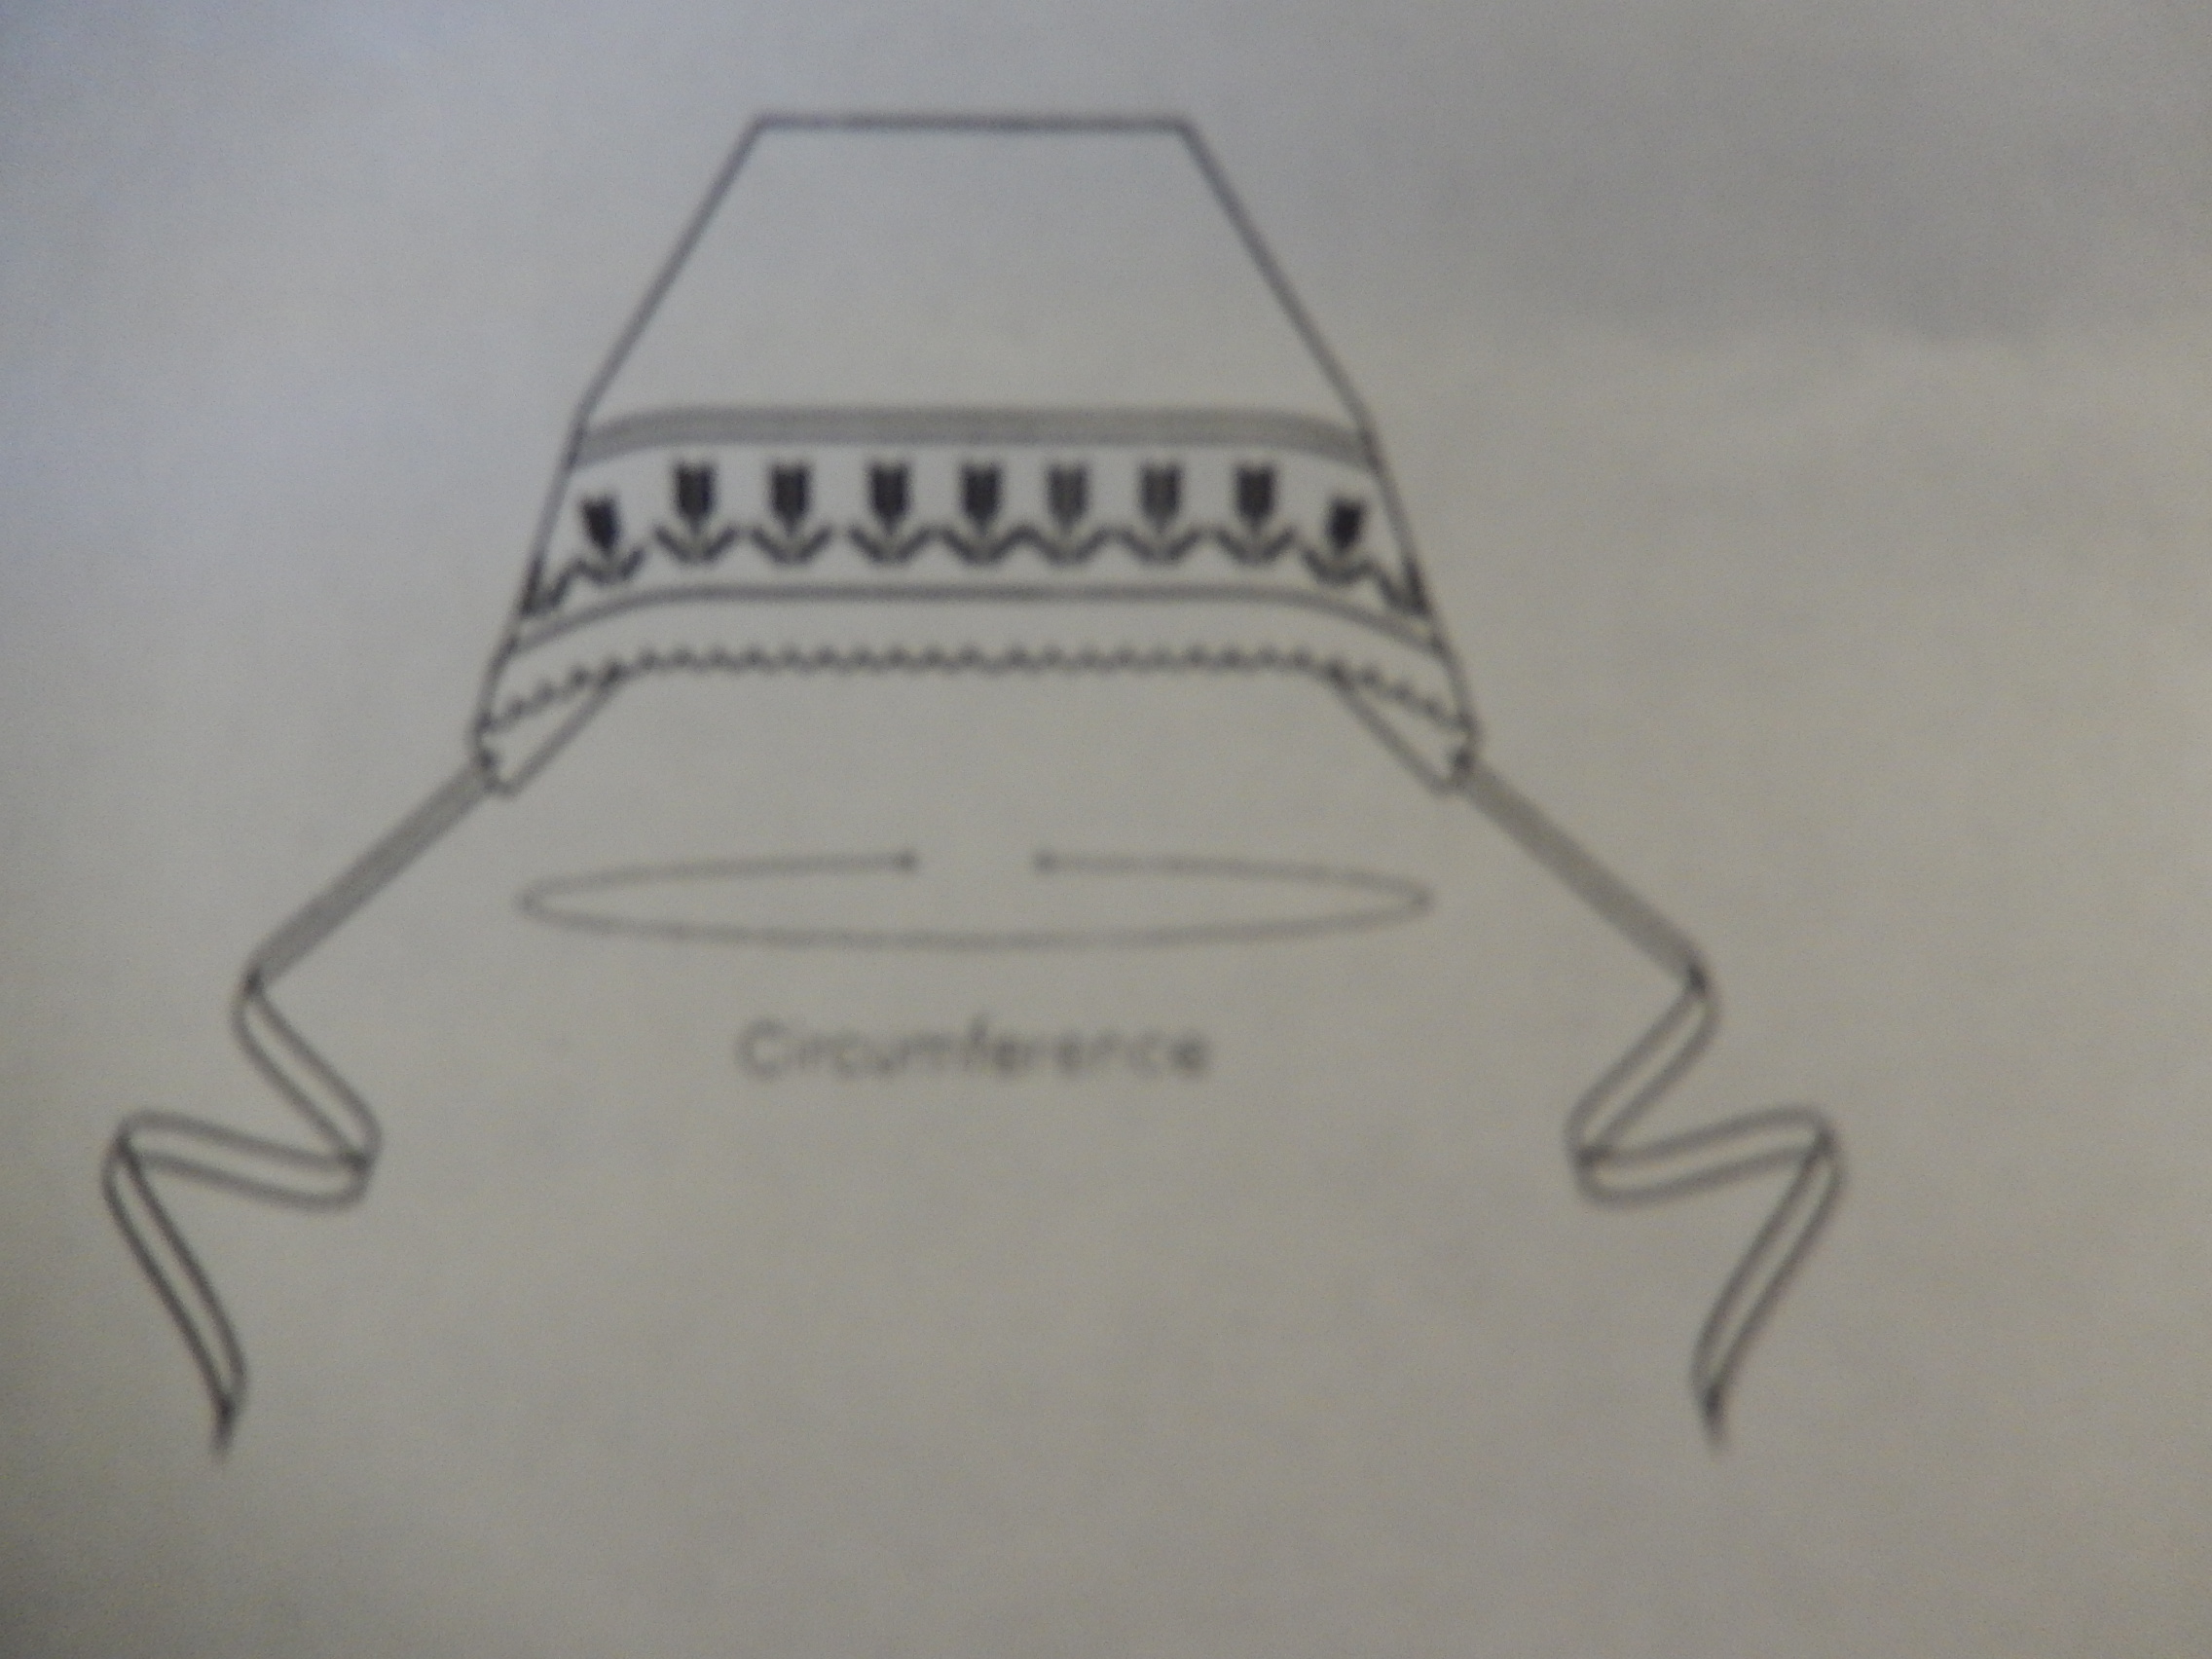
It sounds to me like this hornet has a picot band along the front and a garter band (neck band) across the back. The back has some shaping which you have been doing on 24 stitches for one side, then 24 stitches on the other side. A neck band or edging is to neaten everything off.
If you look at “shape back” about half way down the instructions you will see “bind off remaining 5 stitches” (or similar depending on the size you are making).
Next line says “Return to 24 stitches left on holder, rejoin yarn with right side facing”
So this is where you worked the held stitches and the second side of the back of the bonnet. It will mirror the right side. At the end of this section “bind of rem 5 sts” refers to the second side of the back and these are the remaining stitches which were on hold but have now been worked and shaped.
I think the garter neckband will makes more sense once you have worked both back sides and joined the back seam.
If not, come back and ask again.
As for starting a new thread. I think it’s better to open a new thread for a new pattern as then the rest of the community can see what the pattern is and they might have experience with it and be able to offer advice. It’s a but harder if a thread begins with one pattern and ends on another. It also makes it easier for future users to find a topic if they are looking for the same help.
But I wouldn’t stress over it. Better to ask for help in the “wrong” place rather than not ask for help at all.
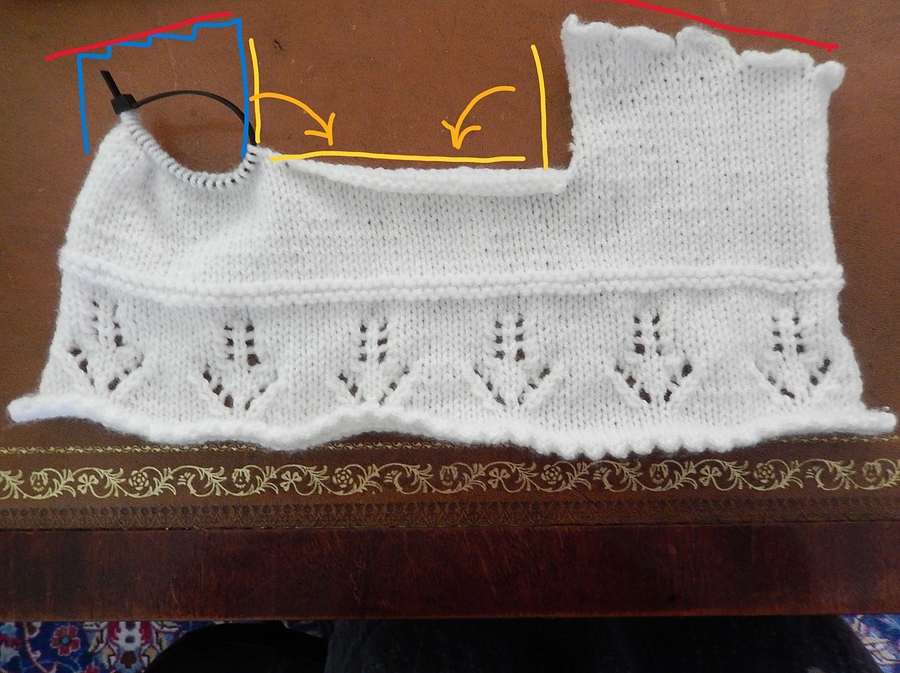
You’ve worked this beautifully so far. Now for a bit of origami. Finish working the second side of the back shown in blue.
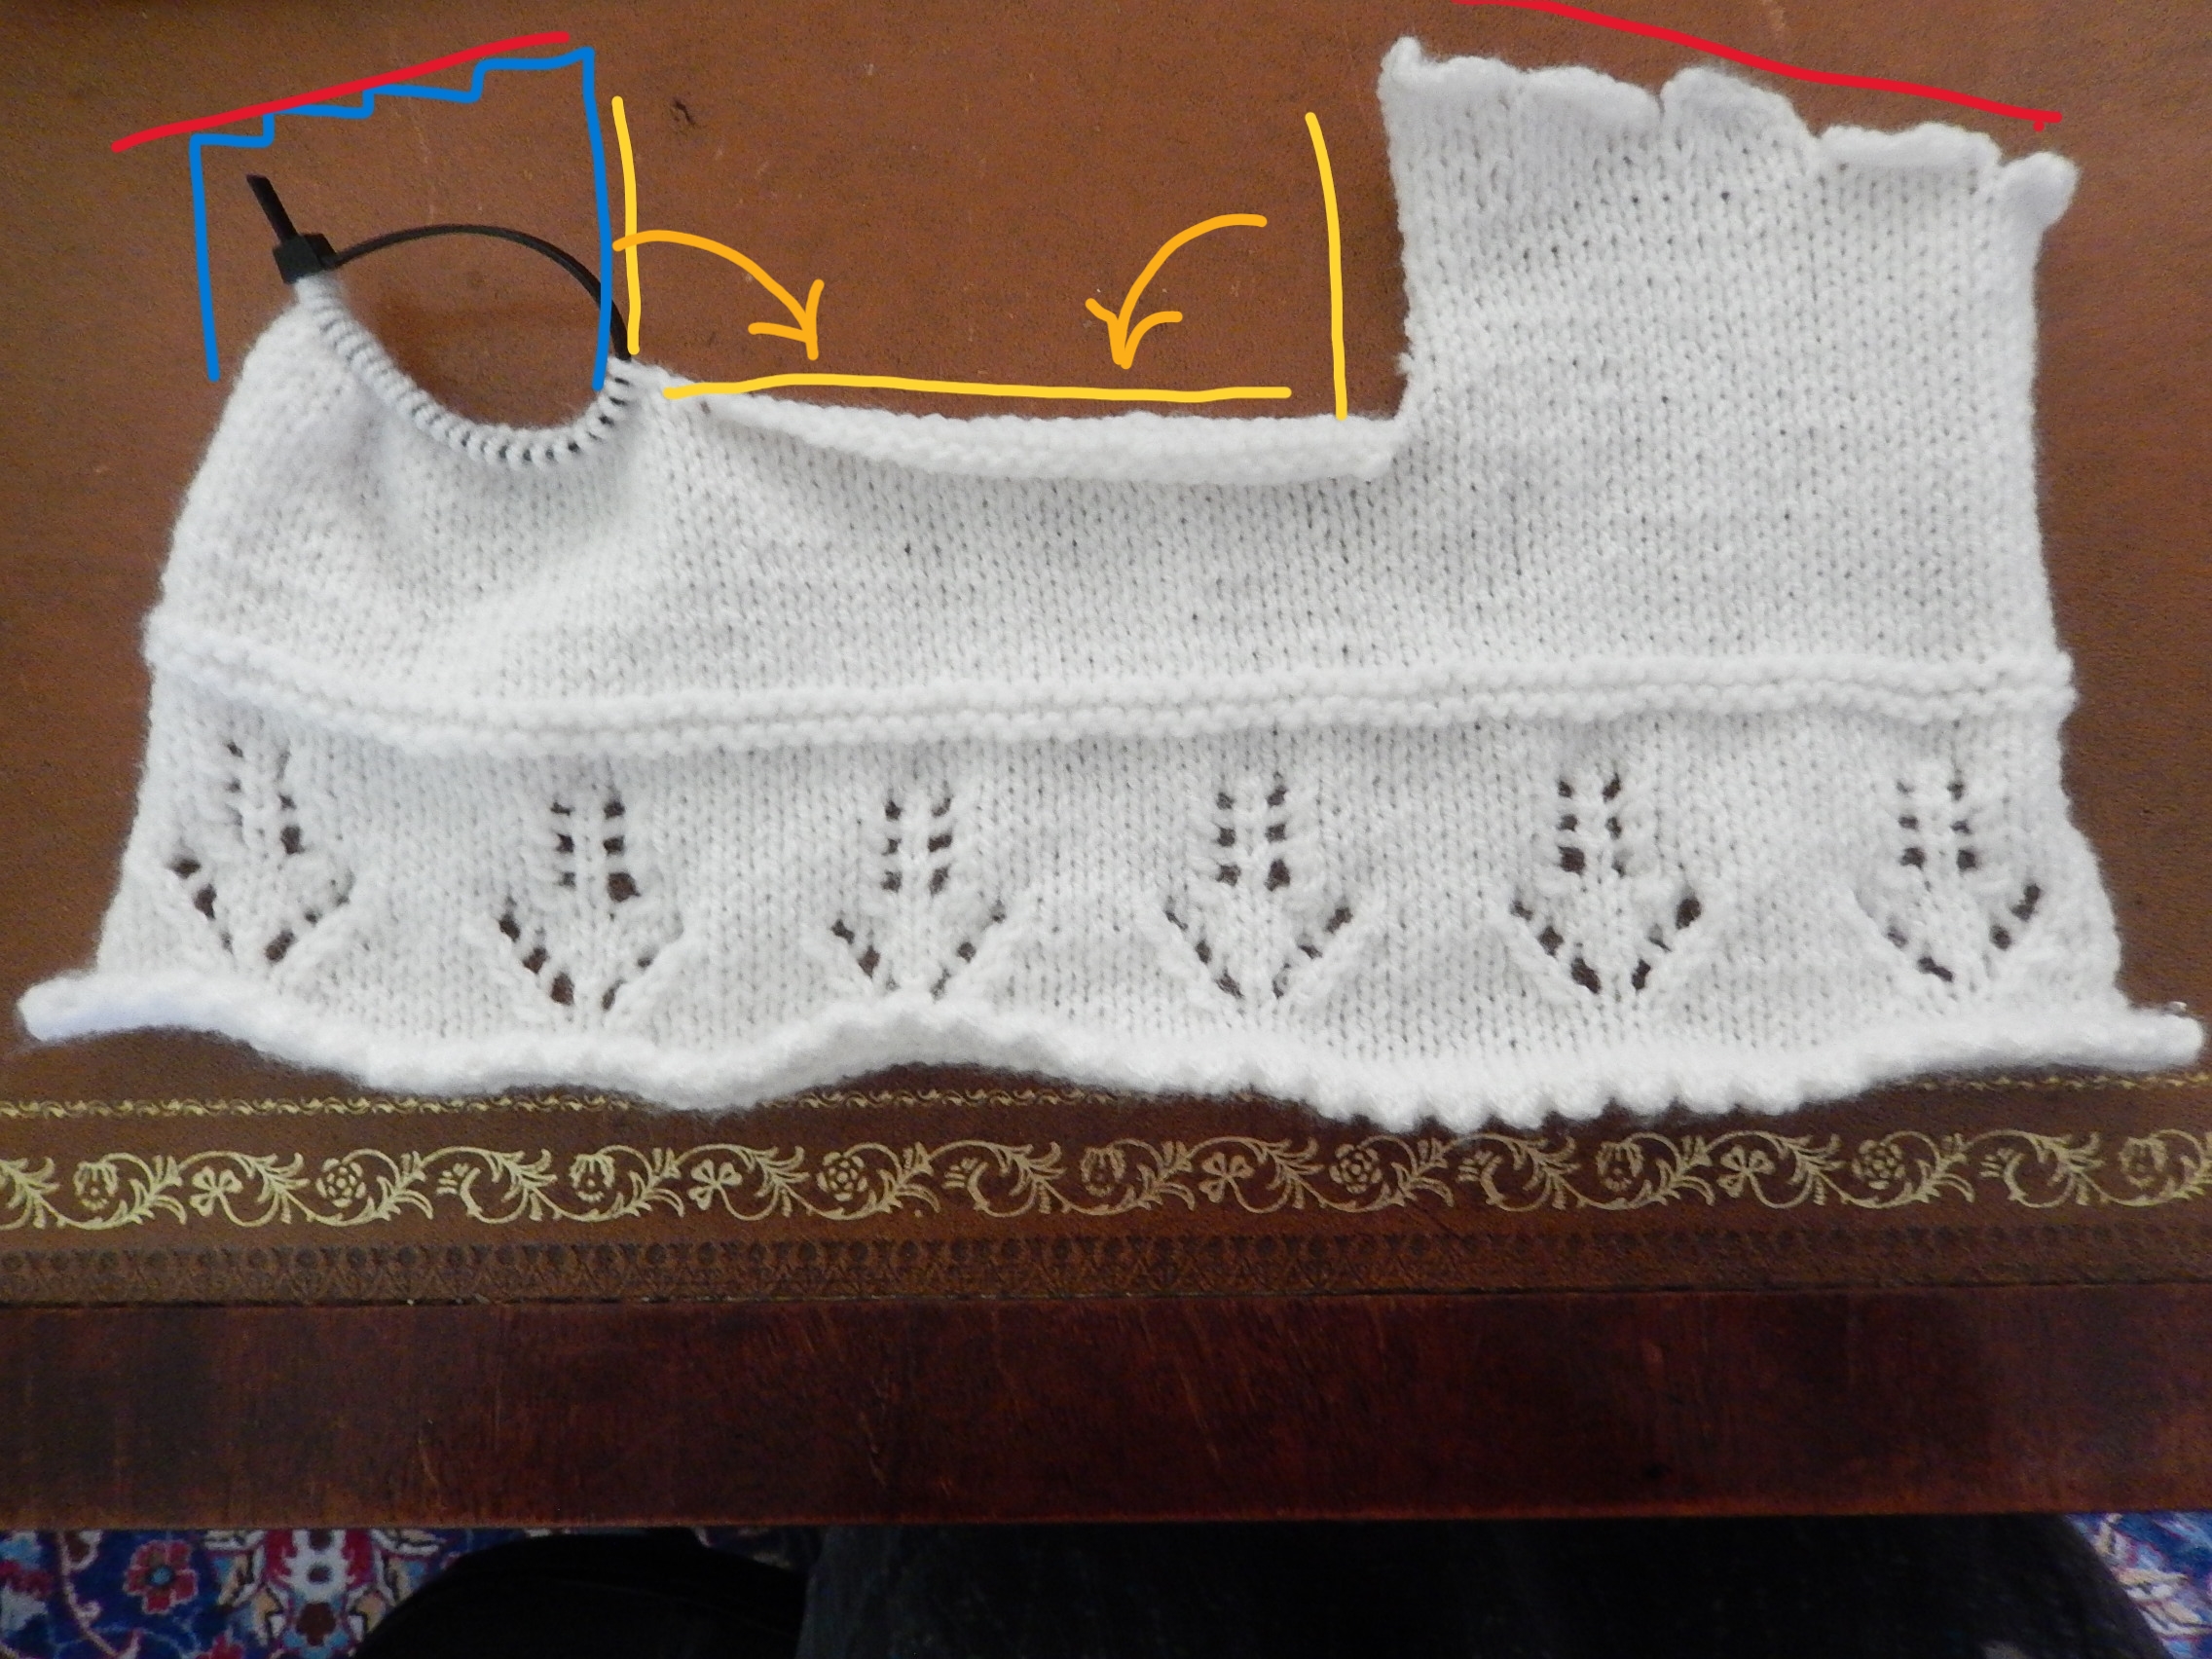
Then fold the two red edges together and seam. Once that’s done there will be a gap at the middle where the cast off sts are and the row ends of the back (shown in yellow). Fold the 2 side edges in to meet the cast off sts and seam. It should now look like a bonnet.
At this point the pick up for the neckband will make more sense. Start at the side of the picot edge and pick up sts along to the back seam, then continue picking up sts to the other side ending at the picot edge. You’ll have sts along the neck edge of the bonnet from one side of the front to the other.
Bootees are not easy to make but it sounds like you’ve powered through. Good going!
Thank you so much for these two very helpful replies. I can see now how the left hand side has to mirror the right. I think I’ll have to go back and look carefully through the shape back section as for some reason I somehow managed to miss the return to 24 sts left on holder (so it’s possible I’ve knitted too much on the right hand side!). Has been a week or so, so can’t remember what I did exactly…love knitting but don’t think I’m a natural with patterns!
1 Like
Truthfully, no one is a natural with patterns. It’s like learning a new language, one with several dialects. All you can do is plunge in, read, knit and learn from each one. It’s part of the fun.
You’re doing very nicely with this set. Enjoy finishing up.
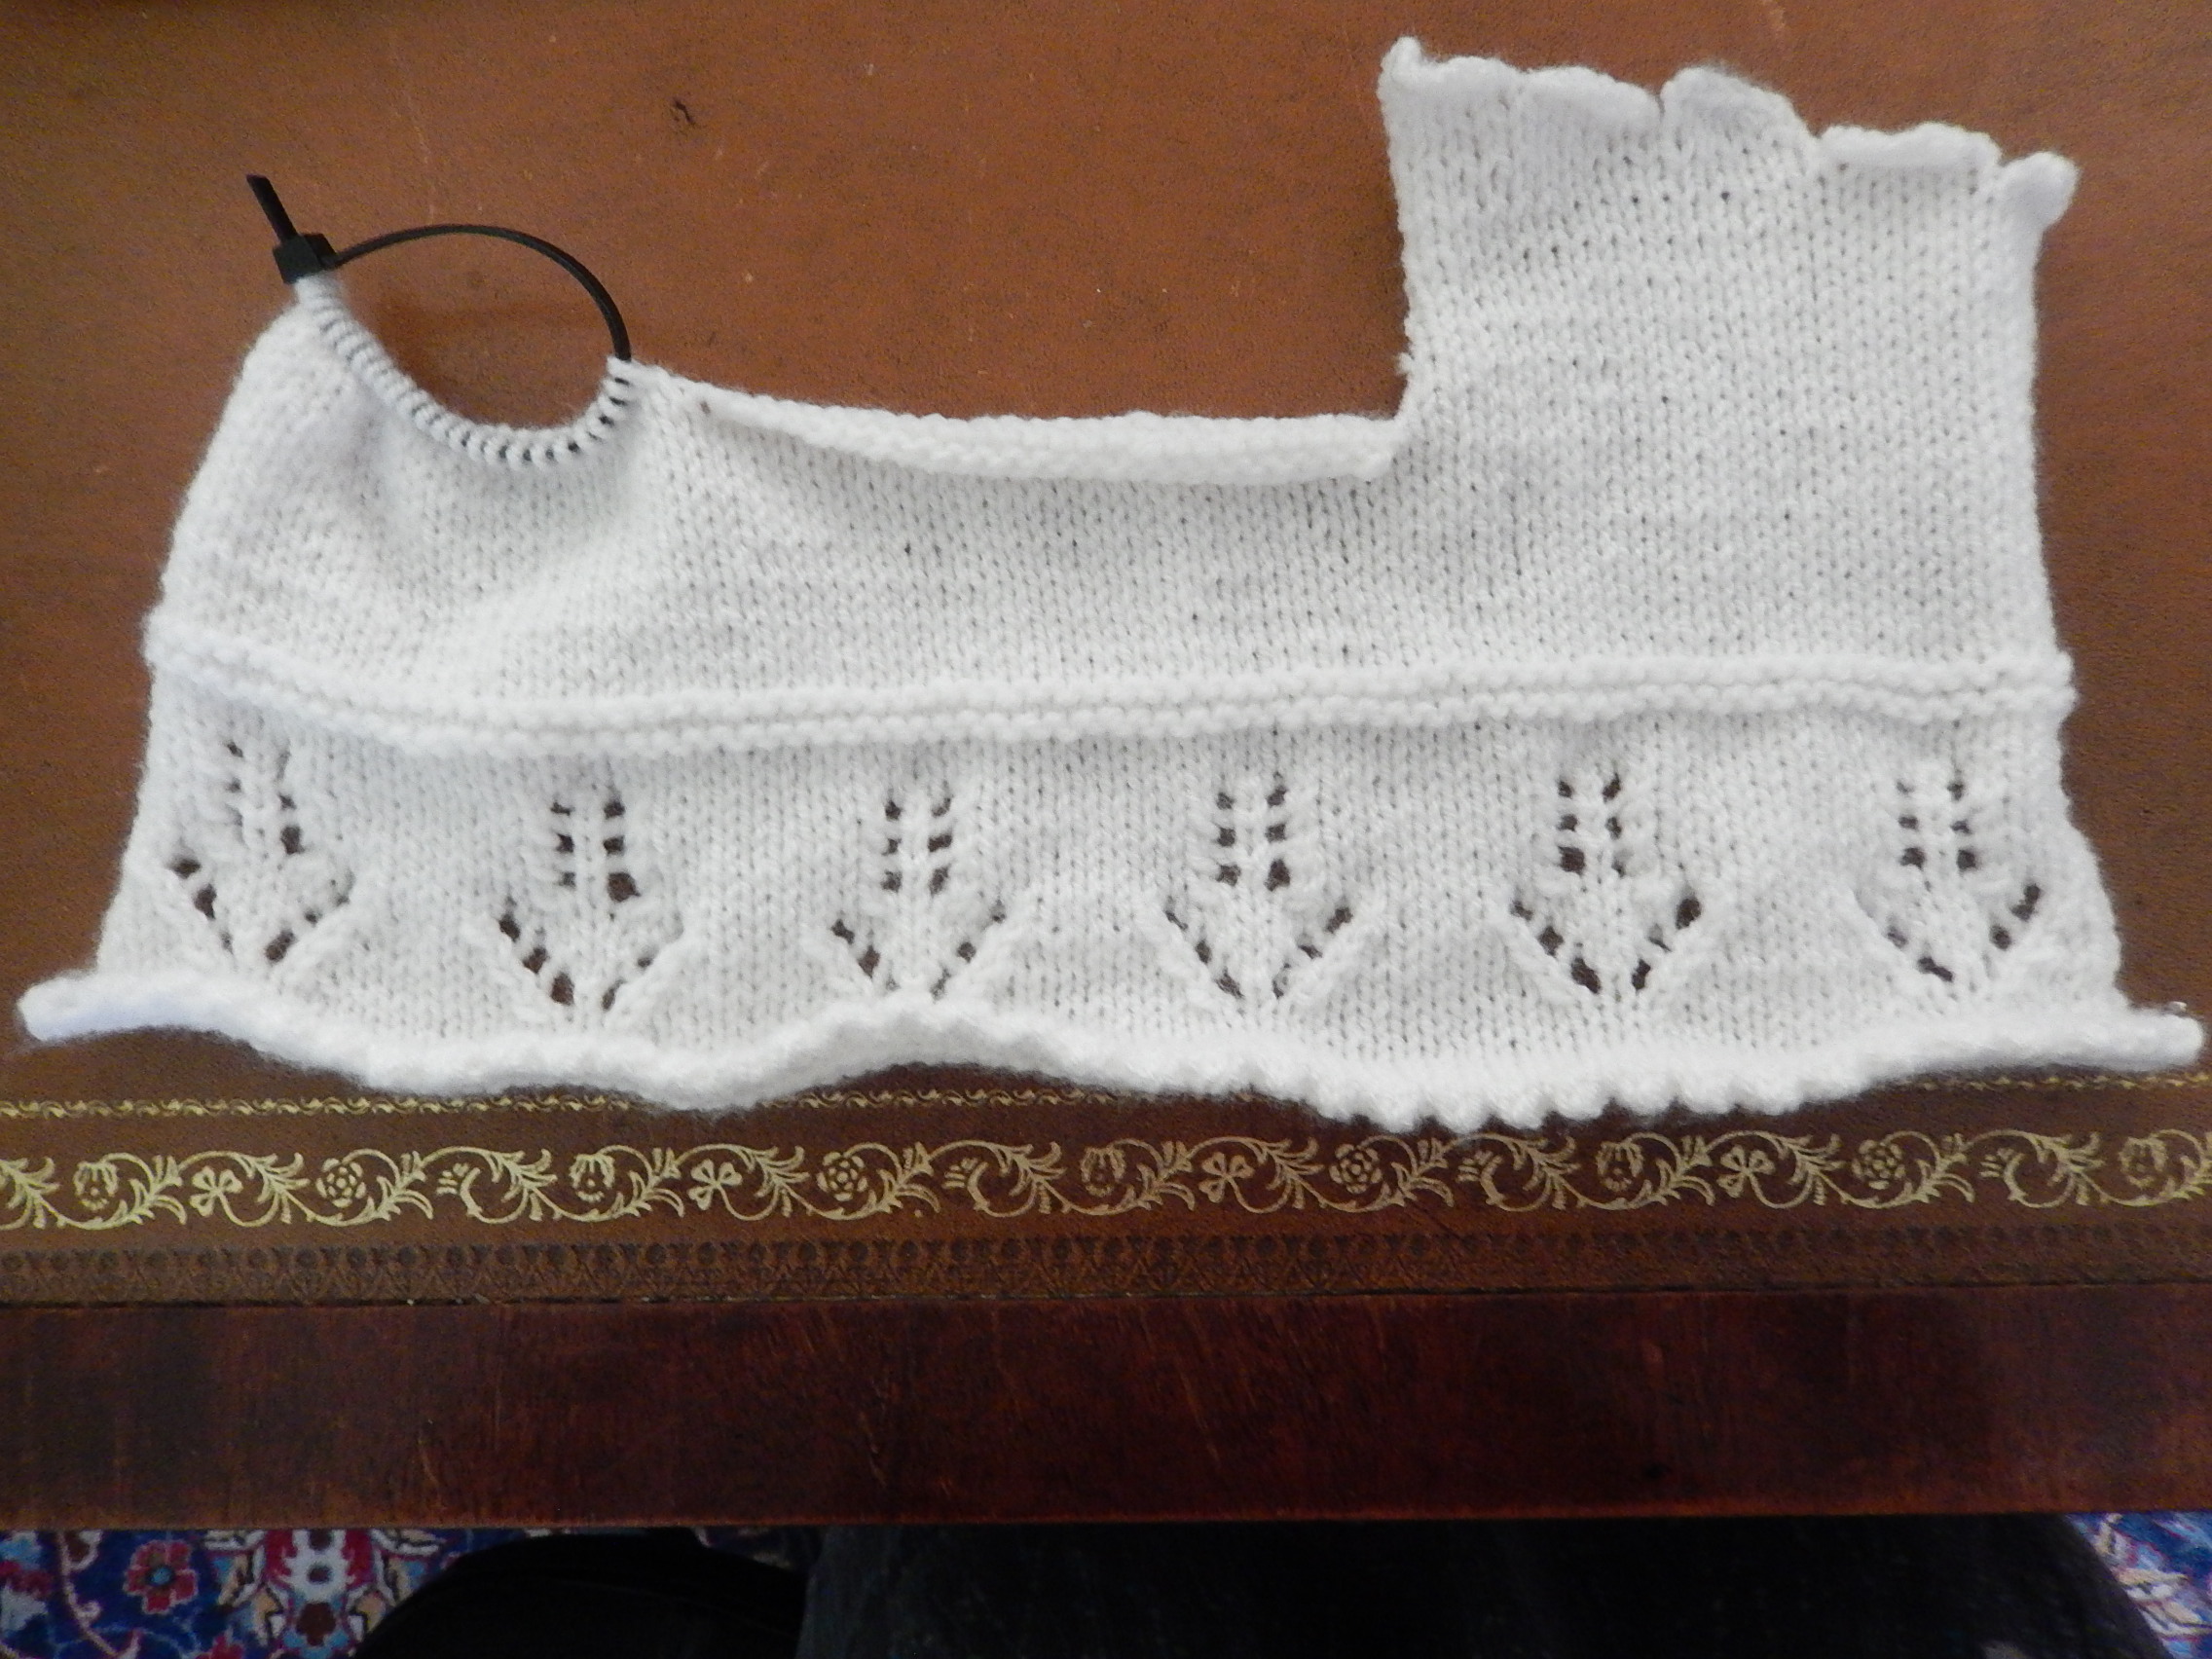
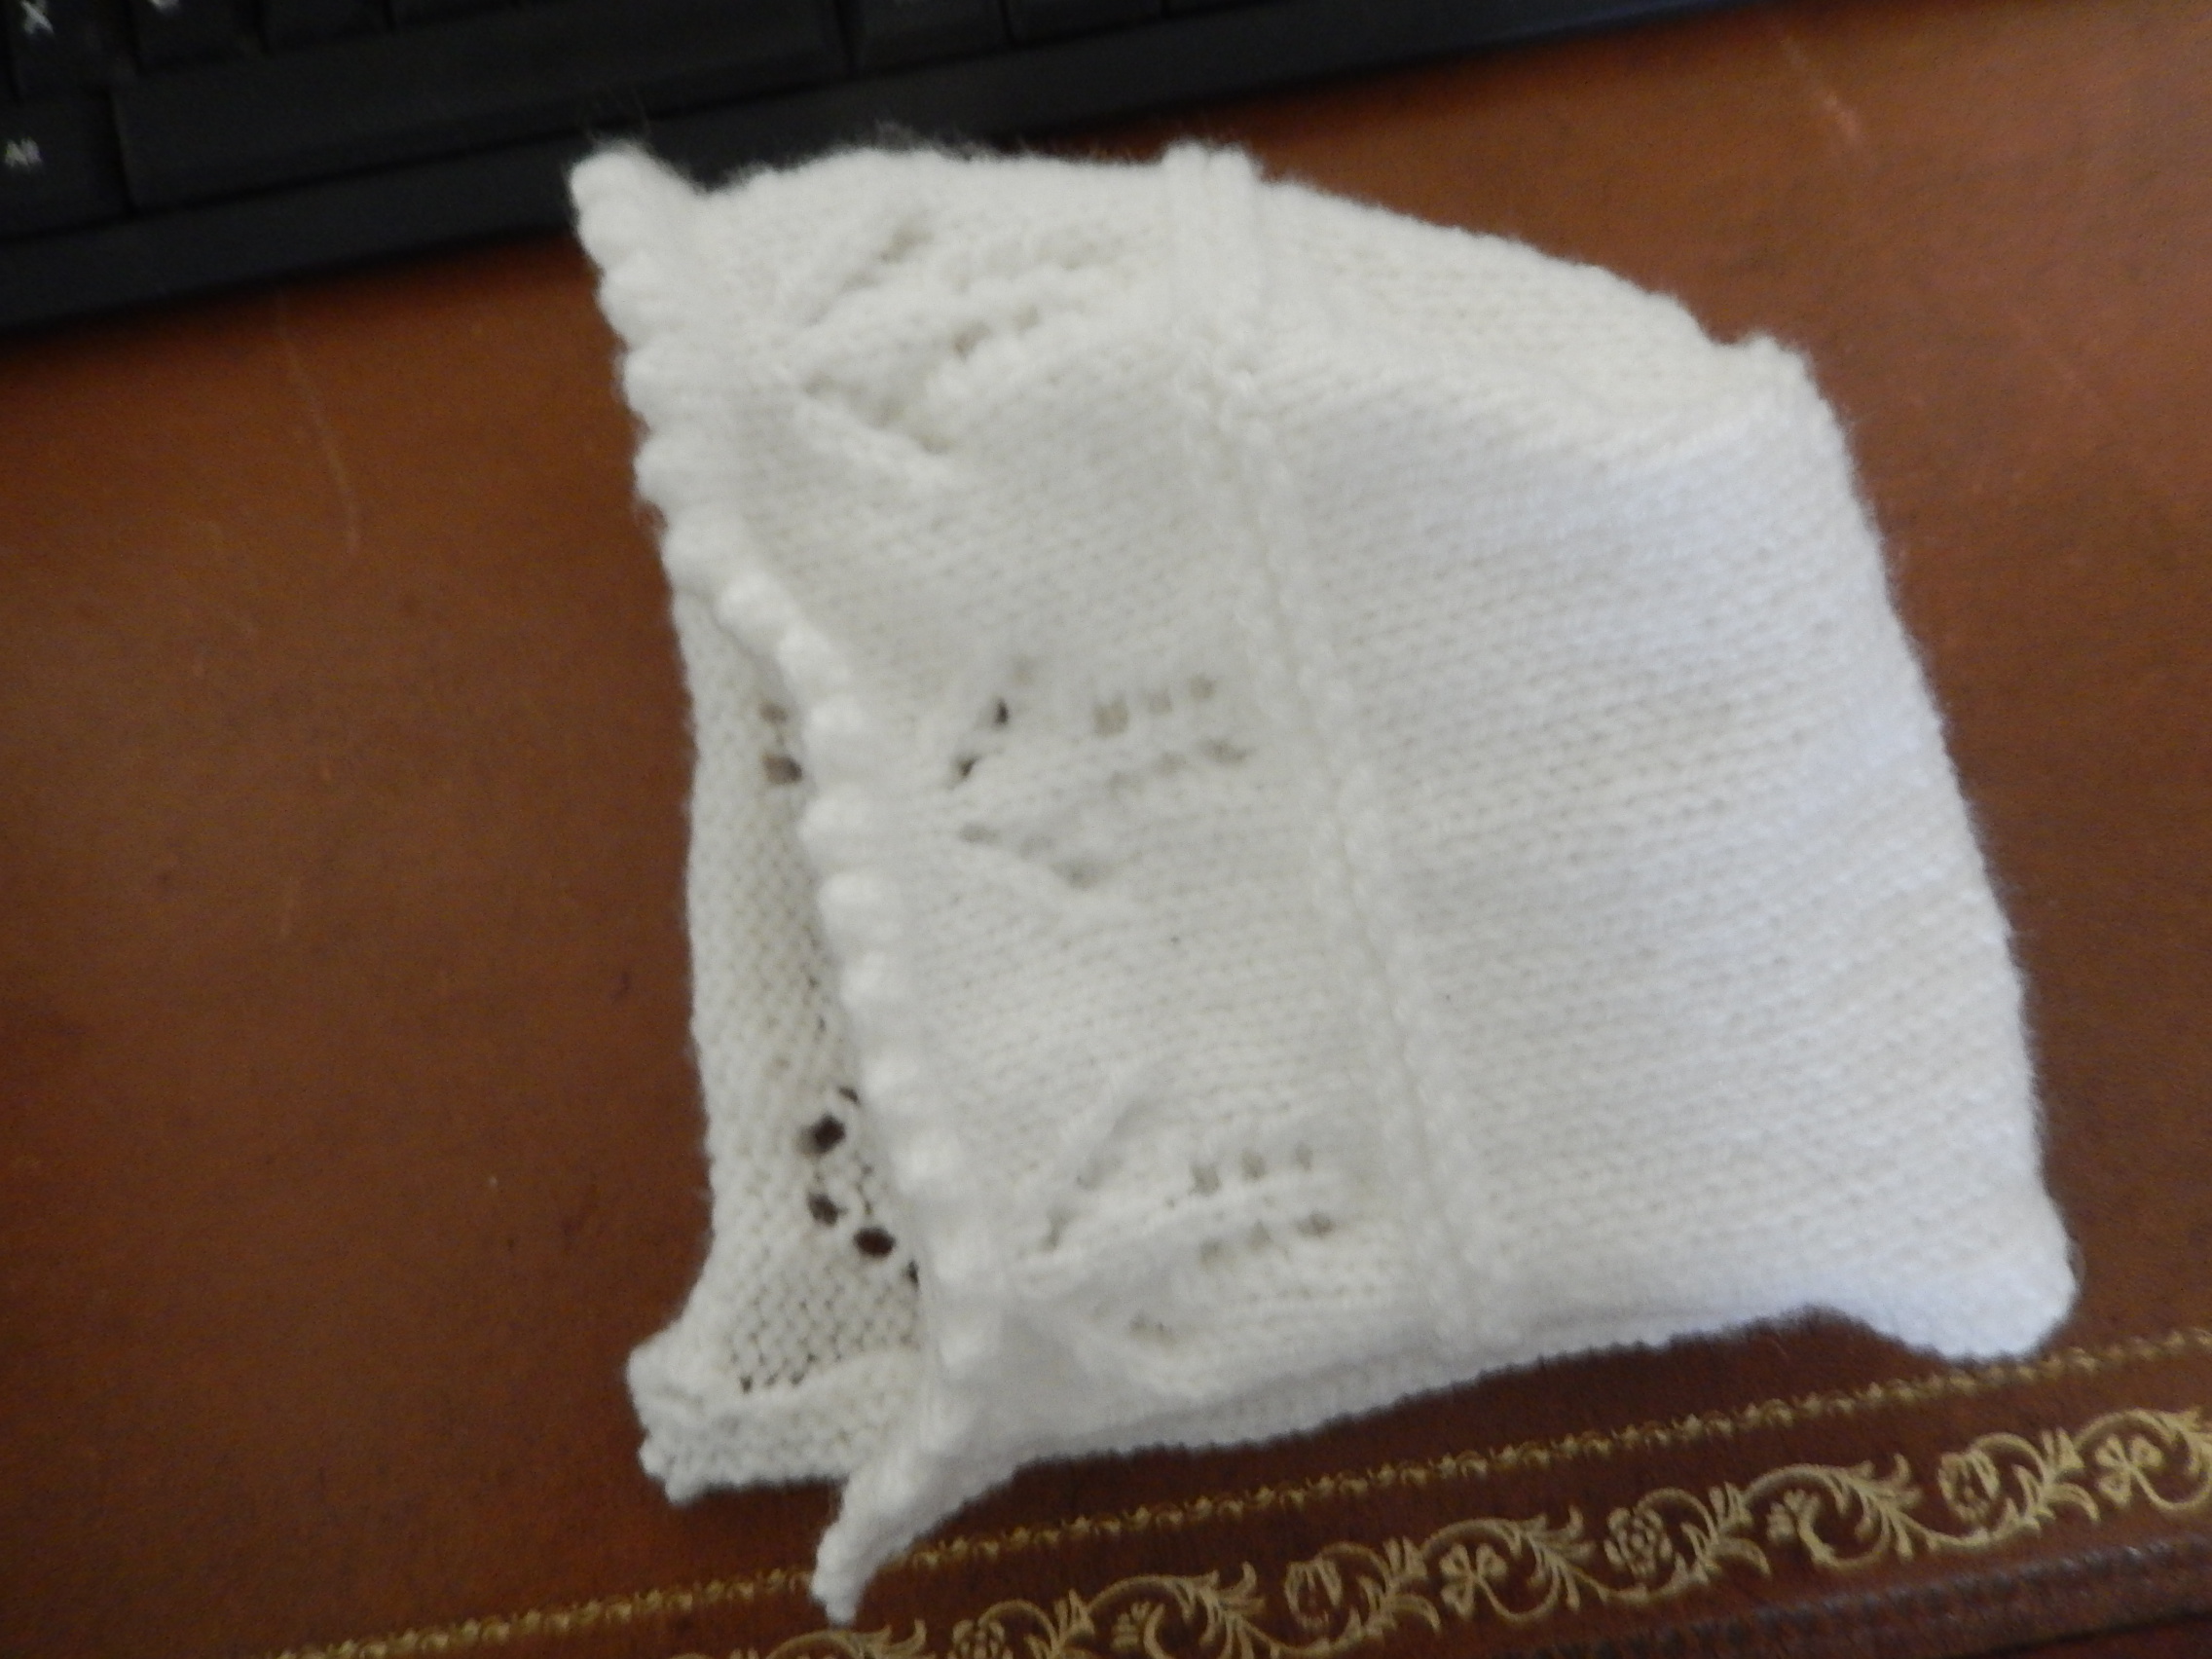
Hello again, I’ve got this far thanks to your help but would just like to confirm the next step please. I’ve done the first part and sewed the cast off edges together (top right in the photo). There is indeed now a gap in the middle. Pattern says fold bonnet flat etc (as in photo) and sew top seam. Does that mean sew both edges of the remaining gap? Wish I knew how to draw the coloured lines for demonstration purposes as would make my question easier to understand!

1 Like
OK, great. Now lay the hat out as flat as you can, similar to this photo.
You won’t be able to place it perfectly flat because of the seamed bound off edges.
Right now the last photo that you posted has the hat folded in profile. Instead place the hat on a table with the lacy edge extended flat as much as possible. Seam the row ends (vertical yellow lines in my photo) to the long cast off stitches (horizontal yellow line). Yes, seam both these “row end” edges to the long cast off stitches.
Done! well, apart from the ties (I’m tempted to just use ribbon but I’ll try the knitted ones as it will be a good learning exercise, particularly pom poms). Thanks again, your reply was so helpful especially with the yellow lines…suddenly it all became clear!
1 Like
A triumph! The bonnet is lovely and either ribbons or the knit ties (maybe i-cord) will work well.
Good for you for persisting.
So cute.
Glad to see you got it all worked out.
The icord sounds harder than it is and id say it’s worth giving it a try even if you decide to go with ribbon in the end.