Need help with joining sleeve to armholes.

Still working on my Chroi cardigan. I have finished the main piece which consists of the back and both front sections.

I am now working on the first sleeve.

There will be about 3.5 inches before the bindoff. I have finished the increases but I am going to need to frog back so I can do more increases -the sleeve is definitely not wide enough for the armholes.

I have knit 2 big swatches to experiment with. I have no idea how to sew the sleeve to the armhole. It is joining purl stitches horizontally and vertically. I discontinued the lace pattern on my sleeve swatch and did 2 rows plain before the bindoff so there wouldn’t be lace holes next to the seam. Does that sound like a good idea? I wasn’t sure how to bindoff - I did a knit bind off on the wrong side.

I haven’t been able to find any videos on how to join these edges - only videos on joining horizontal and vertical when the right side is knit. Any help and advice will be greatly appreciated.

1 Like

I love the color of your yarn! It’s going to be a lovely cardigan.
Actually the seaming isn’t going to be all that different from stockinette. Here’s a video for mattress stitch in reverse stockinette. The vertial body seam is going to use the same technique.

For the horizontal seam you’ll be picking up one stitch or bump on that side of the seam each time.
It helps to pin the seam together in several places to make sure you stay on track.

Thank you. I watched the video and will practice on my swatches.

1 Like

That’s a very useful idea, a good way to see any problems and spare your working yarn.

1 Like

When i seam horizontal to vertical rev stockinette i do it the same as regular mattress stitch. Under one row bar and under 2 legs of a stitch. I dont know if this is the right way but it always works for me. Just between the rows of purl bumps you’ll find the 2 legs of the v. As your practising on a swatch you might try it this way and see how it looks.

The vertical to vertical i do just as the video.

Your knitting is lovely, this will be a stunning cardigan.

Just wondering if you’re ok with adding the increases you need? It’s unusual (in my limited experience) for a sleeve cap not to fit the armhole.

Thank you. The sleeve is straight across at the top so I thought it was a dropped shoulder seam. I will have to really stretch the sleeve to get it to fit the armhole so I thought the only option was to add more stitches. Would it be better to modify the shape at the top of the sleeve?

I wish I had changed the pattern and knit the back and front sections so they could be seamed at the sides, then it would be easier to fit the sleeve. It would add some structure too because it seems a bit droopy without side seams.

I thought of adding a fake seam at the sides but not sure if I am confident (and competent) enough to do that. I think there is enough ease to do that but I don’t want to mess it up because it was a lot of work. I might try that on a swatch and see how much smaller it is with a fake seam.

A fake seam is part of a look for the sweater but I’m not sure it adds so much to the structure. I like side seams on sweaters but right now the trend is for seamless top down or even bottlom up sweaters. If you like a side seam you can usually convert patterns for that.

1 Like

I didn’t know that. I thought it was a way to add a seam after knitting in the round or in one piece.

There is always something new to learn and so many kind, experienced knitters on this site willing to share their knowledge. Thank you.

Hmm… i think i might have seen a video about a faux side seam put in afterwards to add structure to a droopy sweater.

There are 2 different fake seams that i have heard of, one is put in during the knitting, say a line of purls up the side of a stockinette sweater, and this gives the look of a seam without adding structure (i read it can reduce sweater twist caused by kntting inthe round? Possibly?).
Then the second type which is done after the kniting to add some stability to the fabric.
Maybe Roxanne Richardson?
Maybe Patty Lyons?

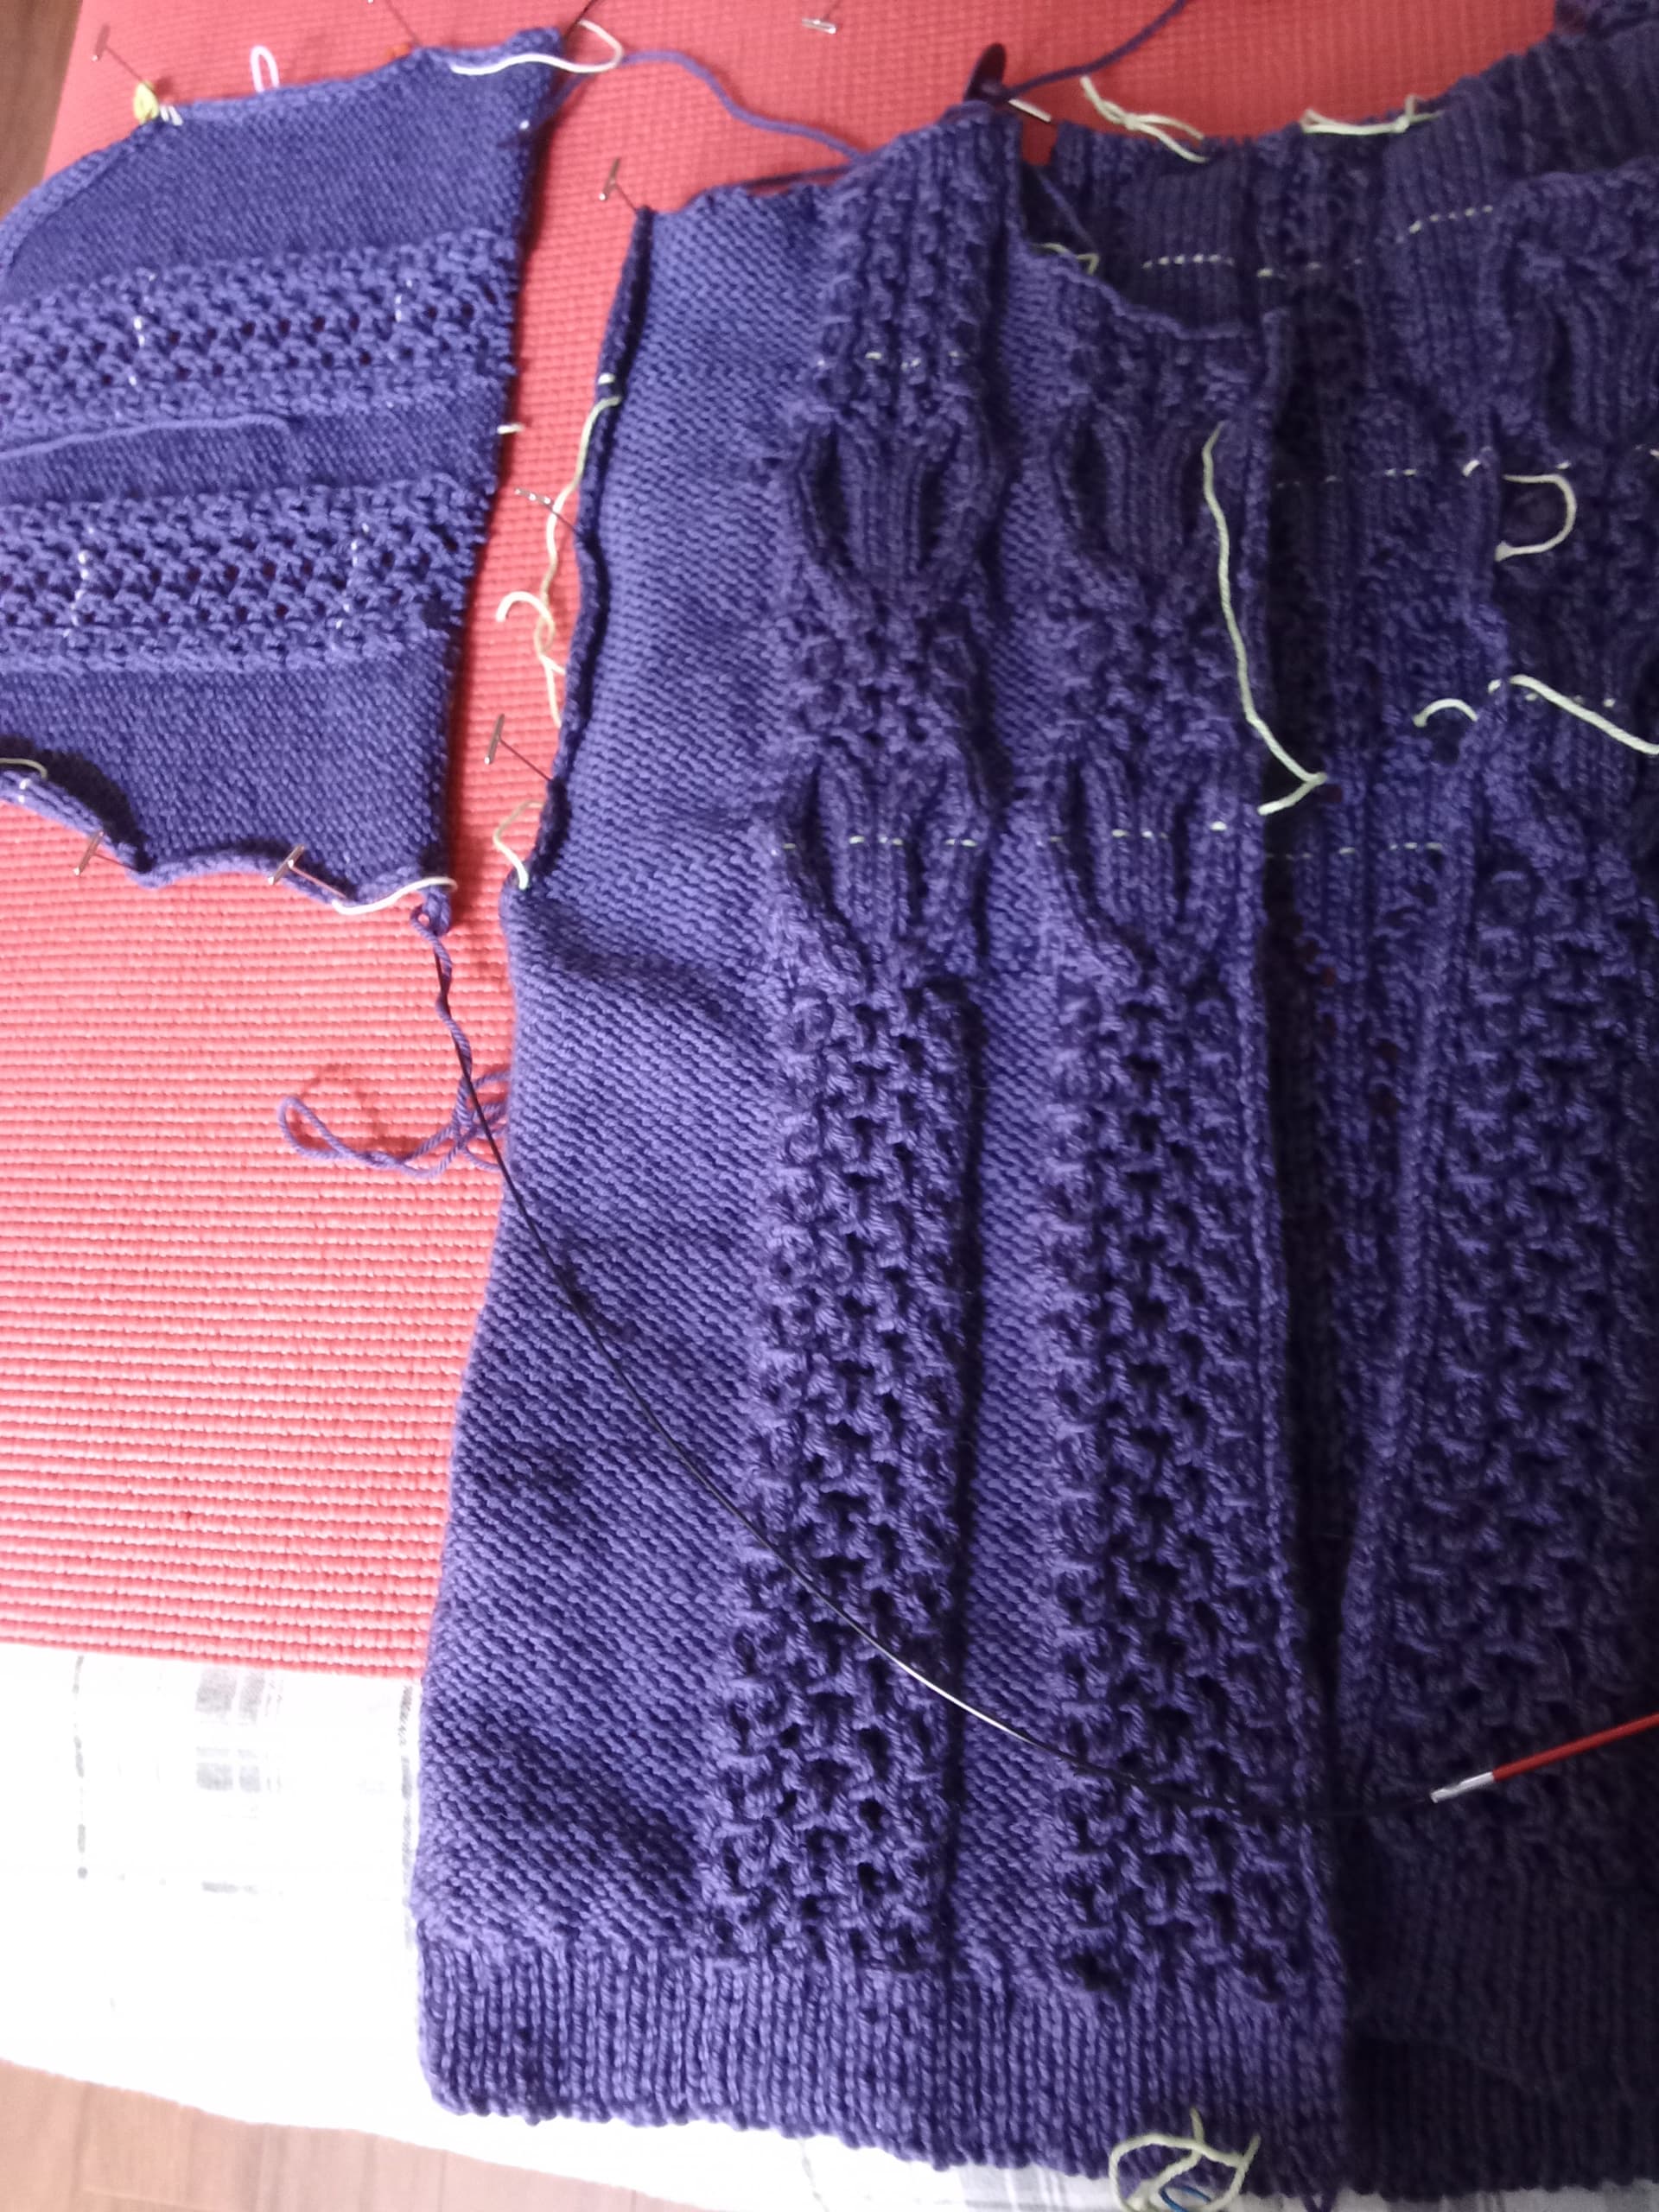
I have been mostly modifying patterns to make with a seam. I didn’t much like the result of knitting wihout although seamless can be nice for some colourwork.

Edited to add.
I can’t find the video i was thinking of and the ones i found involve dropping down a stitch (Elizabth zimmernan) or making a purl seam whilst you knit and then mattress seaming it to turn the purl into a seam. I don’t think you can do either as your pieces are already bound off and, as i say, i can’t find the thing i think i once saw.

However, i just tried it on the knitting i have in front of me and it is possible to do afterthought seam and it will add stability.
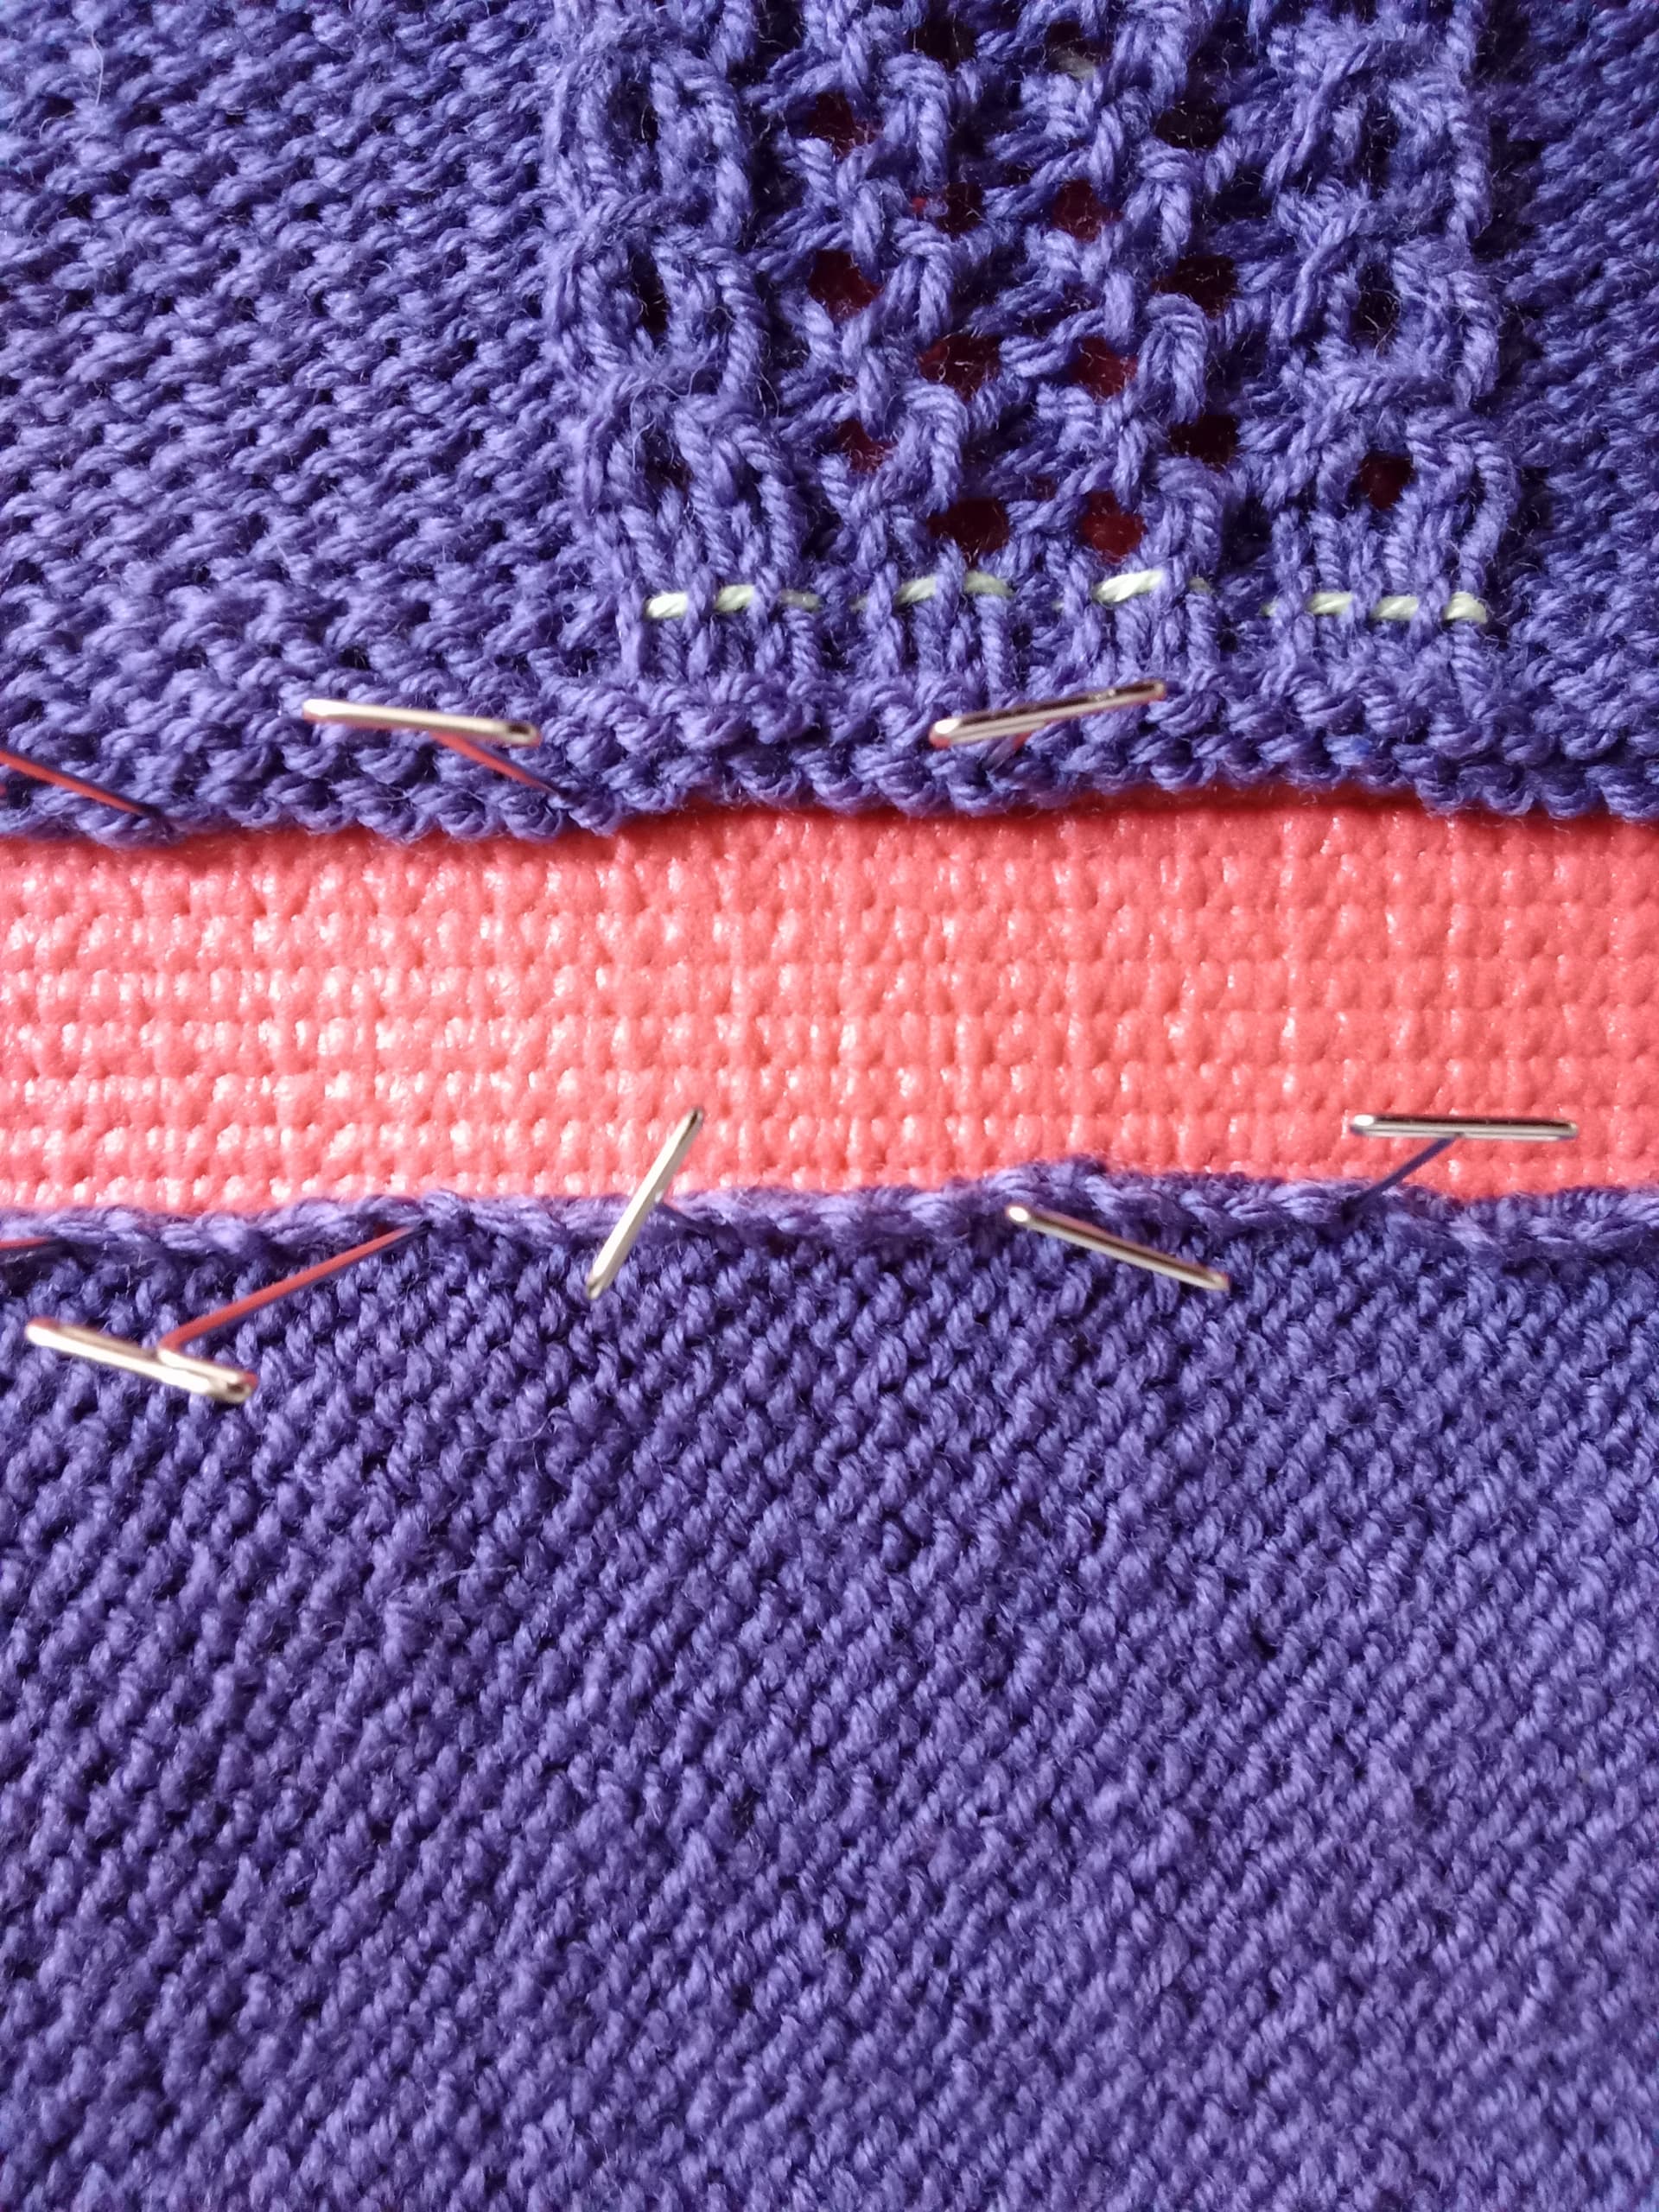
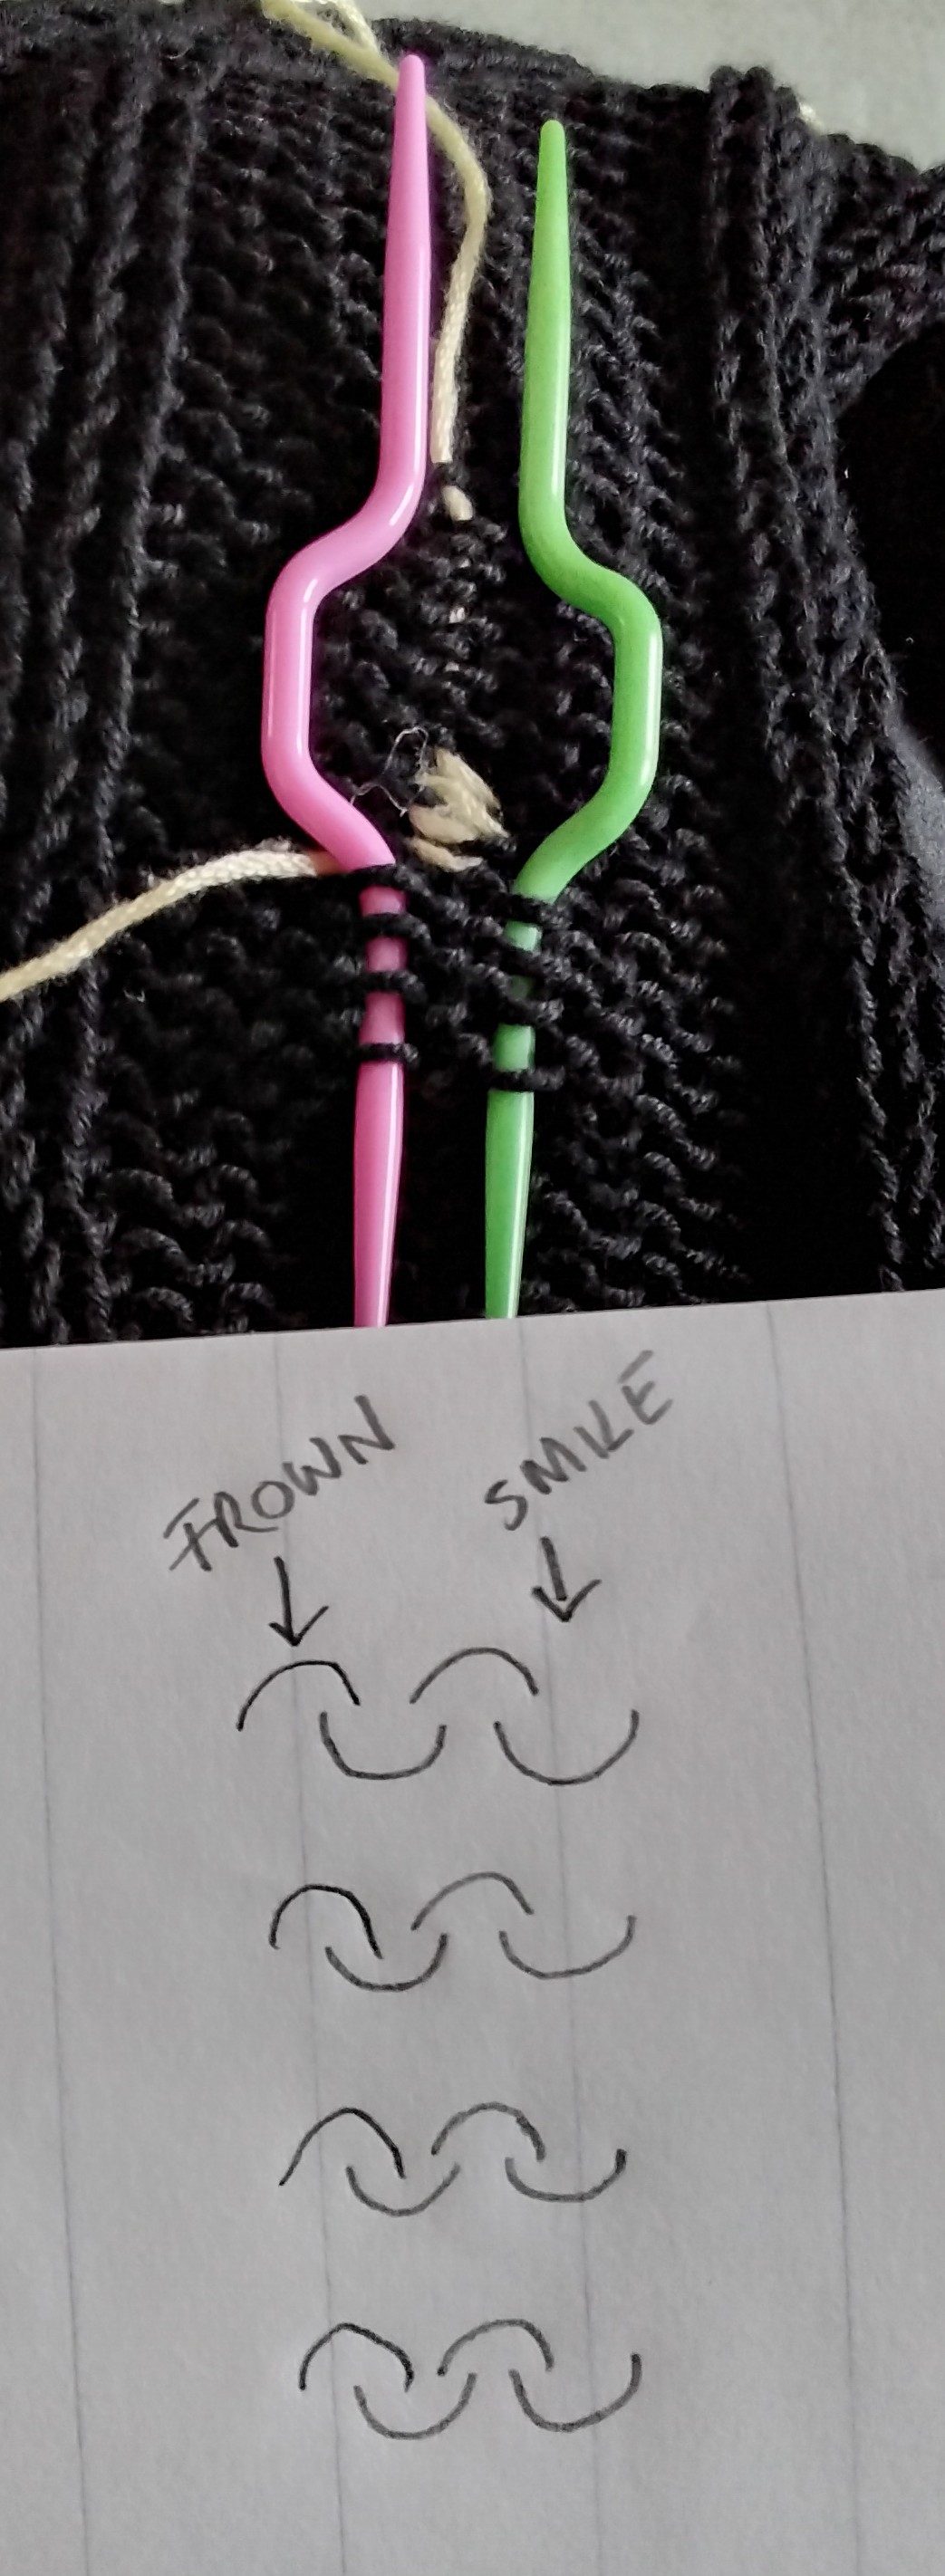
Sorry this is a terrible example in black but it’s all i have to hand.

On reverse stockinette seam, under a frown, then moving across to the other side of the seam (miss one smile, miss one frown) seam under the smile. Then under the next frown on the left, smile on the right, so on. Pull to snug up and secure the ends.
Pink needle shows line of frowns on left.
Green needle shows line of smiles on right.
Barely visible is the skipoed smile and frown between the needles.
Pale thread shows seaming not yet snugged up and a small section of snugged up. Invisible on the outside, small neat seam bump inside.

On stockinette seam under the bar between the Vs. Leaving one V skipped between the seam lines. Again the pink and green needles are inserted where the next stitches would go, just visible is the V between. Light thread some unsnugged stitches and above it a snugged up seam, invisible but stable.

Try it on your swatch. When the seaming thread is snugged up the knit fabric can no longer stretch down, even before the ends are woven in you’ll feel the stability.
You might just skip the ribbed hem out and start above it.

What i cant tell is if it adds a ‘folding’ edge. Seamed sweaters lay flat at the side seam more easily but i don’t know if this afterthought seam adds the same benefit of a folding edge, i think it will. My bit of knitting isn’t a good size or shape to be able to test it.

Sorry it’s black and so unclear!

Patterns are usually good at getting the right stitch count at the top of the sleeve for it to fit the armhole. I agree it looks like yours has turned out ather small.
Have you checked the stitch count?
How was your gauge compared to the gauge required in the pattern?
Have you checked the measurement of the armhole, did it come out the right size? Is it definitely the sleeve cap that is wrong?
If all of those things have been checked and you need to remake the sleeve then i would go back to my gauge, work out how many stitches i need to acheive the measurement of the armhole (shoulder to underam multiplied by 2 to get the full circumference) then I’d work out how frequently to do the increases to acheive that (theres a knitting calculator if needed).
Another way i have done this is to count how many rows in the armhole from underarm to bind off multiplied by 2 for full circumference. Then divide by 4 and multiply by 3, going on a common seaming ratio of 4 rows to 3 stitches, rows in the armhole, stitches in the sleeve cap.
Rows underarm to shoulder x 2 = total rows
Total rows ÷ 4 × 2 = number of stitches in sleeve cap.
I modify sleeves a lot and i must admit i don’t always get the shape i want first time in the area of decreases/increases but the top of my sleeve does always fit in the hole so there’s one part at least i get right using either of those methods.

There are also methods of calculating a bell shaped sleeve cap, im not sure if that’s an option after the armhole is already complete - my lack of experience and knowledge.
@salmonmac would be able to help better than i could if you need more help with the sleeve.

Definitely give this a try on swatches. The cast off edge is relatively easy to see so that you can pick up across single sts.

The side edge is fairly easy too as long as you keep to the space between the same column of sts.
I couldn’t find a video for cast off edge to side rows in reverse stockinette. You would need to combine (or seam together) this video with the one in post #2.
See how it goes and let us know.

Thank you! Your explanation and diagrams are excellent. I will practice on my swatch and see how it looks and make sure there is still enough ease in the sweater.

Before I do this I will check my stitch count and gauge as you suggested in your next post and make sure the sleeve width is correct.

Gauge was tricky for this sweater. There are 2 gauges:

GAUGE
21 sts and 29 rows = 4" in Chroi Stitch
Pattern on larger needles, blocked
20 sts and 29 rows = 4" in Stockinette
Stitch on larger needles, blocked

My size has 63 rows for the armhole and it measures 8.75"
That means my armhole circumference is 17.5"

4 inches = 29 rows
1 inch = 29/4
8.75 inches = ( 29/4) * 8.75 = 63 7/16 rows

I think my row gauge is okay.

My stitch gauge is off by 2 stitches in stockinette but okay in pattern.

If my gauge was correct I think my sleeve my would be 13" wide. (There are 2 pattern repeats (20 stitches each) in my sleeve. There are 25 stitches in stockinette.). My sleeve is only 11.5" wide.

If I use the 4:3 ratio, stitches in sleeve = (126 * 3)/4 = 94.5
Is that correct?

I am going to increase stitches in my swatch to make my sleeve 13" then try sewing the seams. If it puckers too much, I will redo the swatch and increase more stitches. I have 1 ball of yarn to play with - it’s not the right dye lot so I can swatch, swatch, swatch away.

Thank you for all the help. I will look at the seaming videos and see how that works.

Thank you again for all your help.

Thank you. I have watched this video and the other video. They are very helpful. I need to increase the width of my swatch, then I will attempt to seam.

I may play around with the last row of stitches before the bindoff. I don’t want any holes next to the seam so I will do at least 1 row of plain knitting before the bindoff. Perhaps if I do a knit row it will be easier to bindoff. I will try both.

Thank you again for all the help.

1 Like

Rather than trying to adjust your gauge, can you knit a larger size sleeve to get the width you need? That looks like a pretty significant difference.

Can you temporarily sew the shoulders together so you can try it on and determine if the armhole is too deep? You might be able to sew up a bit of the side seam so that it’s a closer fit for the sleeve, depending on how it fits.

Yes, I will probably have to increase the number of stitches in my sleeve. I like the depth of the armholes - they were measured against another sweater that fits well.

I will increase stitches on my swatch until I like the join, then go back to the sleeve and calculate where to do the increases. The sleeve fits well up to the elbow, so I may rework the increases from there. The instructions specify an increase every 12 rows, I will use one of the online calculators to determine the new increase rate. Hopefully I won’t have to rip out the entire sleeve.

Thank you for helping.

Yes.
You can go for 94 or 95 depending if you need a centre stitch for your stitch pattern.
You can also use your current sleeve to measure and count stitches.
Measure the whole centre decoration panel as a single item, that is the 2 fancy bits and the central reverse stockinette, this section cannot change size so is set. However many stitches and cm this is is final. Jot that in your working.
Then use your reverse stockinette gauge (your gauge, not the pattern gauge, use the sleeve you have or a section of body or your swatch to measure only rev stockinette). Jot that down.
Then
Full sleeve circumference minus full panel width = width of rev stockinette needed.
Use gauge to work out how many stitches, put half each side of main panel.

This (rev stockinette plus centre panel) would hopefully come out at something near the 94 or 95 you have estimated based on seaming ratio.
The method above is more accurate.

With regards to what stitch to switch to and bind off with. I would also choose to stop the eyelets say a row before the bind off (personal choice). I would do the last row in a sort of rib across the panel as i like the effect. Reverse stockinette sections stay as purls, the fancy panel becomes knits and purls based on what the stitch was before. Knits stay as knits, any purl or eyelet type of resess goes to purl. That’s just because i like it kind of running into the seam.
I would bind off in pattern, purl over purl and knit over knit. Like i say though it’s personal choice. I’m a bit unusual in what i like and what I fuss over.

Thank you. I will keep working on my swatch until it is wide enough and then play around with binding off. If I put in a lifeline before the bindoff, it will be easier to frog and try again if I don’t like the seam.

I have spent more time experimenting with swatches than I have spent knitting the actual sweater. :grinning:

1 Like

I do the same. it’s worth it, your cardigan is lovely.

I have watched the videos that were added to the posts here and I also found one video that shows the vertical to horizontal seaming.

I have been practicing seaming on a small swatch and I think I am happy with the way it looks so. Now I will try seaming the test sleeve to the front swatch.

videos.https://youtu.be/OpngLSPhLv0?si=UKuxwri8yJtF48DY

I will post another pic when I have done the seam to get everyone’s feedback.

Thank you everyone for your suggestions, help and the

2 Likes