Is there some one who can help me read this chart. I am doing for 3 years so I have 68 stitches after the rib.
its says : beg and end rows as indicated and repeating the 20 row pattern repeat throughout, cont in part from chart as follows:
Cont straight until back meas 38cm(14 in?)

You’re going to work the chart back and forth between the vertical lines marked for size 3. See the red dots below. Ignore the chart squares outside the vertical lines for size 3.
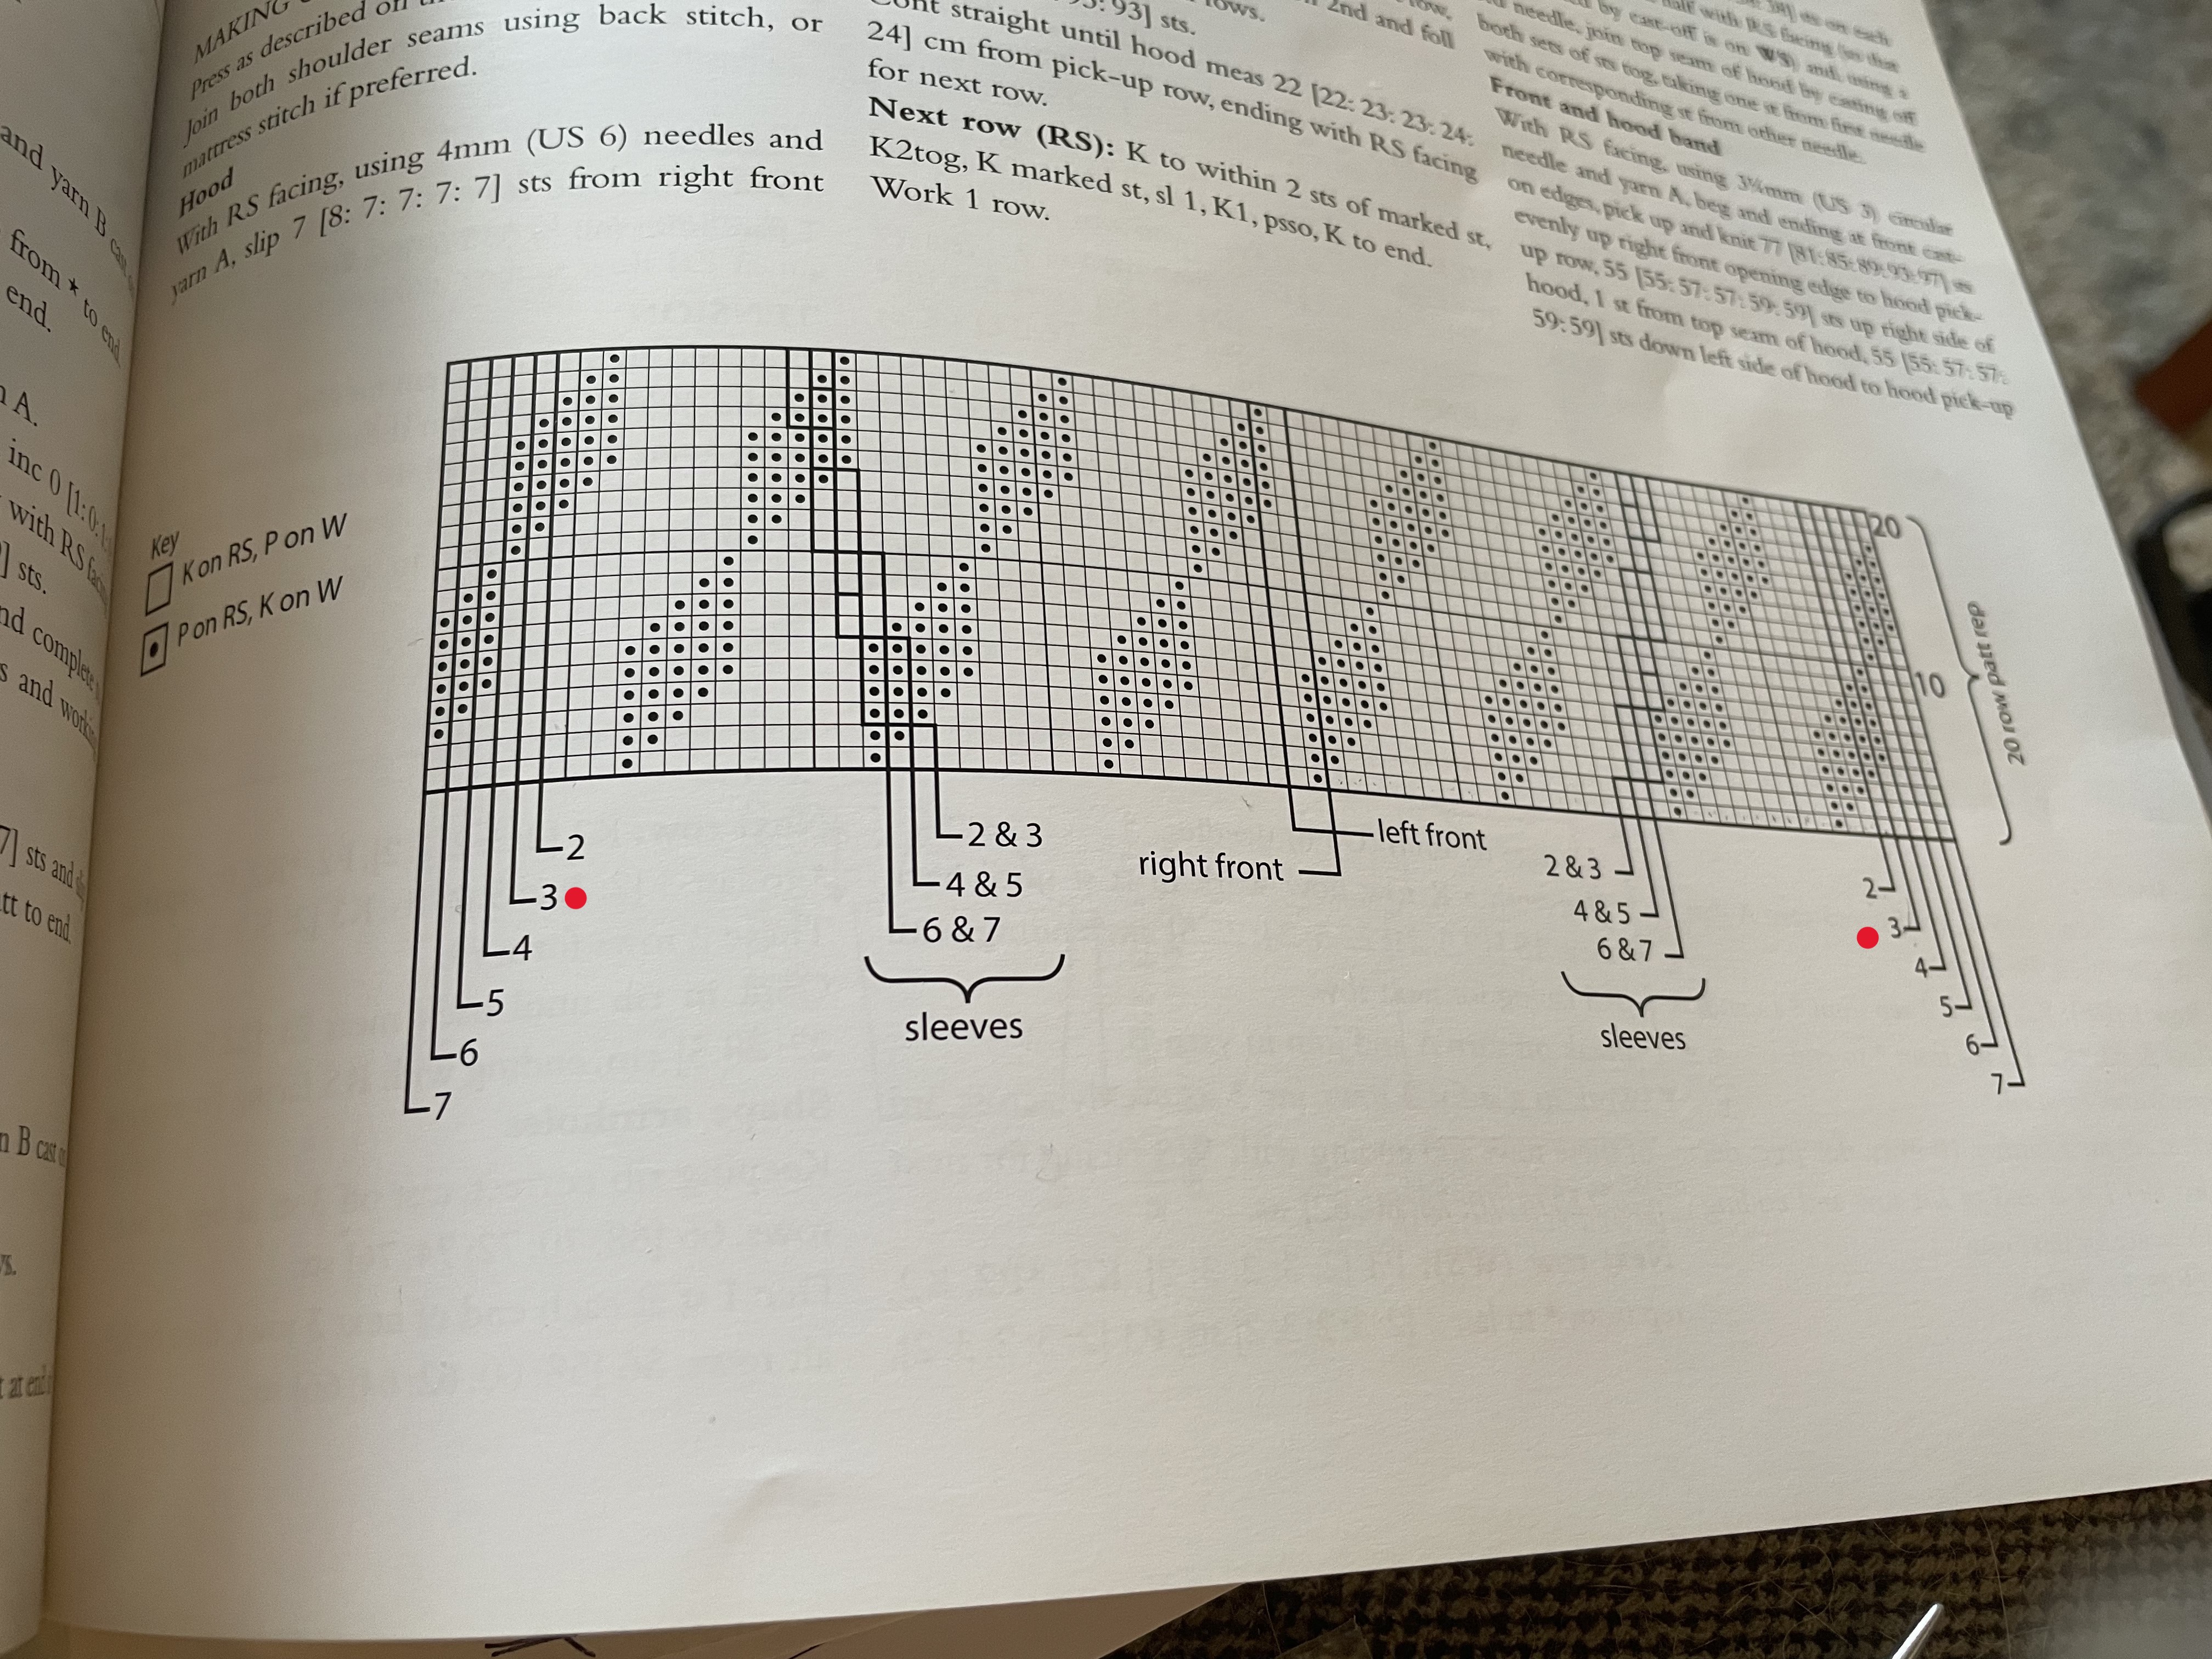
Start knitting at the lower right edge of the chart, 4 blocks in from the chart edge and continue to knitting or purling as indicated stopping at 4 blocks from the left hand edge of the chart. The first row starts on the RS with 3 knit sts then a purl. The row ends with a purl then 4 knit sts.
The chart is worked right to left on the RS rows then left to right on the WS rows.
On the length, 38cm should be about 15inches but you may want to shorten the pattern depending on the child.
If that wasn’t your question on the chart, just reply and let us know. We’ll all be happy to help.
1 Like
Thank you. I will try that, it has sleeves and right and left front all together. It was very confusing . I
Yes, each section, sleeves, back and fronts start at a different point and end at different points. Maybe block the sections of the chart that don’t apply with pieces of paper or highlighter tape until you need them. You could also make copies the chart and draw a vertical line in color along the applicable rows for the back or fronts or sleeves.
After the first repeat of the chart it’ll likely be easier to keep on track. Good luck with it and come back with any questions.
To add to the suggestions of adding coloured lines or papers to block out the chart up to where you need… I recently used white paper strips attached with bull dog clips to my chart which I found useful, paper clips to attach would work too. And another I have used is sticky note pads (post it stickers) as I can stick them accurately but also easily moved or removed. If needed you can also draw a line or write a number or note on the post it sticker, this helped me too, I marked on my papers which colour marker I had on my needle at which point so I could keep track.
Good luck
What I did is write the back pattern on a piece of paper. Made my life easier lol.
Just another question, if I have to decrease and continue straight in the pattern do I eliminate the stitches i decreased,
For example I have to decrease two stitches at the beginning of row but pattern called
For knit 9 do I
Knit 7 being I decreased two?
Thank you
If you’ve decreased two sts from the knitting then yes you could move your beginning line in 2sts to the left on subsequent rows to account for the two sts decreased. For the current row, the row with the decreases you’re going to use up 4sts (it’ll take 4sts to decrease 2 leaving you with 2 sts) if you work k2tog or ssk at the beginning of the row. So you either need to work the decreases as knits or purls depending on where you are in the pattern or work them as knits and incorporate them into the pattern on the next row.
Even better, look at your knitting after or when you make the decreases and predict from the previous rows what part of the pattern you should be working, the purled diamonds or the knit background.
Is there a method suggested for the decreases, maybe something other than k2tog or ssk? Maybe sl1, knit 2tog, psso?
Yes thank you
The decrease is cast of two stitches
OK, even better. So it will take you 3sts to cast off 2sts. The pattern on that decrease row will start 3sts in. On subsequent rows, you can move the start line 2sts to the left to account for the 2 decreased sts. It may be helpful to work the following first stitch as knit on the RS and purl on the WS to give yourself and edge stitch for seaming but that’s up to you.
Thank you for your help😊