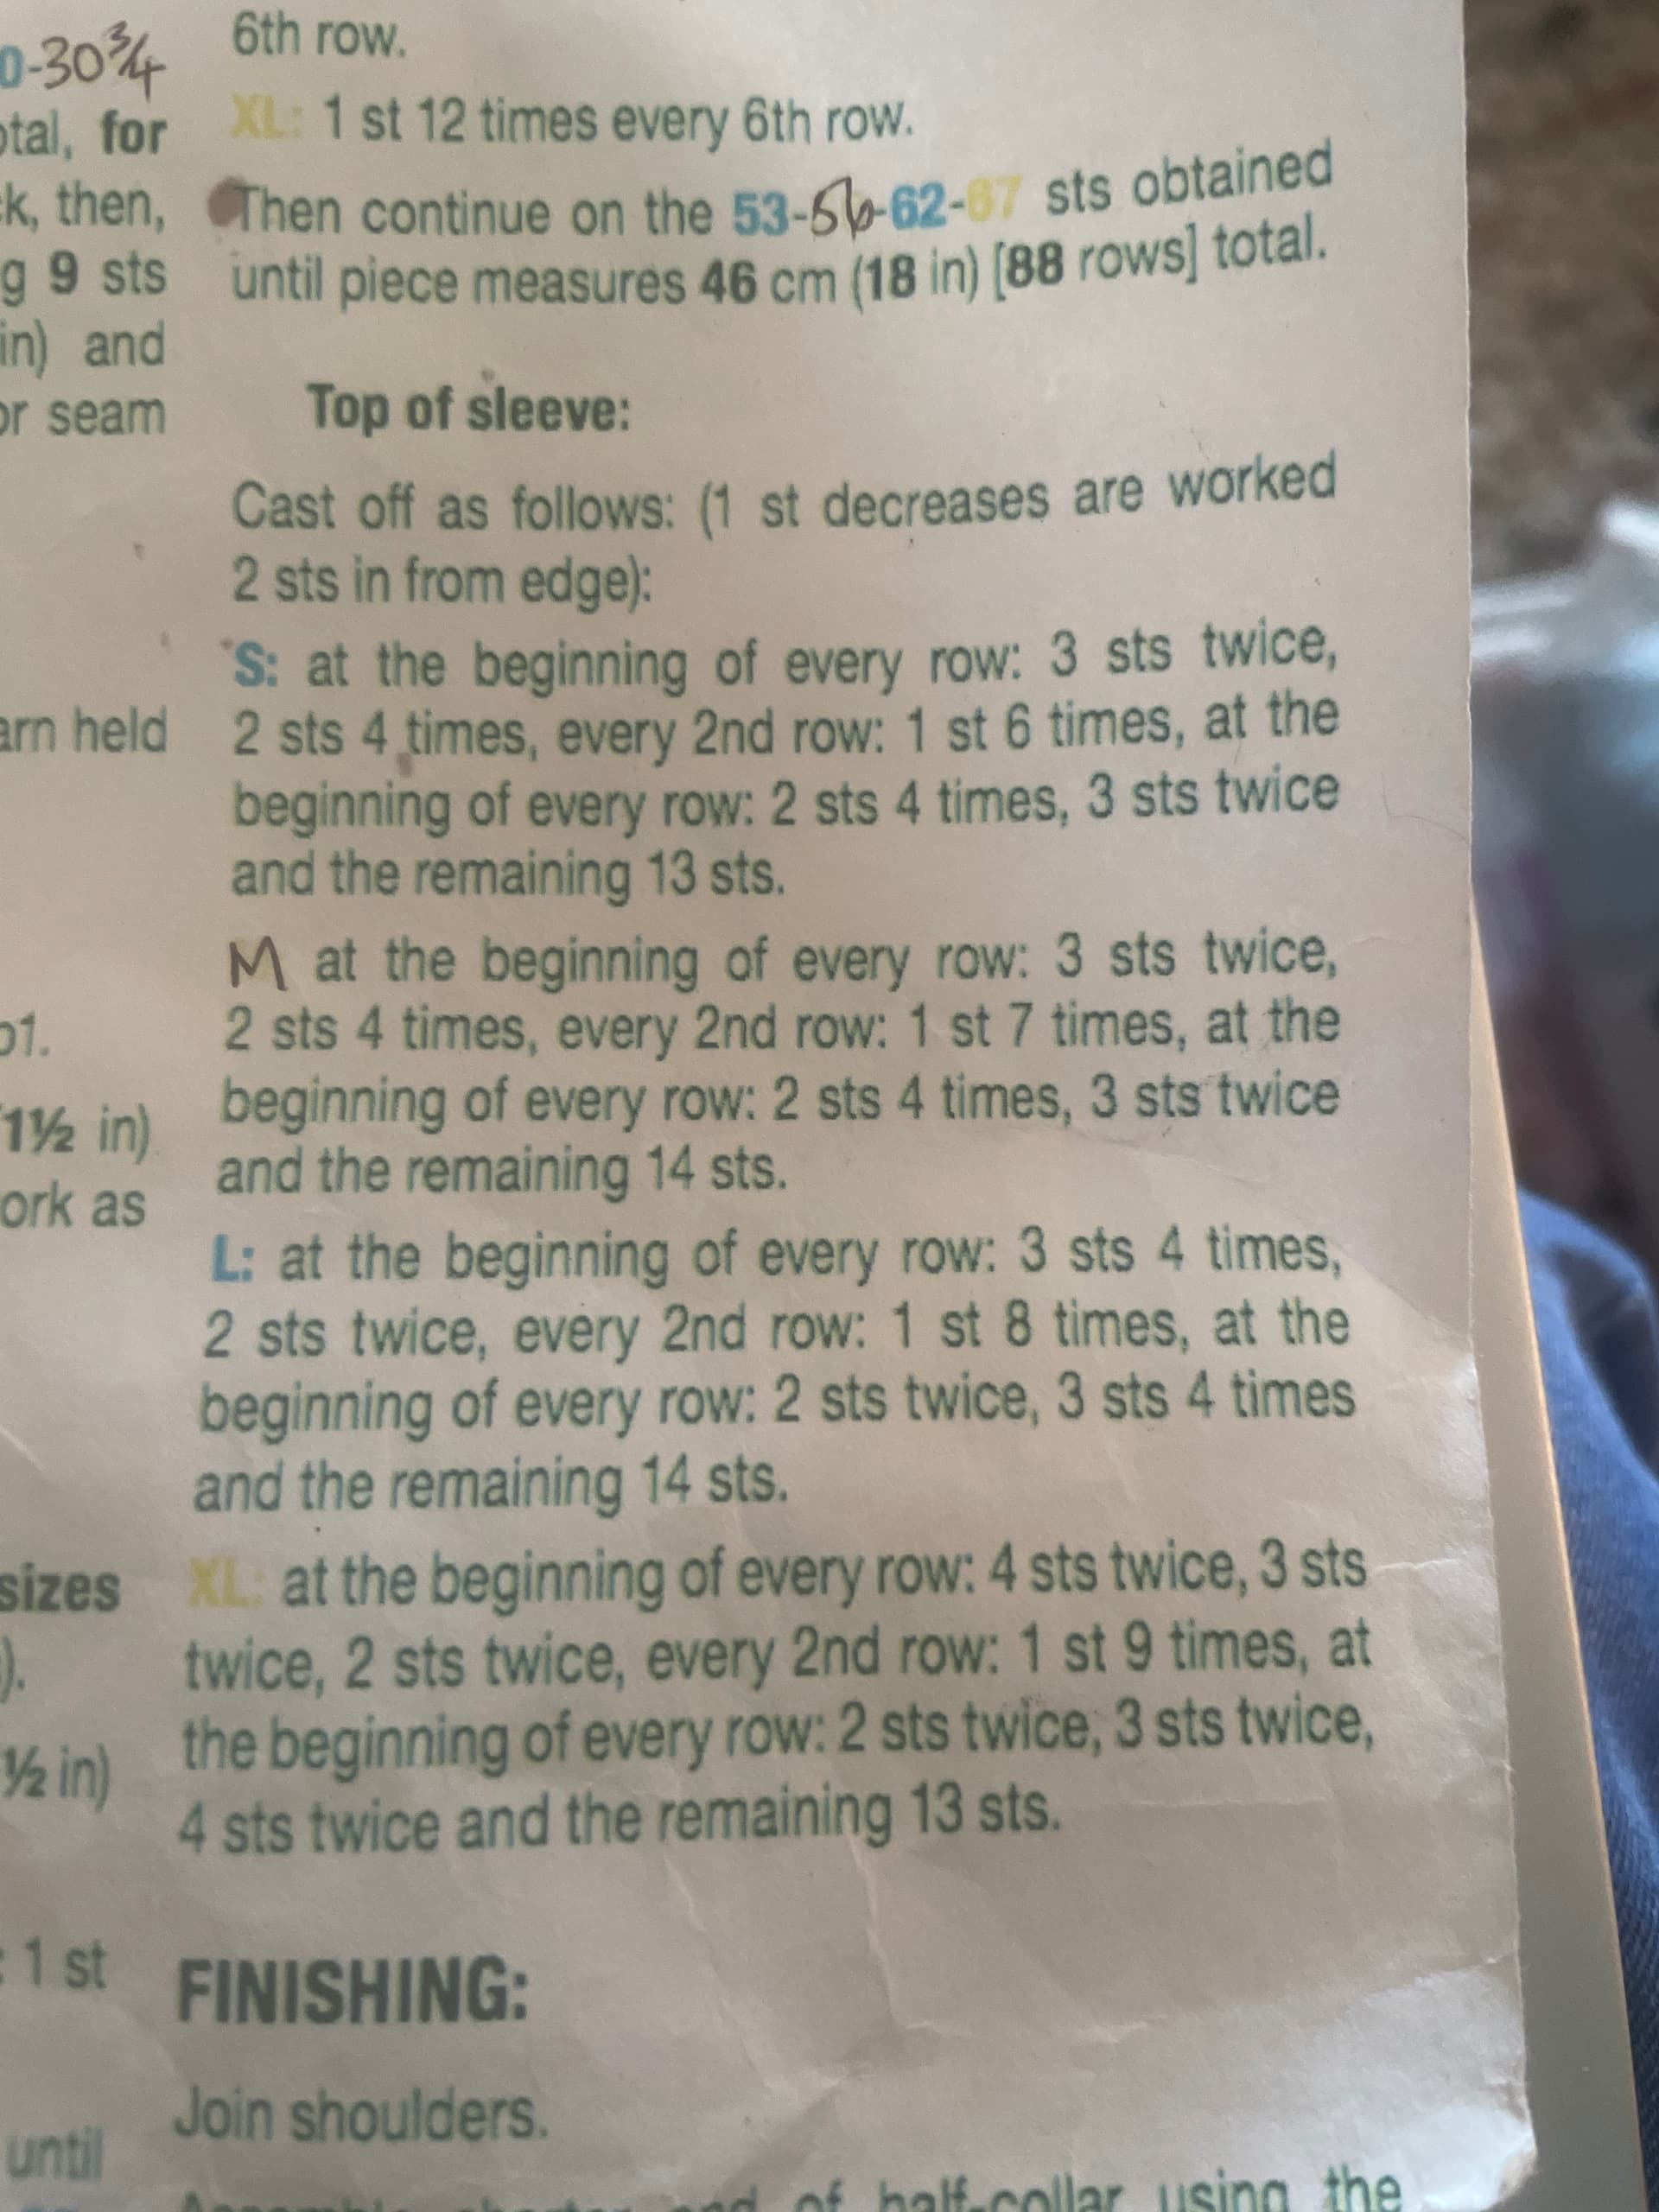
Working the 7 sts rather than 14 would leave you with too many stitches at the end rather than too few. Really the pattern is not as clear in this line as it might have been, in my opinion - unless i have added it up incorrectly. The way i have added up the stitches work out for the stitch count and the shape produced should look like that in the pattern, a bell shaped sleeve cap.
There are a few patterns with this number but i found this and the pattern reads correctly. I hope it’s the right one
https://www.lovecrafts.com/en-us/p/cardigan-in-bergere-de-france-angel-50-creations-17-18-447-downloadable-pdf?srsltid=AfmBOopiNsPKB52p3ec4-OlaNoPst7UaN-yBMo7HTc1ZjWWRDVGhsXhb
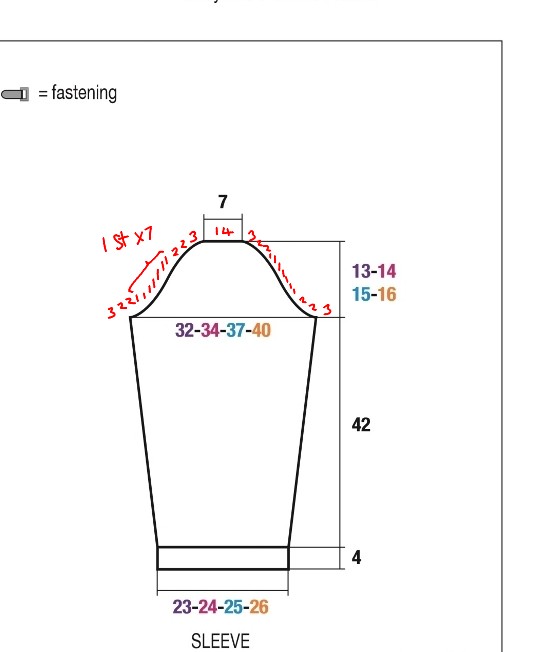
Here is a marked up pic of the schematic for the sleeve cap wih the decreases written on
Sorry it’s not super clear i had a bit of a job getting a pic from the pdf. Maybe you can zoom in to see the decrease numbers.
The sleeve cap is 14 cm on the schematic, going by the row gauge of the pattern this is 27 rows
19 rows = 10 cm
1.9 row = 1 cm
1.9 × 14 = 26.6 rows.
The cast offs/decreases are spaced:
Every row 3 st x2 = 2 rows
Every row 2 st x4 = 4 rows
Every 2nd row 1 st x 7 = 14 rows (right side rows)
Every row 2 st x 4 = 4 rows
Every row 3 st x 2 = 2 rows
Final 14 st = 1 row
Total rows = 27
The rows with 2, 3 or 14 sts are cast off, that is a stitch passed over a stitch and off the needle.
Work the first stitch, work a second stitch, pass first stitch over second stitch and off the needle = 1 st cast off. 1 stitch remains on right needle, work another stitch, pass first stitch over second stitch = 2 sts cast off. Work to end of row. Turn.
Repeat on wrong side of fabric = 2 sts cast off twice.
Repeat all for 2 sts cast off four times.
The rows with 1 st are decreased (k2tog or ssk) and worked 2 sts in from the edge.
Work 2, work 2tog, work to last 4 sts, work 2tog, work 2. Turn. Work wrong side row straight.
Repeat another 6 times for total of seven times.
The shaping of 3 and 2 sts in a single row is to produce the bell shaped sleeve cap. It requires a rapid decrease, then a gradual decrease, then a rapid decrease, to produce the shape. This will seam in nicely to the armhole. It is a more sophisticated shape and fit than a drop shoulder or triangle sleeve cap.
Ok, there’s quite a lot of info there. See what you think. If it doesn’t make sense or you haven’t got the answer you need please do let us know.