I need a cable magic trick

I have been doing lots of swatching and maths working toward my next sweater. I have a problem I haven’t managed to solve yet and I am hoping someone has a magic trick for me.

I have chanced upon a few videos which almost help, they just aren’t quite right or I have not figured out how to transfer and adapt them to my specific design challenge.

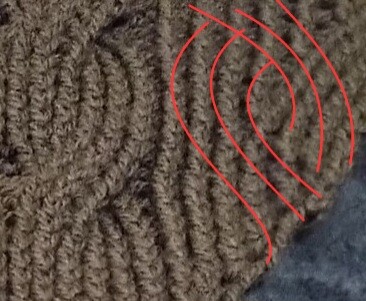
My stitch pattern is a modified seven seas cable plus its mirror (modified by moving the last stitch to be a centre stitch) in half twisted rib

Here’s a pic

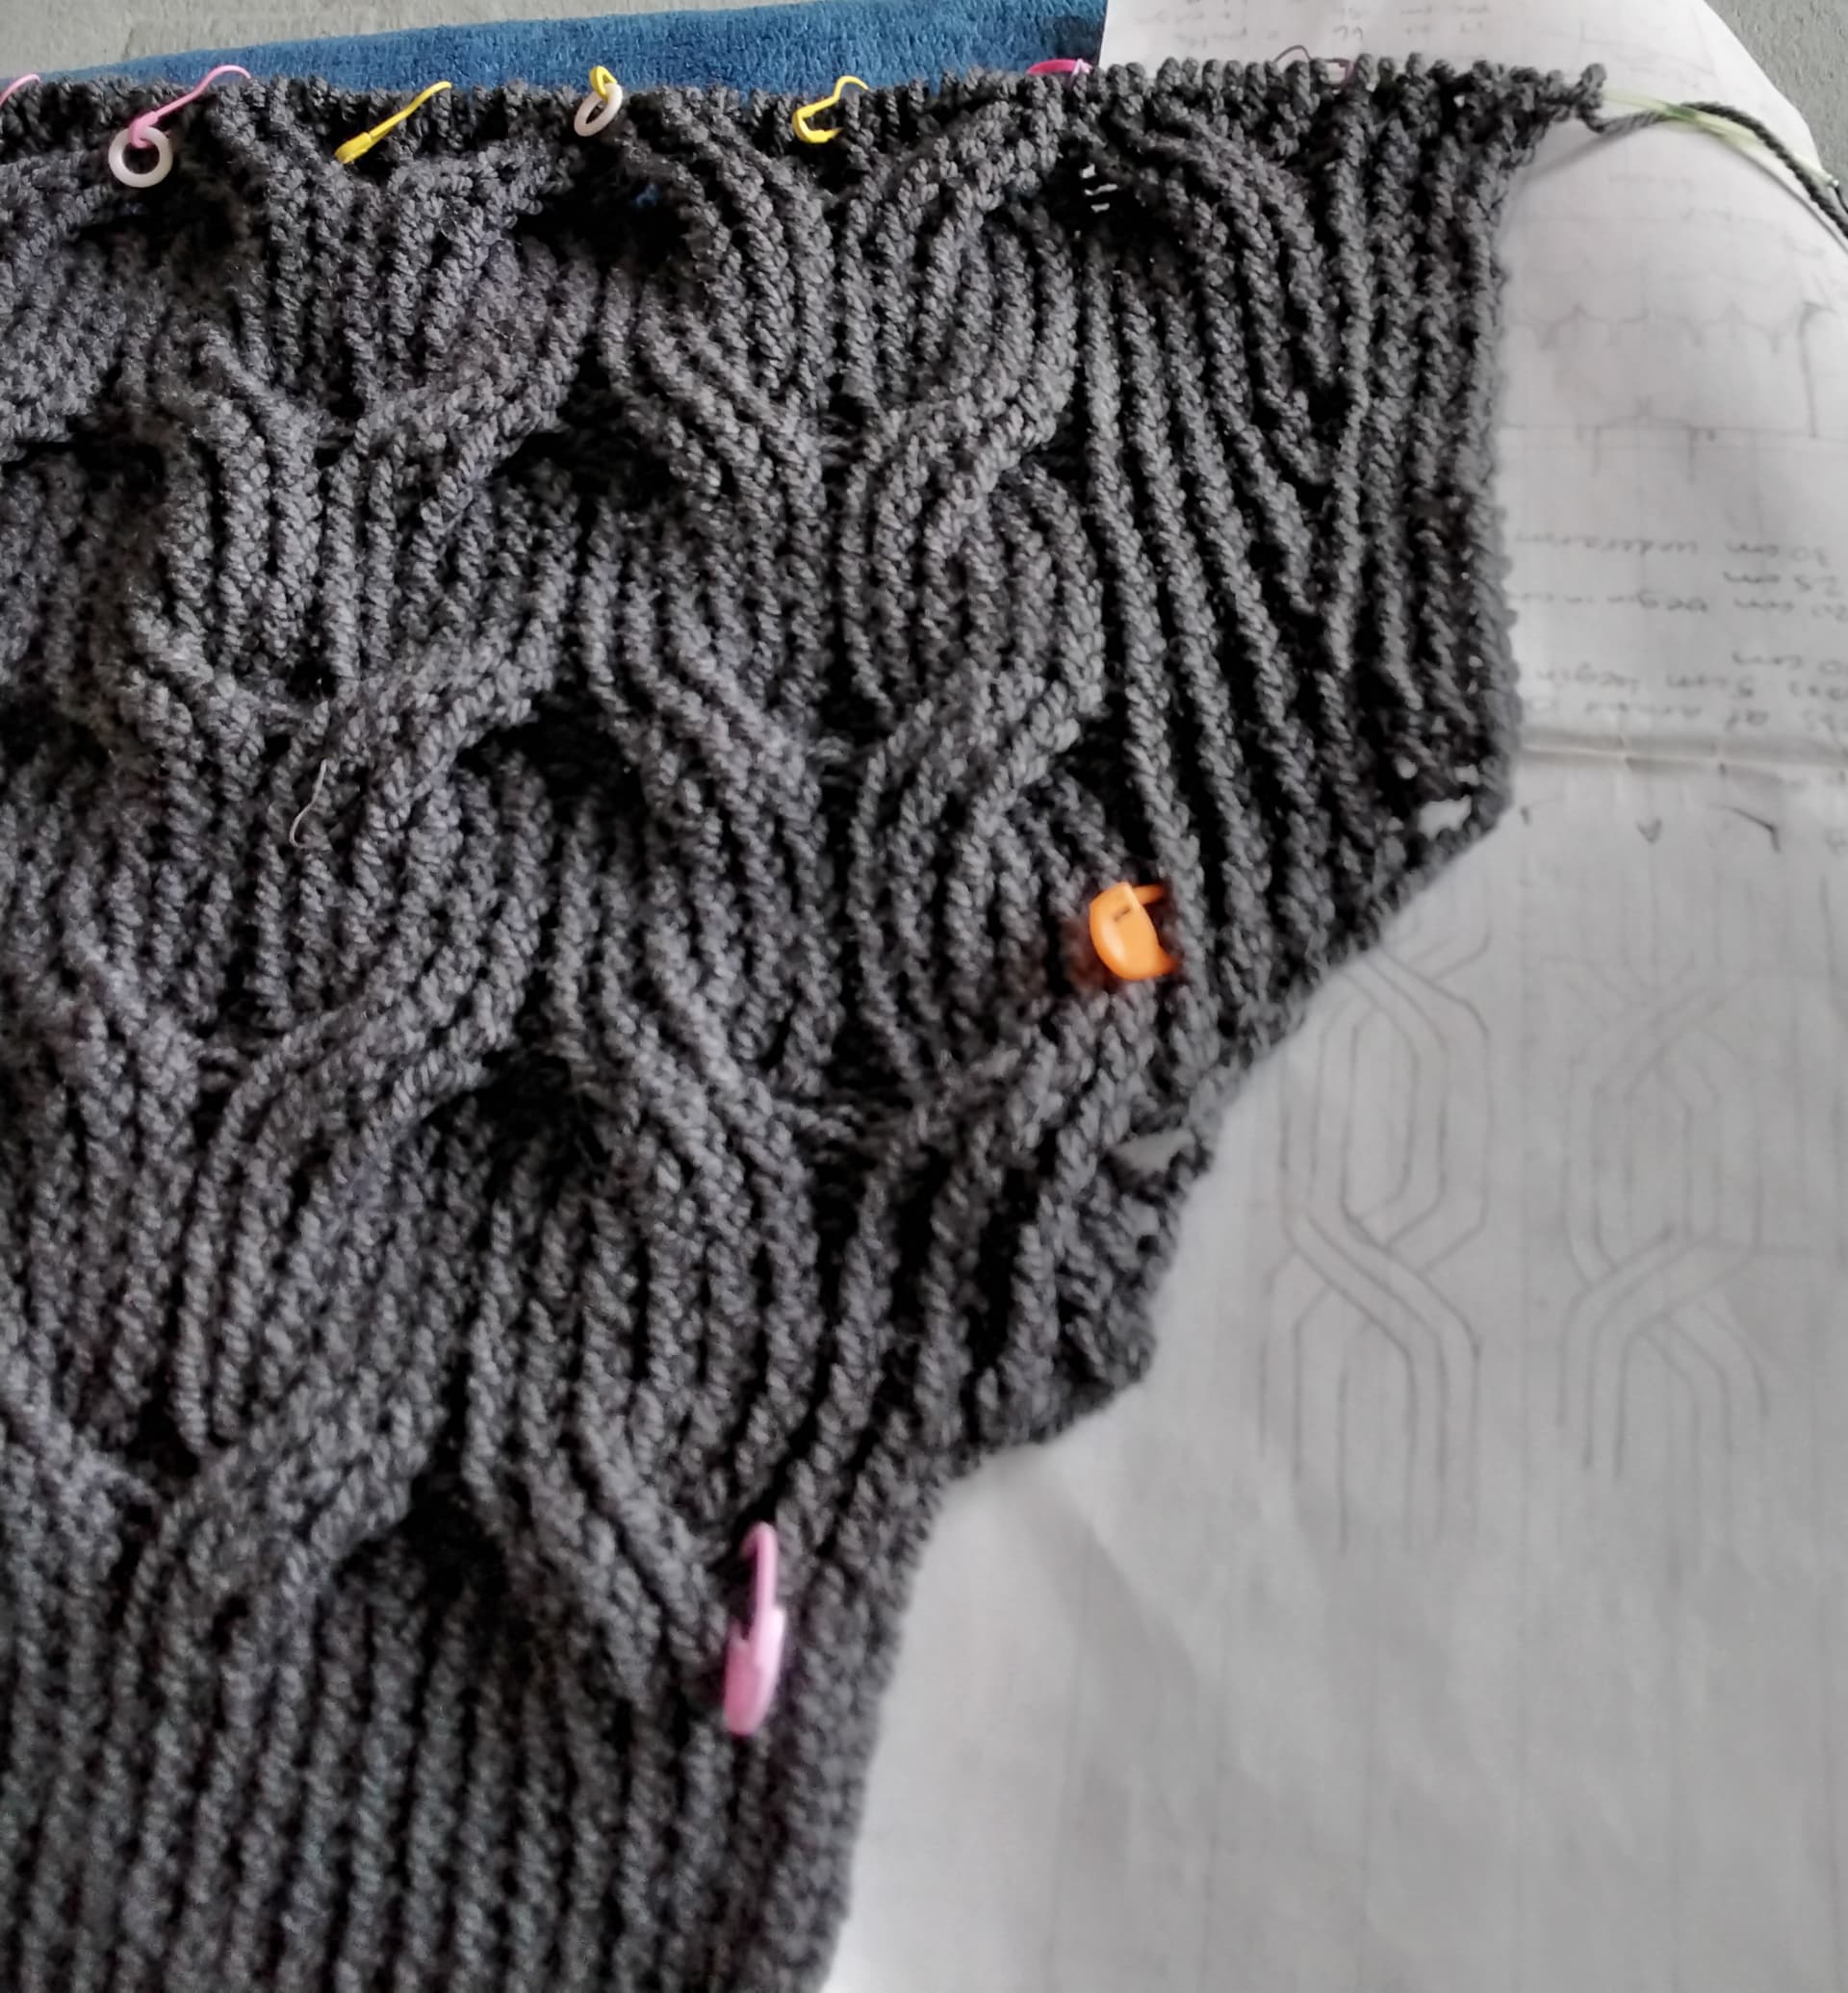
I’m seeing it as a “full” pattern of 24 sts so it’s 12 sts for one seven seas and 12 sts for its mirror. These 2 full patterns emerge from the rib in this swatch.

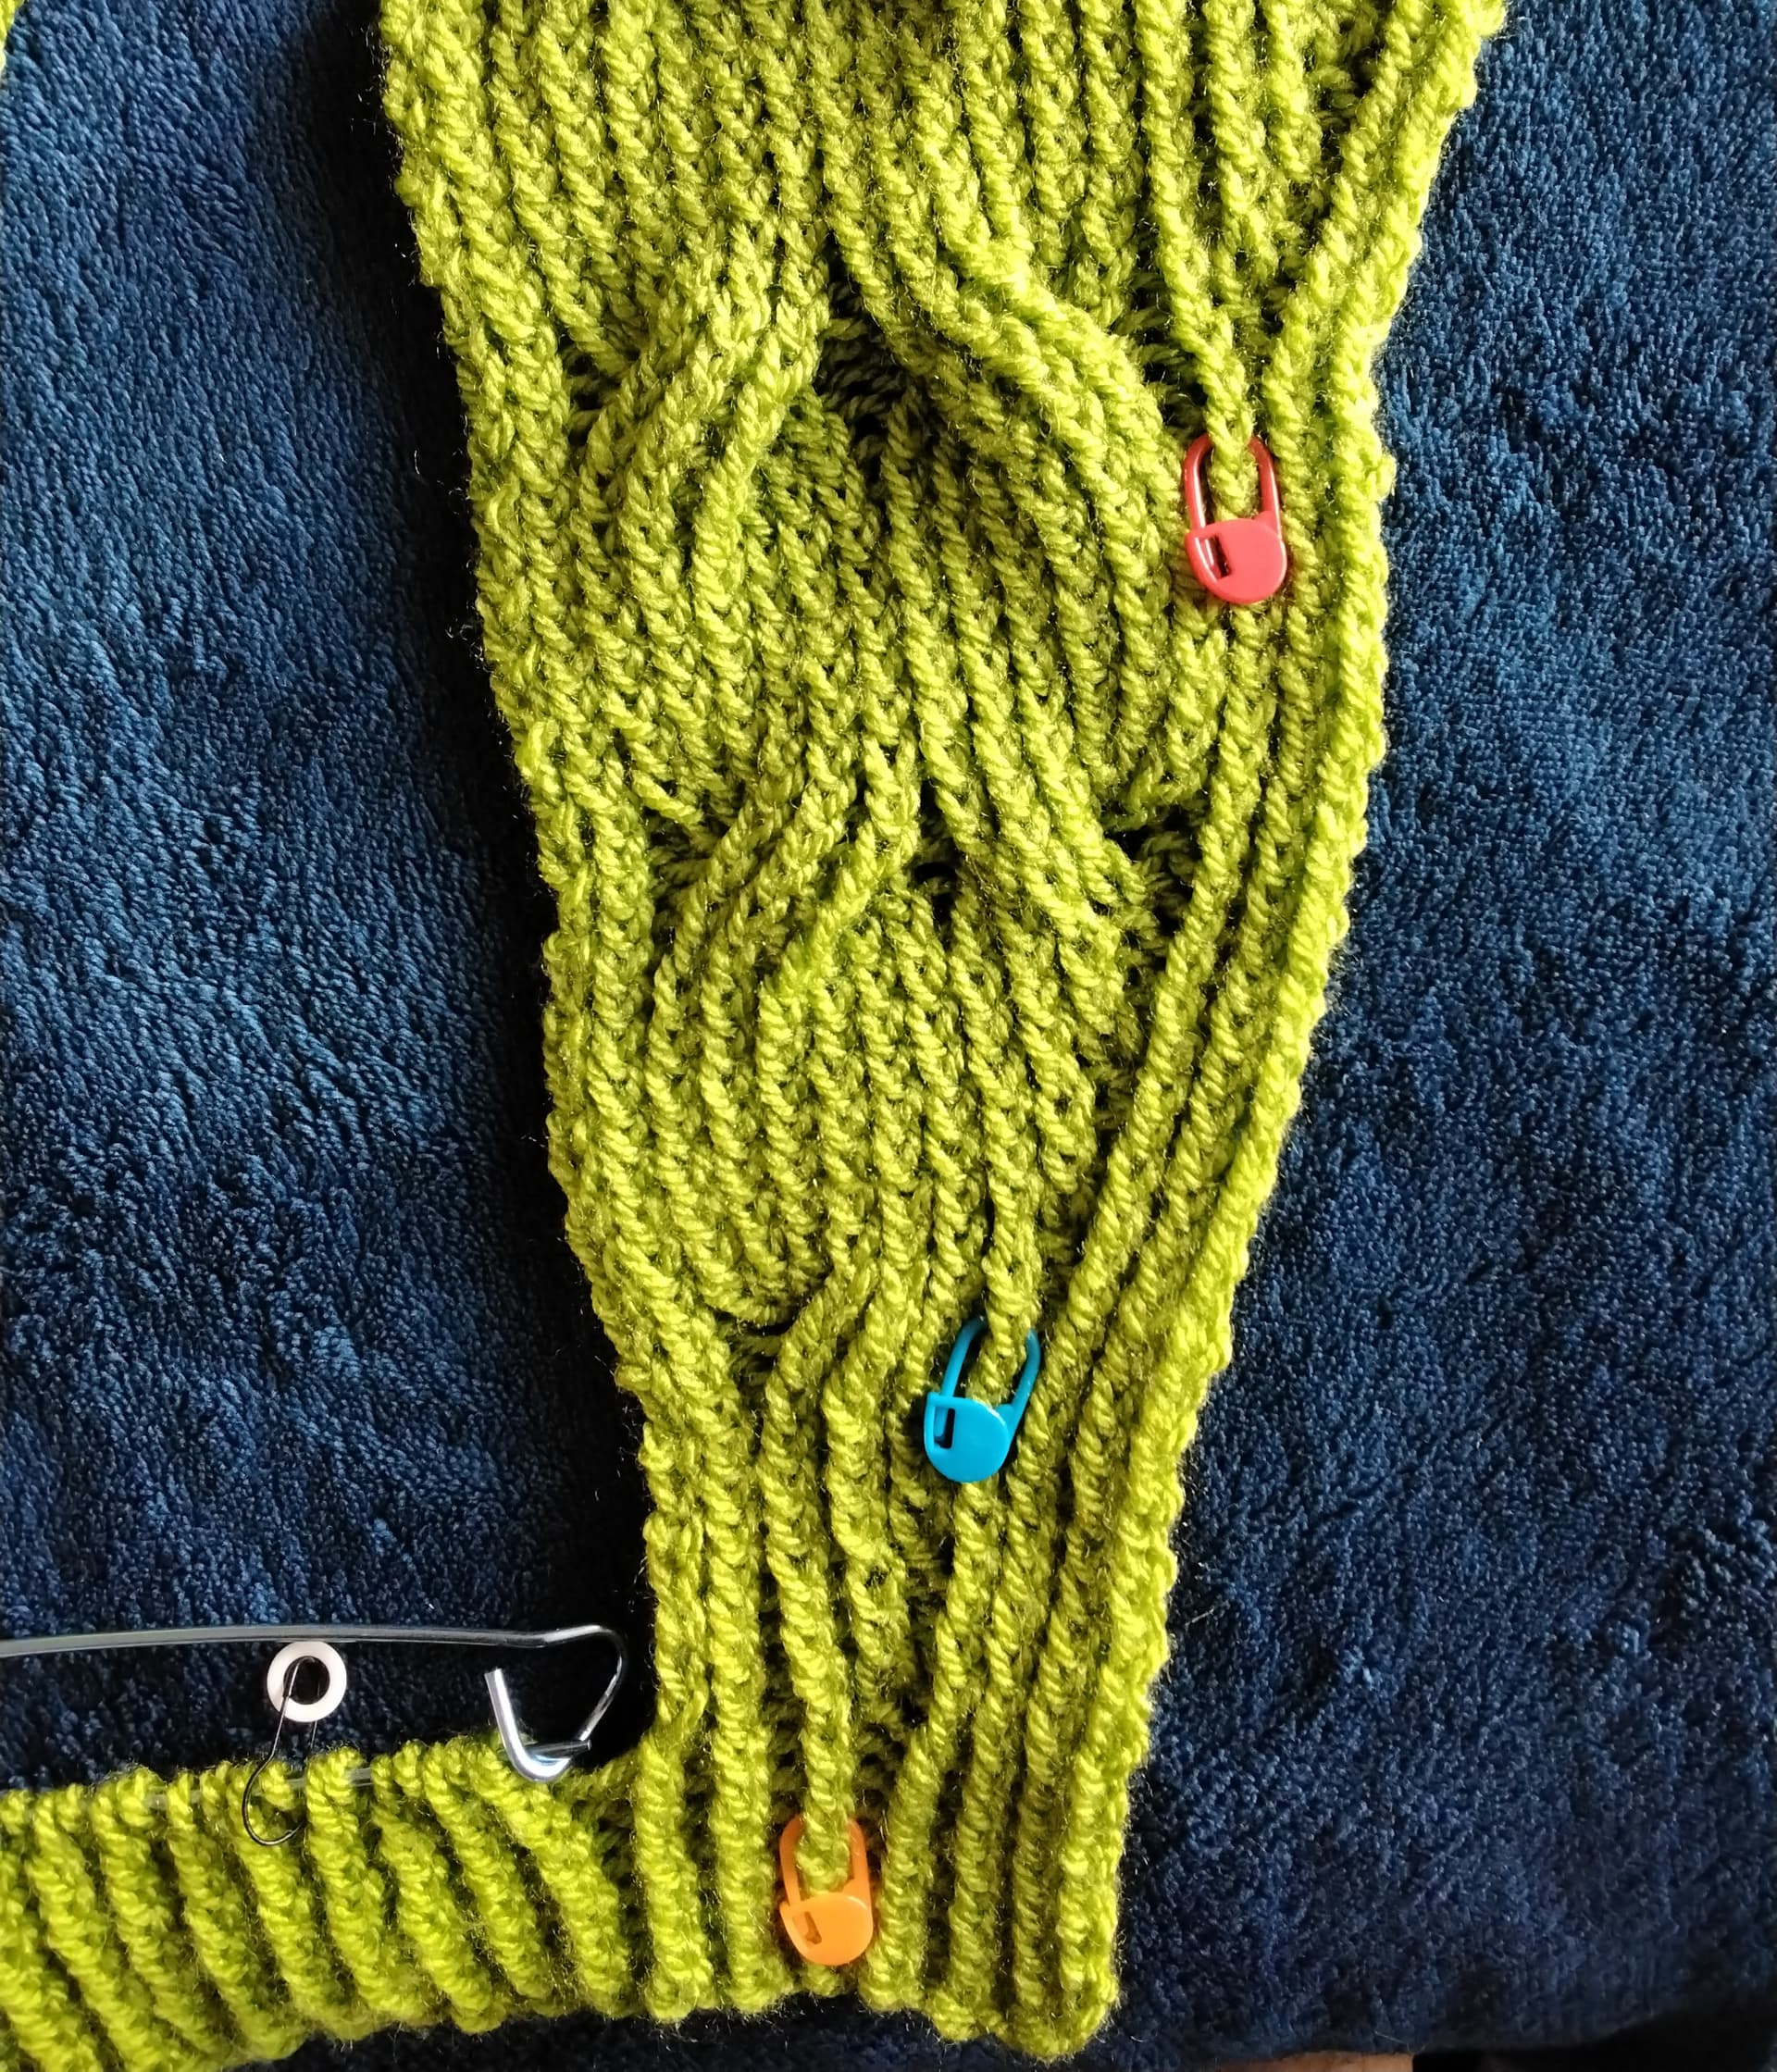
Then I need to increase (for sleeve). In the swatch I have increased each end and on the next cable cross put in a half pattern (12 st) it’s not great where the increases where made although the cross looks nice. But that was using several sts from the initial rib (cuff width), those extra columns each end only increase by about 8 sts to acheive it. The next half pattern would need the full 12 increases and I need a different way of producing them because it’s too ugly having this really wide twisted rib section instead of cables.

Increasing width of cable I’ve looked at. Increasing 2 sts into a 4 st cable. These seem to use mainly kfbf increases in a single stitch hidden behind the cable cross.

sequential lifted increases (left and right) almost answered what I’ve been thinking I need to ‘invent’, stitches being made behind the cable except that I need to have stitches already there before I can increase them to appear from behind.

So, magic tricks please. Some kind of rapid increase in or behind or by the cable. Preferably maintaining the twisted rib.

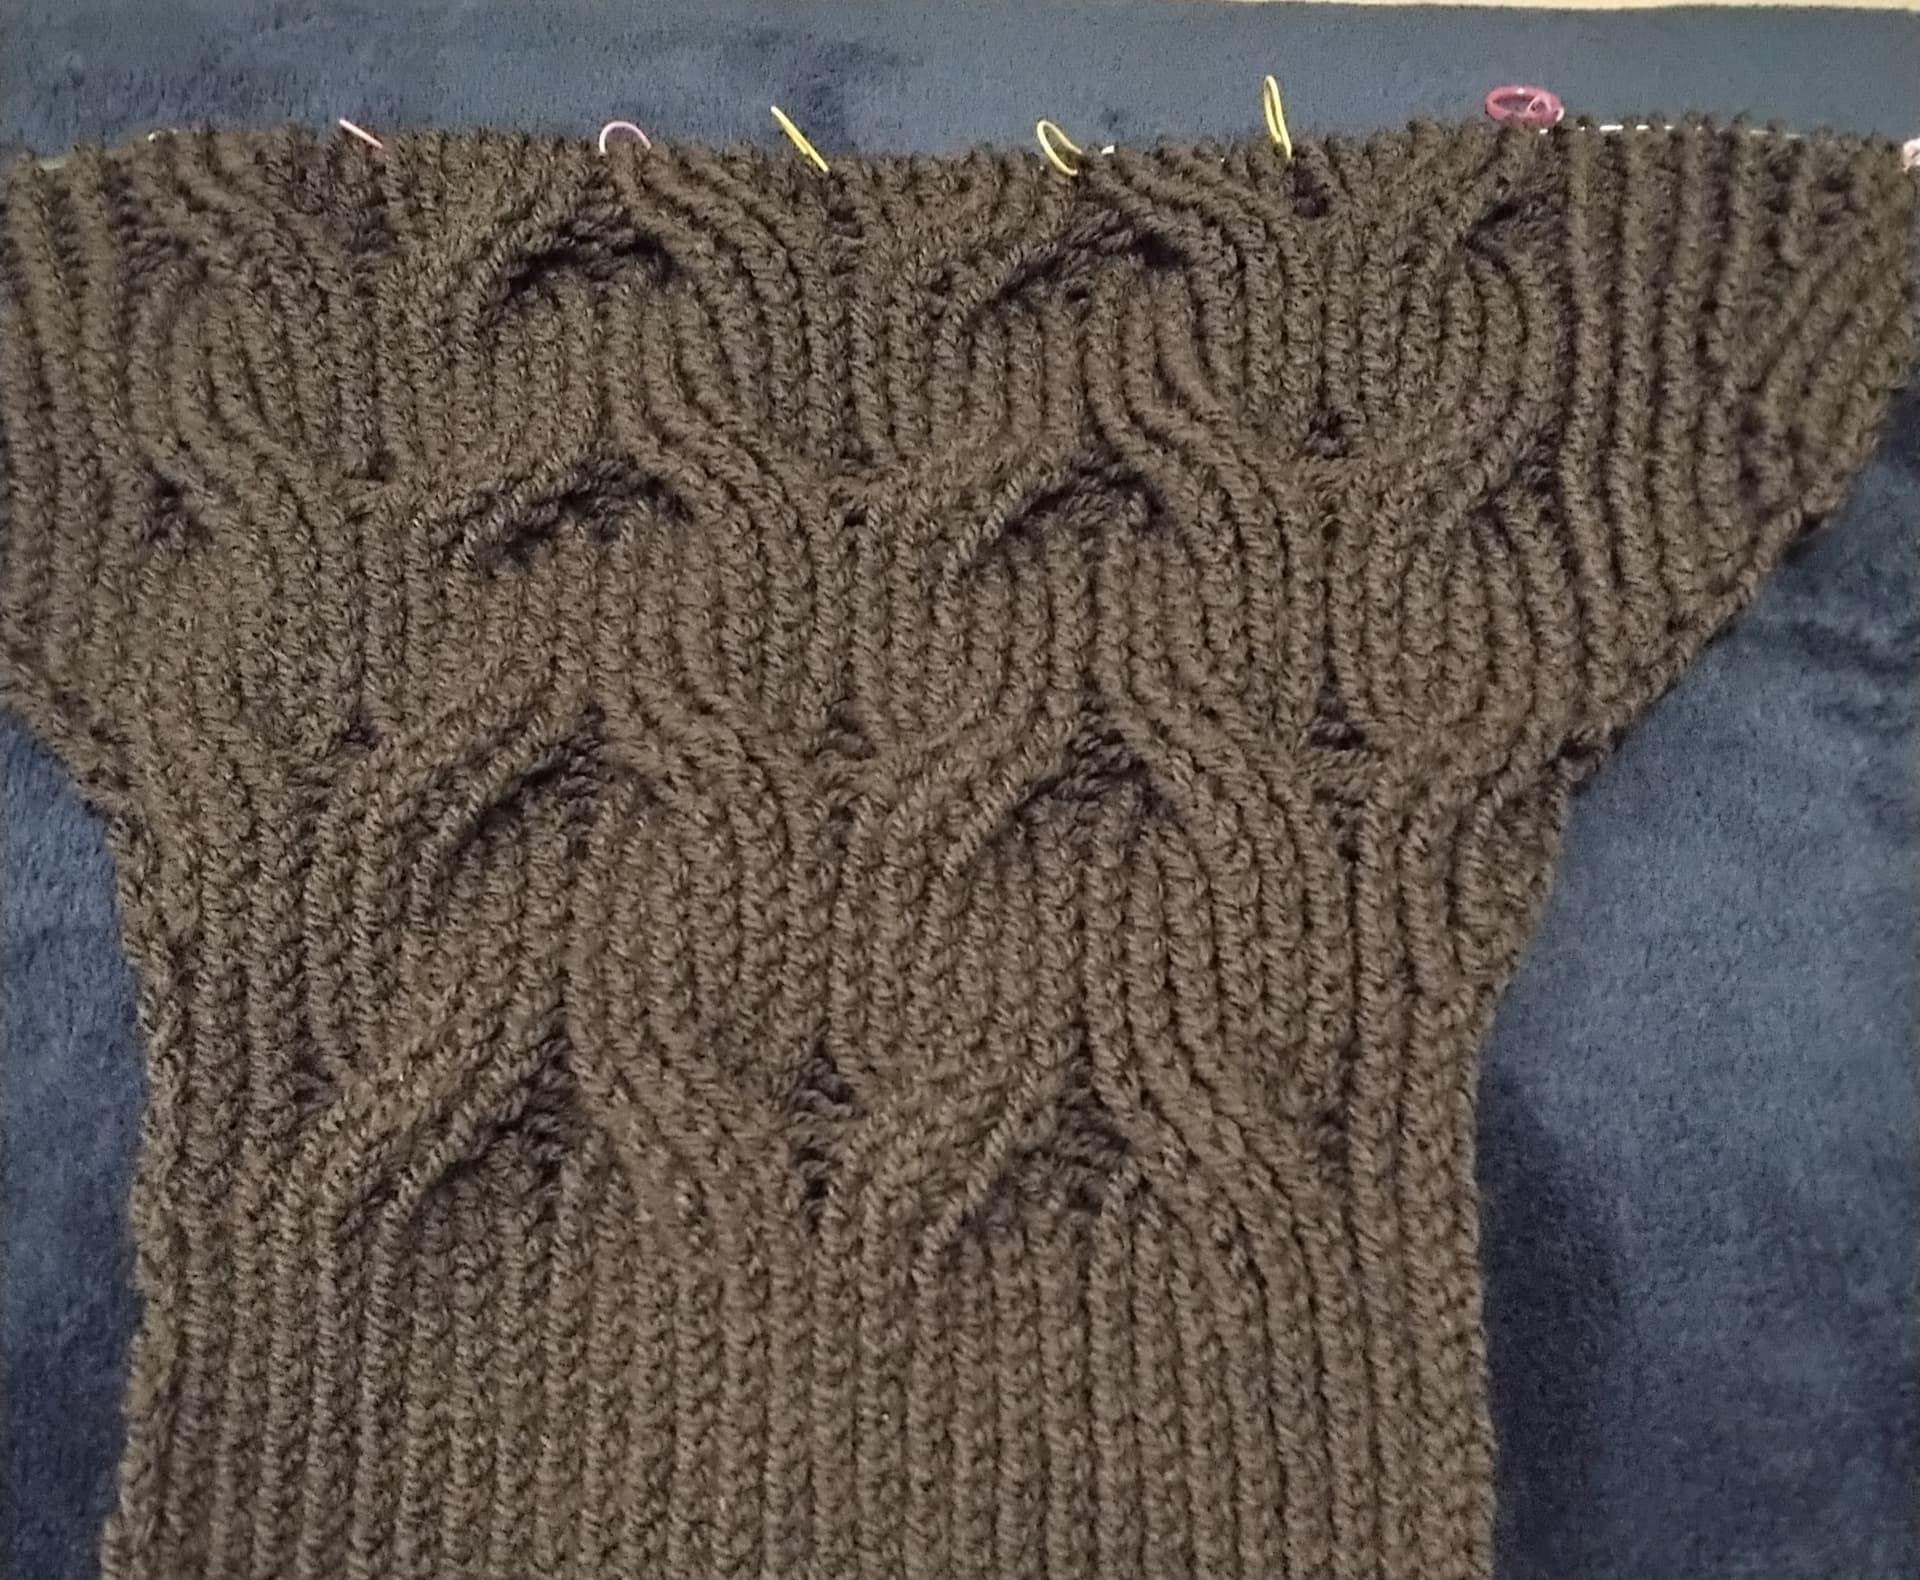
I want 6 or 12 sts to ‘appear’ for the second cable cross. I need a full 12 sts (a half pattern) by the following cable cross. Then I have a few cable crosses before I need another 12 to make the rest of the pattern. By the widest point I have 4 full patterns.

Please help.

I think I understand the gist of your question but maybe not. Could you use 2/1 crossings to begin the new repeat? The pattern I’m currently working uses 2/1p crossings extensively. 2/1L immediately followed by 2/1R mimics a 2/2 cable. I’m thinking you could use these to create a 1/2 cable crossing. I might be way out beyond left field, always a possibility. I grabbed a handy video to show the basics.

1 Like

Thanks for trying to help GG.

This would work if I had more frequent cable crosses and not enough stitches.

My particular challenge is the cable crossings are not so frequent (every 12 rows) and I want to do a rapid increase on or just before the cable crossing.

I feel I need almost a piece of double knitting behind which can then ‘appear’ fully formed at the cable cross.

What isn’t working is if I increase in every row of the 12 rows between crossings it results in a very wide band of ribbing, especially as it is quite an open gauge.

Is there a reason you haven’t done the partial cables in those corners? You seem to have started a right cross, but without the matching left cross.

2 Likes

Thanks for jumping in!

It’s a good question because it does look on the photo like it was possible.

I’ll explain why I didn’t with this pic

This is a swatch not the real sleeve so I’m using it to figure out my measurements and how to make the increases. The place you marked does actually have just enough to make a cross, 12 sts, however:

Green. My selvedge and inner sleeve stitches, these were supposed to travel the full length of the sleeve to give an uninterupted twisted rib section on the underarm which would be equal to the bind off stitches underarm on the body. I was not going to cable these stitches so that the underarm sleeve and body side seams had equal ribs and flowed into each other when seamed. Having some uncabled ribbing here was a bit like using it as a filler stitch.

Blue. I ended up using up all my filler rib right up to the selvedge for this half cable, I was just trying it out to see how it looked, thinking on my real item I could add another couple of stitches on the cuff to maintain my plan of having enough rib filler on the edge for the underarm. Although this edge looks ok on the pic I have had this seamed up, when it stretches out the increases look awful, it only looks reasonable here because it is relaxed and contracted. I decided to plod on and try to modify as I went because after all it’s a swatch.

Yellow. Here is where you marked. Yes I have increased every row for 12 rows so I do really have enough to put a cross there on that cable cross row. However, if I had, the result would have been the same as the blue trial, with all the filler rib used up (only selvedge remaining) and a weird ugly section which looks horrible when seamed (too rapid an increase near the edge, hence the sharp angle which wouldn’t be nice repeated up the seam), it is cable flare I suppose. The cable needs those stitches but the plain rib section is much wider than needed to sit well. So I did not cross as I already knew this wasn’t ideal from the blue trial.

Purple. At this point i decided I needed to try to preserve my filler rib so I moved the increase position here, the idea being all increases and cables need to be to the left of this. This would keep the filler rib and selvedge cleaner for a nice flow up the inner sleeve and eliminate the weird sharp angle increase being near the seam edge. There aren’t enough stitches for a cross until the red line where I’ve put a cross in. The amount of plain twisted rib is way too much to look nice, it looks awful. All that extra fabric isn’t needed for my measurements but the stitches are needed on/by the cable cross row.

I need a cable flare solution. I’ve seen a couple of good tutorials but they are not this situation.

I’ve spent 2 days with a different yarn working a smaller swatch trying to ‘invent’ a solution but my knowledge is too limited. I am sure someone far better than me has already invented the solution and I’m just not aware of it.

The closest I’ve got is casting on 6 additional stitches behind the work and holding them on a cable needle whilst I work the wrong side row, then introducing them from behind where a cross would be. It’s still not working and the way I cast them on is really amateur because I’m groping around in the dark on this.

Almost ready to give up. I’ve come really far with working out the stitch pattern, body size, sleeve size, and even swatched a neck several times (I have made so many swatches! ) but if I can’t resolve this I’ll have to just scrap it. If I liked really wide sleeves I could work 4 full repeats all the way up but I just don’t like wide sleeves at all and would end up not wearing it.

1 Like

Thanks for clarifying!

Could you make your filler ribbing as a separate strip and sew it in? Then the cables could go to the edge of this piece as needed, and be coming out of the seam. The strip could even continue down the side seam.

1 Like

Surprised you managed to get through all that without falling asleep. What an essay!

Yes, I could make a strip.

I think I’d still need to increase differently.

In the first increased cross they are all stacked, increases on every row on top of each other so make a rapid angle sticking out of the fabric, like the part between the blue and yellow lines. It gets really wide, then pulled in by the cross, then really wide again. The shape of the sleeve and the edge ends up bubbly. Like a scalloped edge.

Also where all those increases stack in the same place the knitting is really ugly, lots of holes and flaring out.

I’m convinced there already exists a technique to counter this but I just don’t know what to look for.

I’ve done it. Or at least I’ve done something which is acceptable. After some weeks and thousands of frogged attempts I have made a 2 st to 12 St increase over 12 rows without getting anything too weird going on.

This had an edge which was unseamable and went in and out in some crazy shaping

And this has a tidy edge and smooth increase

I only need to do this increase twice on each side so have decided to use 2 sts from the cuff to increase to 12 for the next cable cross, then I do this once more.

I did try many with a 0 to 12 increase but wasn’t keen on the result.

I am SO fed up of swatching these increases that I no longer have the motivation to try the sleeve cap shaping or saddle shoulder. I’ll leave these all on hold so I can go back to them if/when I need to, to practise the cap or to just stare at the increases if my notes don’t make sense.

4 Likes

That increase looks great! And I totally get why you’re fed up with the whole thing at the moment.

2 Likes

Thank you. It is significantly better. I do have to remind myself that it was worth while as the sleeve is now possible. It’s amazing just how hard it was, when in the end it seems to make perfrct sense.

Well, I have cast on! I couldn’t even cast on the cuff until I knew exactly how the increases were going to work. Everything is calculated around the pattern repeat and the central saddle shoulder. What happens at the top begins at the bottom after all.

2 Likes