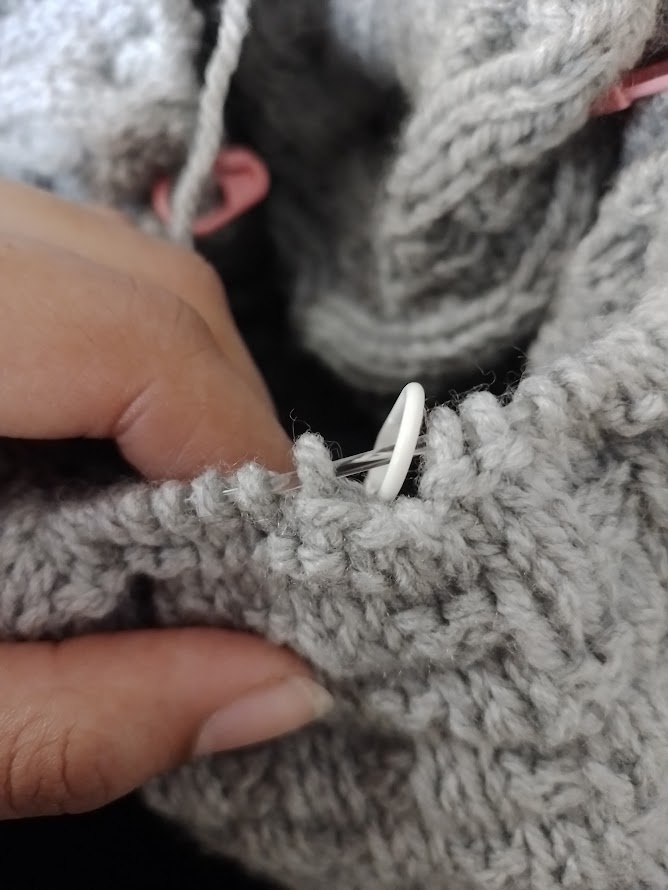
So I’m a beginner knitter and now in full confidence - after knitting a basic turtleneck on straight needle - I have decided to knit an Aran Sweater. I have done the ribbing and added the increase but now I’m stuck on this part of the instruction:
Change to larger circular needles and establish pattern over the front as follows: * 28-36 (32-36-40-44) sts of Pattern 3, Pattern 2, Pattern 4, Pattern 2, 28-36 (32-36-40-44) sts of Pattern 3 *, place a second marker, repeat from * - * over the back.
This is the link
The pattern for the knit is on it but I don’t understand it, I am knitting the biggest size so I need 44 stitches.
My question is that am I supposed to fit pattern 3, 2, 4 and 2 in 44 sts or just pattern 3 in 44 sts and then do pattern 2,4,2 and then do 44 sts of pattern 3?
Great looking sweater.
Just pattern 3 is worked for 44sts. Then work pattern 2 over 28sts, pattern 4 over 48sts, pattern 2 over 28sts and pattern 3 again over 44sts for the front. Repeat the sequence for the back.
You can always check stitch number to be sure that it adds up to the sts you have on the needle. This is going to be a gorgeous sweater and a fun knit!
What a stunning sweater!
Think of it like this:
Pattern 3 is the main stitch for most of the sweater, the sort of waffle pattern.
Pattern 2 is “ropes, horseshoes, ropes”
Pattern 4 is the center panel of a sort of Celtic knotted cable.
Pattern 2 again: Ropes, horseshoes, ropes
Pattern 3 to finish off the side panels
If you haven’t done cables before, I’d recommend a practice swatch, until you get the hang of them. They aren’t especially difficult but do take some concentration right at first. There are lots of videos.
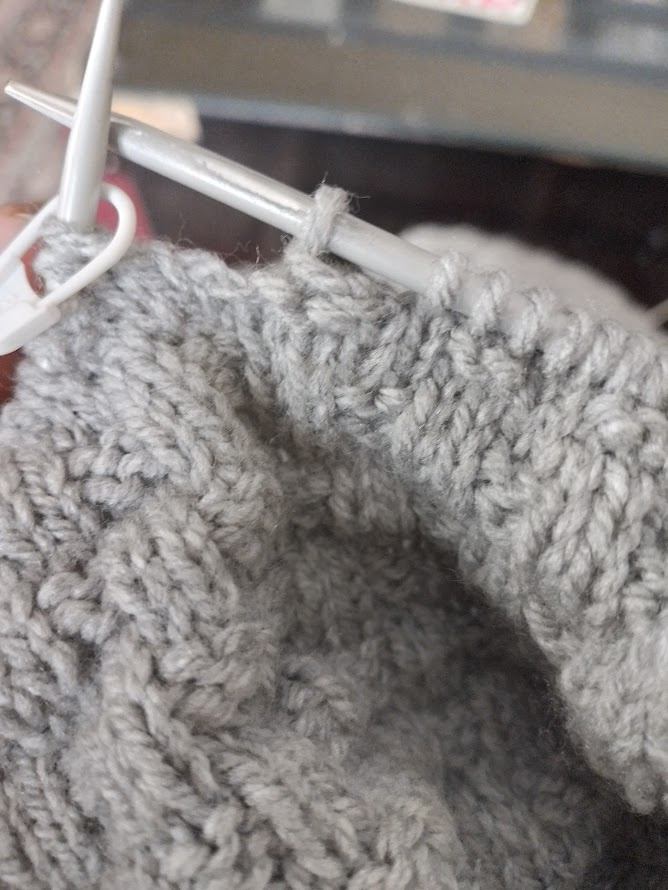
The pattern says to place a marker at the beginning of the round and a second marker at the side between the front and back piece, these will be vital, in my opinion this is not enough markers for a complex pattern like this. I would use easily identifiable markers for the BOR and side marker (for example a red marker with a second marker hanging off it for beginning of round, a red marker with no addition for the side marker) but then a different colour for a bunch of other markers to indicate each pattern section. For instance I’d count off 44 sts and place a marker (any colour except red), then count off 28 sts, place a marker, count off 48, place a marker, count off 28 place a marker, then check there are 44 sts remaining between that marker and the red side marker. Then repeat for the back with the final 44 sts leading up to the BOR marker. The stitch counts are on the pattern chart.
The markers help with a couple of things, 1 not getting carried away and knitting more than you should of a single chart, 2 at each stage you can count the stitches between the markers to check if any have been accidentally added or lost (this can happen even for experienced knitters, I did it myself yesterday, accidentally slipped a stitch after working it instead of dropping it off the needle and ended up with an accidental increase), if you reach a marker and have not completed a chart row you will have an idea something went wrong and recheck just that section instead of working all the way across before finding out.
There are lots of videos on the drops pattern techniques, they are under a tab on your pattern page, you might not be aware of them, they can be quite handy and are usually short and to the point.
Looking forward to seeing your progress on this lovely project.
I’m with Creations: identifiable markers for each group of patterns with BOR totally unique. I am knitting a complex (for me) shawl with many groups of 10 stitches comprised of wrap and turns of differing numbers and the markers are a complete life-saver!
It’s a bit confusing that they have numbered the patterns because you need to knit them out of order so that your different cables (or textured sections) are mirrored.
Usually these sections are labelled A, B, C etc. If you can remember back to studying music or poetry at school, it is similar to the repeating parts in a simple composition, like a limerick or haiku.
Sometimes pattern writers use stitch names, which can also work well.
It might also help to note that the sizes are all the same for the middle panel (the cables) and differ only in the stitch count at the sides. So the smallest size has 28 sts of texture pattern either side of the cable pattern, and the largest has 44 sts of texture panel either side of the cable pattern. The middle pattern is the same width.
Also, Drops always separates out the stitch patterns into small units. Other patterns usually show them as a panel (space permitting) so it is much easier to see how the chart relates to the finished garment.
If you have access to a printer or are handy with the computer you could copy and paste the charts to make this yourself.
(Note that I have put this together myself and can’t guarantee that it’s correct or will print in a satisfactory way. It’s just to give you an idea of what a proper chart looks like and how the motifs go together.)
It depends. I’m working on the Campside Classic cardigan by Alicia Plummer, and she has numbered the charts because she has used letters for the sizes. I’m currently on Chart 4 of Size E. So you might see either configuration.
Great idea to combine the charts! And a nice tip about the center panel being the same for all sizes.
The chart you made is neat, and it certainly gives clarity next to the photo of the finished sweater.
Personally I quite like small charts, I can have them in a stack next to me or all printed on one A4 page which I find really practical for me.
I do work from larger charts sometimes but find them a bit cumbersome.
Great idea though, I’m sure many people would prefer it as one.
an abbreviated master chart showing an overview of the patterns, not every stitch
single charts for each pattern showing every stitch
That way you can look at the master chart to see how it all comes together without it being overwhelming, and look at the individual charts to see the stitch pattern in detail. I think it was in Janet Szabo’s book, but I can’t swear to it. Could have been TechKnitter. She did some interesting things with “meta charts”.
If I was good at sketching I could have made an overview one for this, but sadly I cannot draw even a stick figure.
I agree, giant charts make my eyes go funny. I don’t think my improvised one would be pleasant to knit from, especially as the chart images from Drops seem a bit low-res.
I think the centre panel could be condensed by using a repeat box, which would make it much easier to read, but by the time I had stuck the bits together and labelled them I was getting a bit tired so didn’t take it any further.
Thank you guys for all your help. I have placed markers the way you mentioned it, because it is quite necessary for me since I have horrible memory and I am bound to mess it up without the markers lol
hello, i have an update and a problem.
it has taken me 2 months to finish the first 18.5 inches of knitting this sweater. im now stuck on the armhole instruction:
When the work measures 35-38 (41-43-44-47) cm , knit the next row as follows: bind off 2 sts for armhole, 156-172 (164-172-180-188) sts for the front, bind off 4 sts for armhole, 156-172 (164-172-180-188) sts for the back, bind off 2 sts for armhole. Knit the rest of the front and back separately.
i think i did the first bind of right but the second bind off after 188 sts is where im stuck
the first bind off:
You’re doing great, this is a complex pattern and you’ve reached the armholes!
I’ve seem armhole bind offs written like this before, I don’t know what others make of them but to me they make no sense.
Here’s what I would have done.
When it said ‘knit next row/round as follows’ I would have gone back 2 stitches, ie stopping the previous round 2 stitches early. Then bound off 2 stitches (back), slipped (BOR) side marker, bound off 2 stitches (front), worked front to 2 stitches before side marker, bind off 2 (front), slip marker, bind off 2 (back) Work to end of round. This places you at the same place but with both underarms bound off evenly and no lonely stitch stranded in the middle.
Options from where you are
1, tink back a full round (do you know tink? It is knit spelled backwards, it’s a way of unknitting each stitch in a very controlled way, one at a time to keep the stitches safe).
Or
2. Tink back just these last 2 bound off stitches, work the end of the row (those 2 stitches) as normal, then turn to the wrong side ready to work back and forth flat, and bind off 2 stitches at the beginnig of the row. This will put your underarm bind offs a little out of alignment, one side bound off a row later, but it shouldn’t make a big difference and it is anyway under the arm and will be either in a seam or picked up in for the sleeve stitches (depending how the sleeves are worked), either way probably unnoticeable.
I’ve done exactly the same as you before. Don’t know why they write patterns like that.
Haven’t we all tinked so many times!? I see it as just part of knitting now.
The bind offs will work out fine, I do find it odd that it’s worded this way in many patterns.
Another way the row and bind off can be worked (perhaps for future reference) is to begin the round without bind any off, work across, bind off before and after the side marker, work across, then bind off the stitches before and after the BOR marker. It’s the same principle but results in the yarn being ready to work with on the other body piece, if for instance you had a preference to work the front body before the back body. It ends in readiness to work a right side row on the (what is often) the front rather than a wrong side on the back. Same thing really and usually just personal preference but could be handy to know.
okay so i did bind off as u suggested, thank u for your help. just one more thing is that now im supposed to knit front and back separately, so im knitting flat right? but that also means that i have to purl the wrong side etc?
Yes, that’s right. The front will be knit back and forth as will the back. When you see a bump, purl the stitch. When you see a V, knit the stitch. You want to maintain the pattern that you’ve set up on previous rows.
The charts are now worked right to left on right side (RS) rows and left to right on wrong side (WS) rows. Although the key to the chart doesn’t state it, the open chart squares are knit on the RS, purl on the WS. Also, the X chart squares are purl on the RS, knit on the WS.