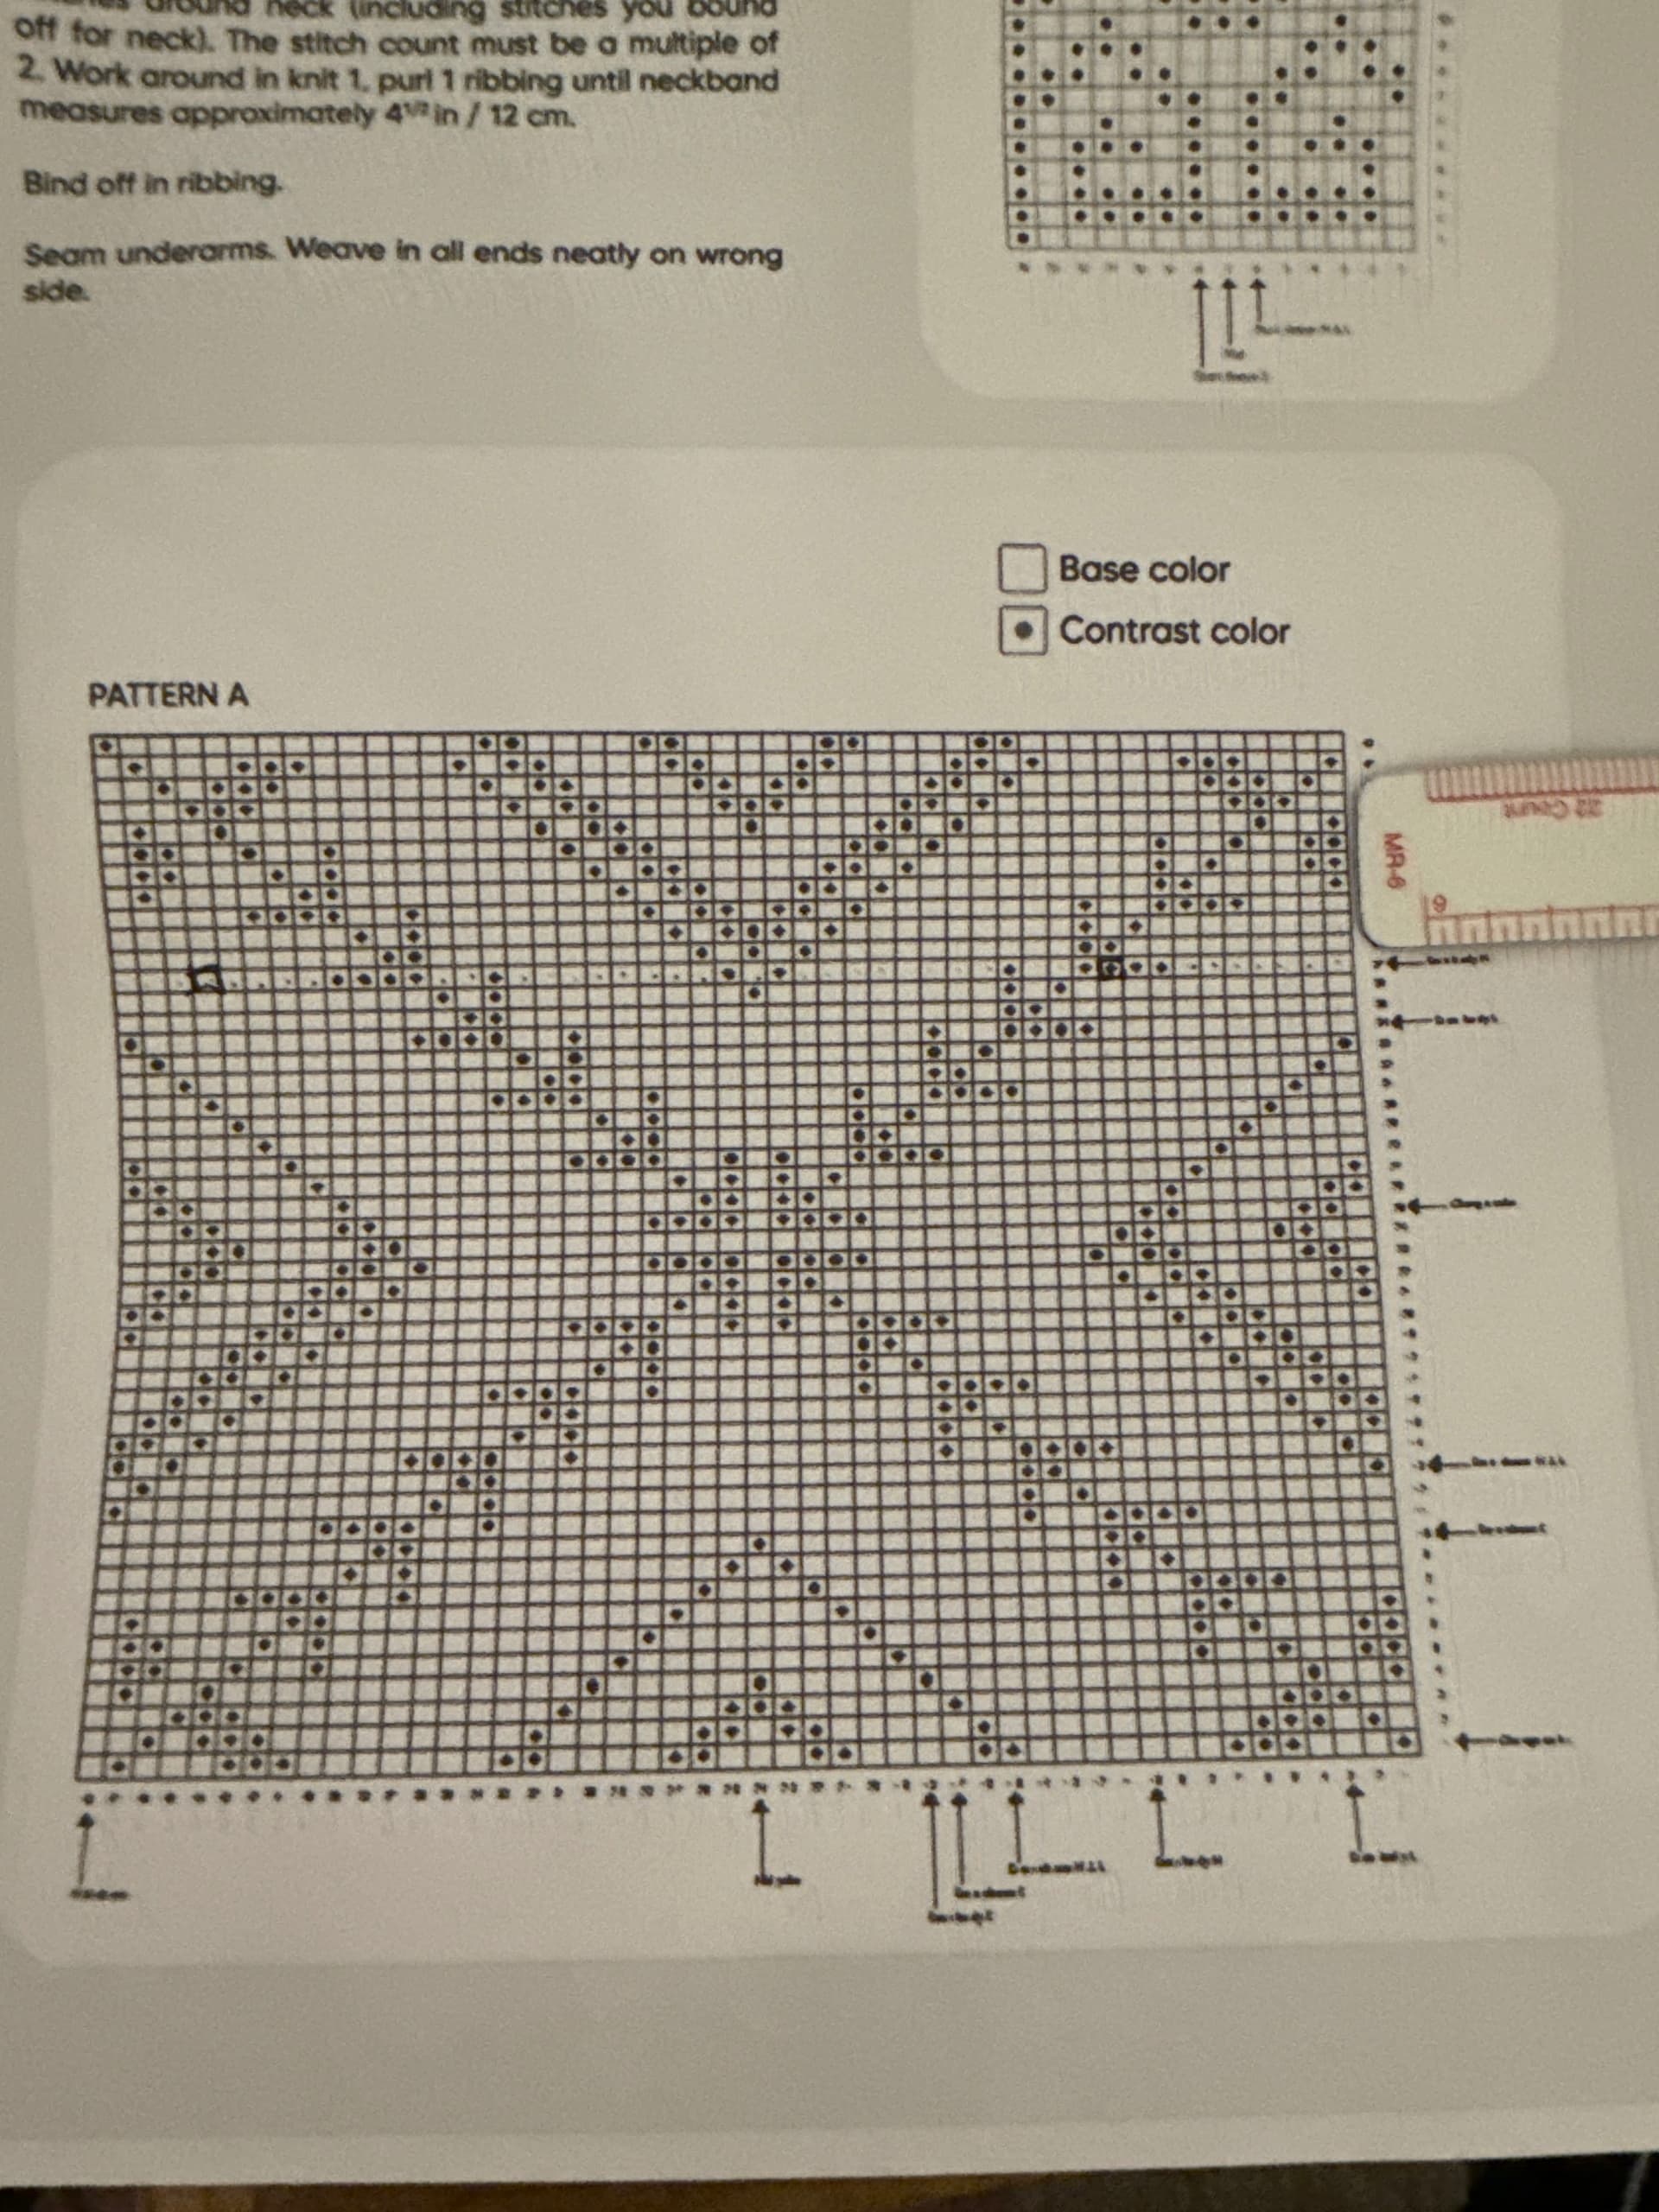
the chart says to start at your designated size row and column, but it also says to start at route 1 no matter what. There are 250 stitches in size medium so that’s 125 on the front and back and it’s a 48 stitch chart with the medium starting at stitch 10. Do I knit the chart 10-48 and then restart the same row to stitch 10 and then restart that same row? What about the other 29 stitches? Do I just go as far as I can in that row and then start the row over from stitch 10? What do we thing she meant by route 1?
Welcome to KH!
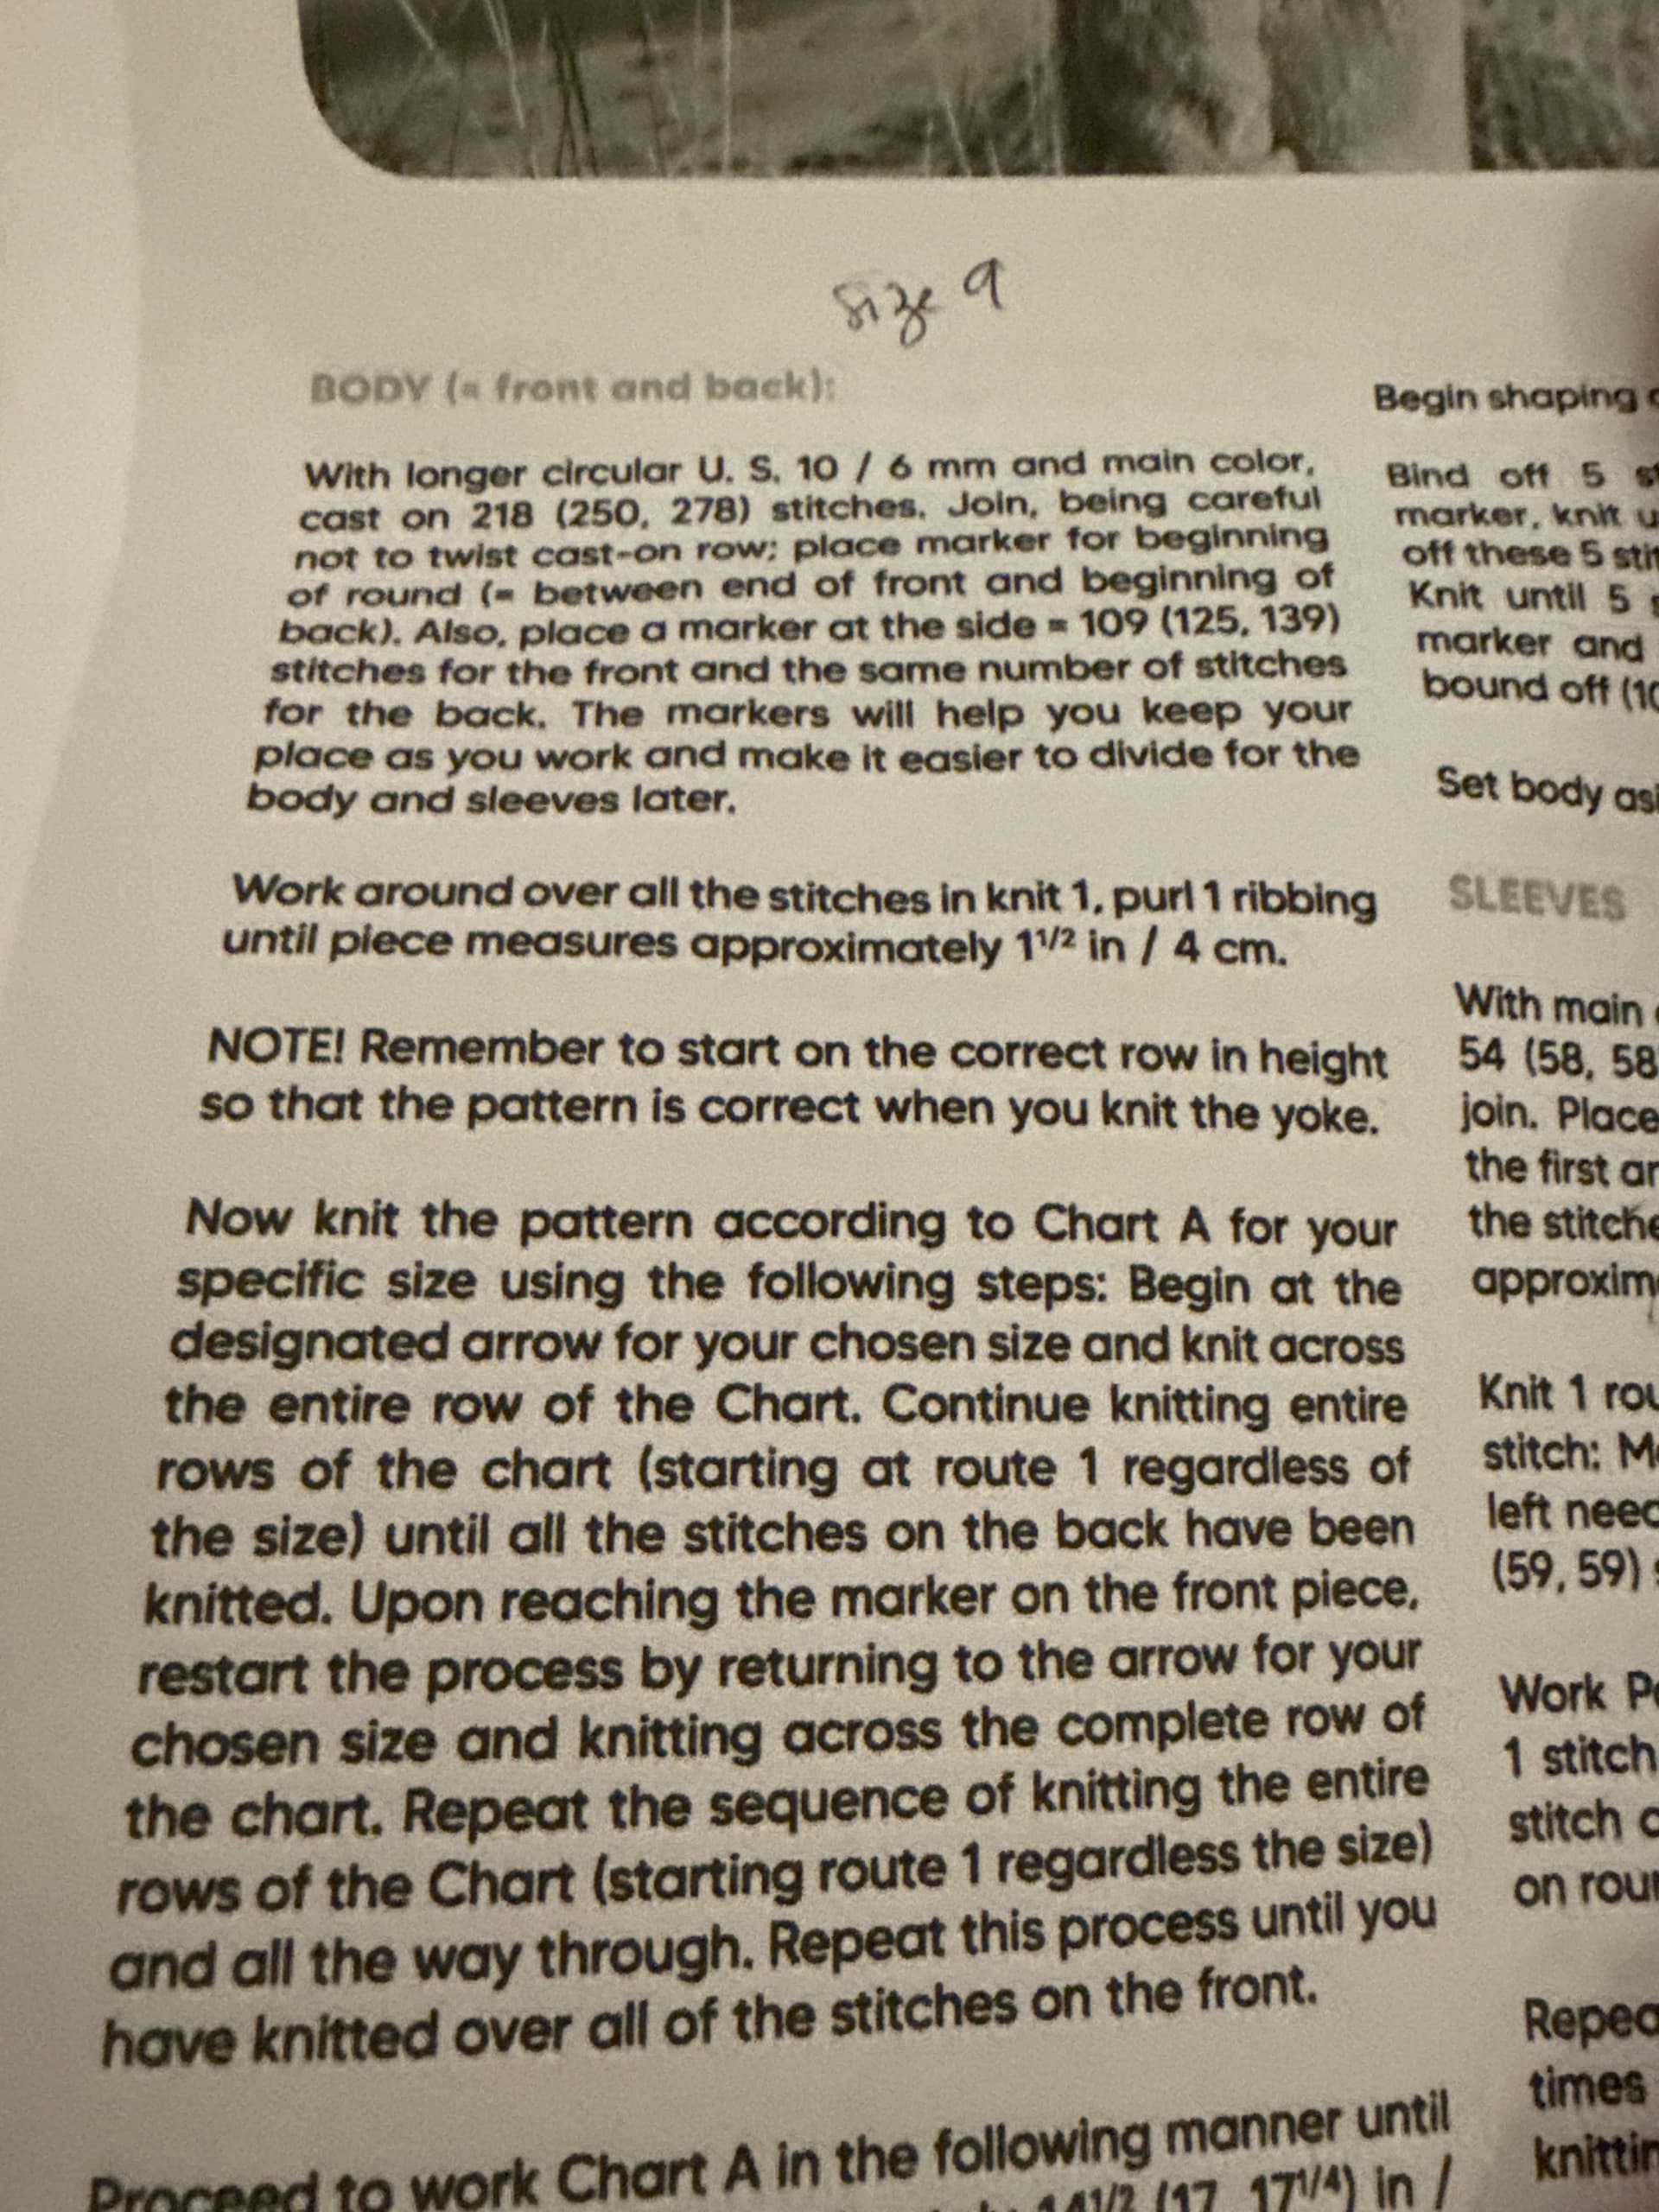
What is the name of your pattern and designer?
Start working the chart at stitch 10, the first stitch for size medium. Continue to stitch 48 then repeat from stitch one through 48. You’ll have to repeat again from stitch 1 to the end of the back sts.
Then begin the front sts with stitch 10 and repeat the same sequence as for the back.
It seems that “route 1” refers to column 1 (stitch 1) of the chart.
There’s also a note to remember to start knit at the correct row of the chart for your size.
1 Like
Maybe this one
When you follow the chart in the way salmonmac has described the diamond pattern will be centred on the sweater front and again on the sweater back. You can check this visually on your knitting by placing a removable marker or yarn loop at the front centre stitch and when you reach it check you are also at the point of the centre stitch in the chart.
I like to write things out so the symmetry works logically for the way I think
39 - 48 - 38 (total 125)
Stitch 10 to 48 is 39 sts, then the full row is 48 sts, then the remaining 38 stitches are stitch 1 to 38
3 Likes
Hi! Me again. I followed your advice for the sweater front and back and it worked perfectly. I’m at the point where I pause and make the sleeves. There is a lovely detail on the first 24 rows of the sleeve but I can’t seem to wrap my head around how to make it work. There are 59 stitches. The chart is 14 stitches across (24 rows total). There is a two stitch increase every five rows for a total increase of 10 stitches. For my size I need to start on stitch 6, knit to stitch 14 and then knit stitches 1-5. I’m having the hardest time visualizing how the pattern will look since one of the repeats won’t have the full 14 stitches in it and how it will work if I add two stitches since it’s not shown. So the first row I’ll have 4 repeats and then 3 more stitches. I assume that would be stitches 6-9. That continues until row 5. I add one stitch after the BOR and another just before the last stitch. So now my first repeat has 15 and my last has 4. On row 6 do I just knit the 14 stitches as before and then stitch 1? On the last repeat it would be stitch 6-10? Same adjustment for all the rows after that increase row? Won’t that throw off the pattern? I wish I had a tool to just put those increases in like I normally see on an increase chart so I could visualize!

Glad you’ve worked the back and front so nicely. For the sleeves as you posted, start with stitch 6-14 then proceed with 1-5 and continue the pattern for 4 repeats ending with sts 6,7 and 8.
When you get to the increase round work the increase beginning of round as stitch 5 and the end of round increase as stitch 9. For the next inc round, work the first increase at stitch 4 and the last as stitch 10. That pattern continues for the inc rounds.
The pattern will be broken up at the center underarm but will seem to grow from that center as you work the sleeve.
I find it makes more logical sense to visualise and mark out the sleeve or chart with a centre. In this case the centre 14 stitches are a full chart. Another full chart sit either side and the partial chart stitches sit outside of this, at the beginning and end of the row/round. The chart won’t align across the BOR, that’s like a seam, the pattern will be disrupted but it will be neat and symmetrical.
9, 14, 14, 14, 8 (placing markers on your needles at these points should help)
Starting at stitch 6 there are 9 sts to end of chart
Then 3 full charts of 14 sts across with the centre chart always staying centred on the outer sleeve.
Then 8 sts (sts 1,2,3,4,5 complete the chart to where you began at st 6, then 3 more are sts 6,7,8).
If you look at the sts in columns stitch 6 and 8, they make a straight line up, symetrical, so the chart won’t be off, it will be very nice, these are the columns each side of the BOR/seam/underarm.
You can print off the chart several times and cut and stick them together to make an entire sleeve chart with the increases drawn on if it helps. Or you can draw it on squared paper.
Here’s the first few increases marked up.
At round 5 an increase of 1 st at beginning will be worked as stitch 5. An increase at the end will be worked as stitch 9

I hope this helps some.