Hello
I have done what I call “spaghetti intarsia” which is lots and lots of strands worked at once. It’s kind of daunting to begin with but once you get into the flow of it, it’s actually very satisfying.
I’m not a fan of duplicate stitch in these cases because the added stitch ends up a bit raised from the surface - that can look good if the thing pictured makes sense to be raised (like strands of grasses maybe) but often it adds bulk and always adds another bunch of ends to weave in later. The many strands of intarsia do also add many ends to weave in later, but without the added bulk to the fabric, also often its possible to weave the end in as you go (see videos weaving in as you go or weavin’ Steven method,) and sometimes if you look ahead a strand might be woven as you go a few stitches and then carried behind up the rows to another place a few rows after where it is needed and can be woven as you go, a stitch or two before it’s needed, to secure it, and then used again. This reduces the amount of weaving in later.
The hardest part, probably, the daunting bit, is dealing with all the strands. For this type of intarsia I never use little balls or big balls or butterflies or anything which prevents the strand from pulling through the bundle of spaghetti yarn you will work with.
Long loose strands are just left to do their thing, They will become twisted in what looks like an impossible knot, however, almost always the strand needed for the next stitch can be drawn/pulled, from the needle end, and it will fall out of the bundle of spaghetti. If the bundle ever tightens up it can be gently pulled apart to loosen it and a few long strands pulled out from the needle end will make the whole thing loosen up and free the strands again. The strand ends must be loose to allow the drawing through of the strand needed. Any butterfly or ball just causes unmanageable knots and blocks the flow of the yarn.
The first time I did this type of intarsia I read to use strands each only a couple of meters long. I later found I could work with 10 or 15 meters successfully which helps with managing yarn for the larger areas, working with just 2 meters was too limiting (i was having to add another strand when I ran out, more ends, more bulk). But as you go along you will judge how long you will need the strand. When a strand has finished being used and remains long you can cut it off (leave a tail to weave unless already woven as you go) and keep it for another area.
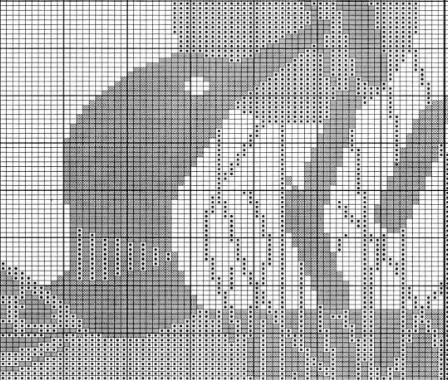
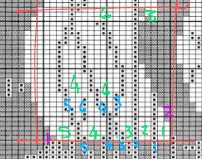
I’ve marked up a piece of your chart, the part I think you are not sure of, to give an example of the strands.
You’ll probably need to zoom in the see the numbers but maybe this could help.
Green, the white boxes. Beginning on the bottom right as though row 1 of a chart, each section has its own strand. As you look up the rows for each number you can see the area I works. Look at number 3, it begins with a single stitch, that’s the new strand, there is a single stitch to the left (one stitch of grass between), as it stands alone I would use strand 3 here too, in the row above strand 3 carries across back to its original column and is worked, then stays in that section all the way up.
About 7 rows up a new strand is brought in because 3 can’t go both ways, green 6. Follow them up and green 3 and 6 merge into one, at this point 3 can be carried behind to the next section (3 at top right).
Blue, the grass strands. Each has its own. Blue 4 initially looks redundant as 3 could work the first few rows, however 3nand 4 branch away from each other so at some point that strand 4 needs bringing in, either at the bottom or a few rows up. You can intarsia link 2 strands of the same colour where they meet for a few rows and then allow them to seperate as they branch off. Blue 5 and 6 you could choose to combine into a single strand and strand it across the few stitches of white between.
Purple shows 2 strands of the dark box.
You could work up this section, around 21 sts wide and 28 rows on a swatch to see how it goes?
Another option is to use a single long strand for ALL the white boxes (green mark up) in that section and only have multiple strands for the grass (blue) and dark (purple). Personally I find the fabric is more even with the full intarsia, but I’ve also worked sections this way. As you work the white boxes all in one strand you twist the yarn behind the intarsia grass strand when you come to it and carry the main colour across like stranded work. If you work this way I still recommend cutting a long strand for the main colour and not working with a ball/butterfly.
Either option, the intarsia method is perfectly workable in a single stitch or 2 stitches. It’s just a matter of setting up and starting. It’s a little slower than fairisle which can whip across a row of 2 colours in no time, but the slower process can be very enjoyable and I am surprised at how quickly I get across a row of many stranded intarsia.
Everyone is different and everyone has preferences. This is just mine. I personally don’t feel the pattern was intended to have duplicate stitch and it doesn’t look that way in the pattern photo, but you should work whichever way you prefer.
I’d love to see your progress pics on this piece. It’s a great design.
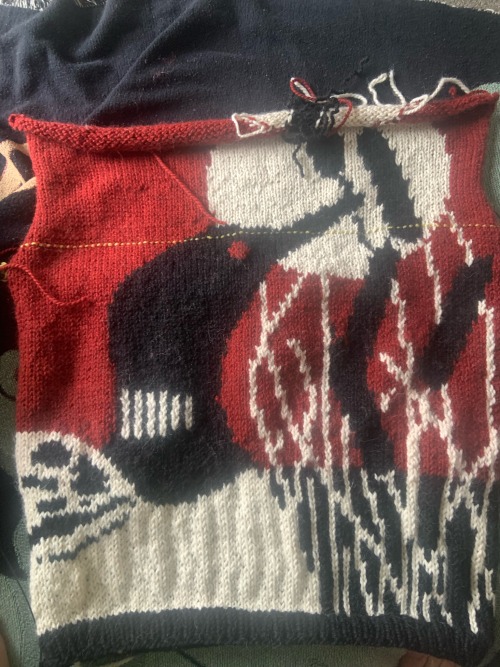
Thought I’d share a pic of my early rows of a recent sweater so you can see the yarn spaghetti bundle, it’s only a few rows in but already a big bundle of yarn strands to work 1, 2 or 3 wide stretches of colour. In this pic I still have a few small balls I have not unwound yet, they were only wound for a few set up rows before totally unwinding all of them so the strands could glide through the mess.