I have a buttonband knitted seperatly which i am seaming onto a v neck cardigan.
I have worked out the ratio of band rows to body rows so it sits flat but struggling a bit on where it changes direction at the V and up the slope.
Any tips for how to get this part seamed so it is not too loose or too tight?
Can you try a short row or two in the ribbing at the bend? That might give you the curve and the extra ease for the band.
https://www.youtube.com/watch?v=jK-c0jMIsAw
Maybe this video will give you idea. You can do it 
1 Like
Hmm, maybe I need to but I have already knit almost the whole band in one piece which I saw on various tutorials, none mentioned short rows near the bend. I’d like to try seaming without frogging if possible. Also i have an eyelet cable in the band and short rows through those would cause me more trouble than i think i can manage.
I’ve allowed for more rows of band around the bend by seaming for instance 1 body to 3 band rows for perhaps 3 times before during and after the bend. It might be close to ok.
The diagonal of the v the \ was decreased on the neck edge and it will have a different seaming ratio I’m sort of struggling with that bit.
I’ll undo that bit and see if i can find a better ratio.
Can i ask about this please.
This is an extract, i have copied a larger chunk to put it in context an i will bold the part I am asking about:
You’ve specifically knitted the band on smaller needles, which means tighter row gauge — more rows per inch than what you have on the body pieces you’re seaming to — so it’s no longer 1-to-1. What that means is you have to lay them flat next to each other, use your judgment, and work back and forth picking up whichever bar is directly across from the one you just picked up, which most likely will mean skipping one every few rows along the straight parts of the front, and easing them together as makes sense along the slopes. (The outer lane of a racetrack is longer than the inner one. So you’ll need to allow more band fabric along the front curves.)
Link to source
Usually when I mattress stitch a certain ratio, let’s say 1 : 2 i go under one bar on body and under 2 bars on band, meaning i still go into the band where the last stitch came out but instead of going under 1 bar I go under 2 bars.
The quote seems like it is saying not to do this but rather to totally skip rows, so under one bar of body and do not reenter the band where the last stitch came out but instead totally skip a bar and go under the second bar only.
Is this right?
I have never done this and would like to know if this would give a better result? What do you think?
For what it’s worth i can’t see any pics on the tutorial i am quoting from, there might be a pic of it but i can’t get them.
Thanks for trying to help me
It’s often helpful to change from a strict 1 to 1 pick up to 2 to 1 in mattress stitch. It compensates for differenct gauges in the two pieces or just one side being uneven with the other. The bolded section is ambiguous enough that you can interpret “skipping” this way. At any rate it’s your knitting and you can work it as best you think rather than strictly following someone else’s recommendations.
1 Like
I have worked out the ratios of the 2 different fabrics, but usually on videos i see more than one bar passed under when needed rather than totally skipping the row.
I was thinking though, is it patty lyons perhaps who has a tutorial for working a band at the same time as the body but on a smaller needle and she doesn’t attach every row to allow for the gauge difference, i spposed the equivalent would be totally skipping seaming in the band on some rows rather than what ive been doing hich is seaming under more than one bar.
Maybe it spreads the fabric differently.
Best way to know it to give it a try and please do report back.
It’s great!
So far I have only tried it on a straight section but it is a much nicer seam.
I’m seaming at a gauge of 5 : 7 so every 2 or 3 rows I skip one bar on the band side instead of going under 2 bars. Much nicer.
We’ll see how it goes around the change in direction and the long diagonal where the ratios are different.
1 Like
If at first you dont succeed, try, try, try, try…
When trying doesn’t work, turn to maths.
I used pythagoras’s theorem to calculate the length of the \ angle on my V then converted to rows. Then used 2 different gauge one for eyelets one for plain rib, to calculate the seam ratio of the band to the top shoulder, a third ratio for the back neck,
And it worked
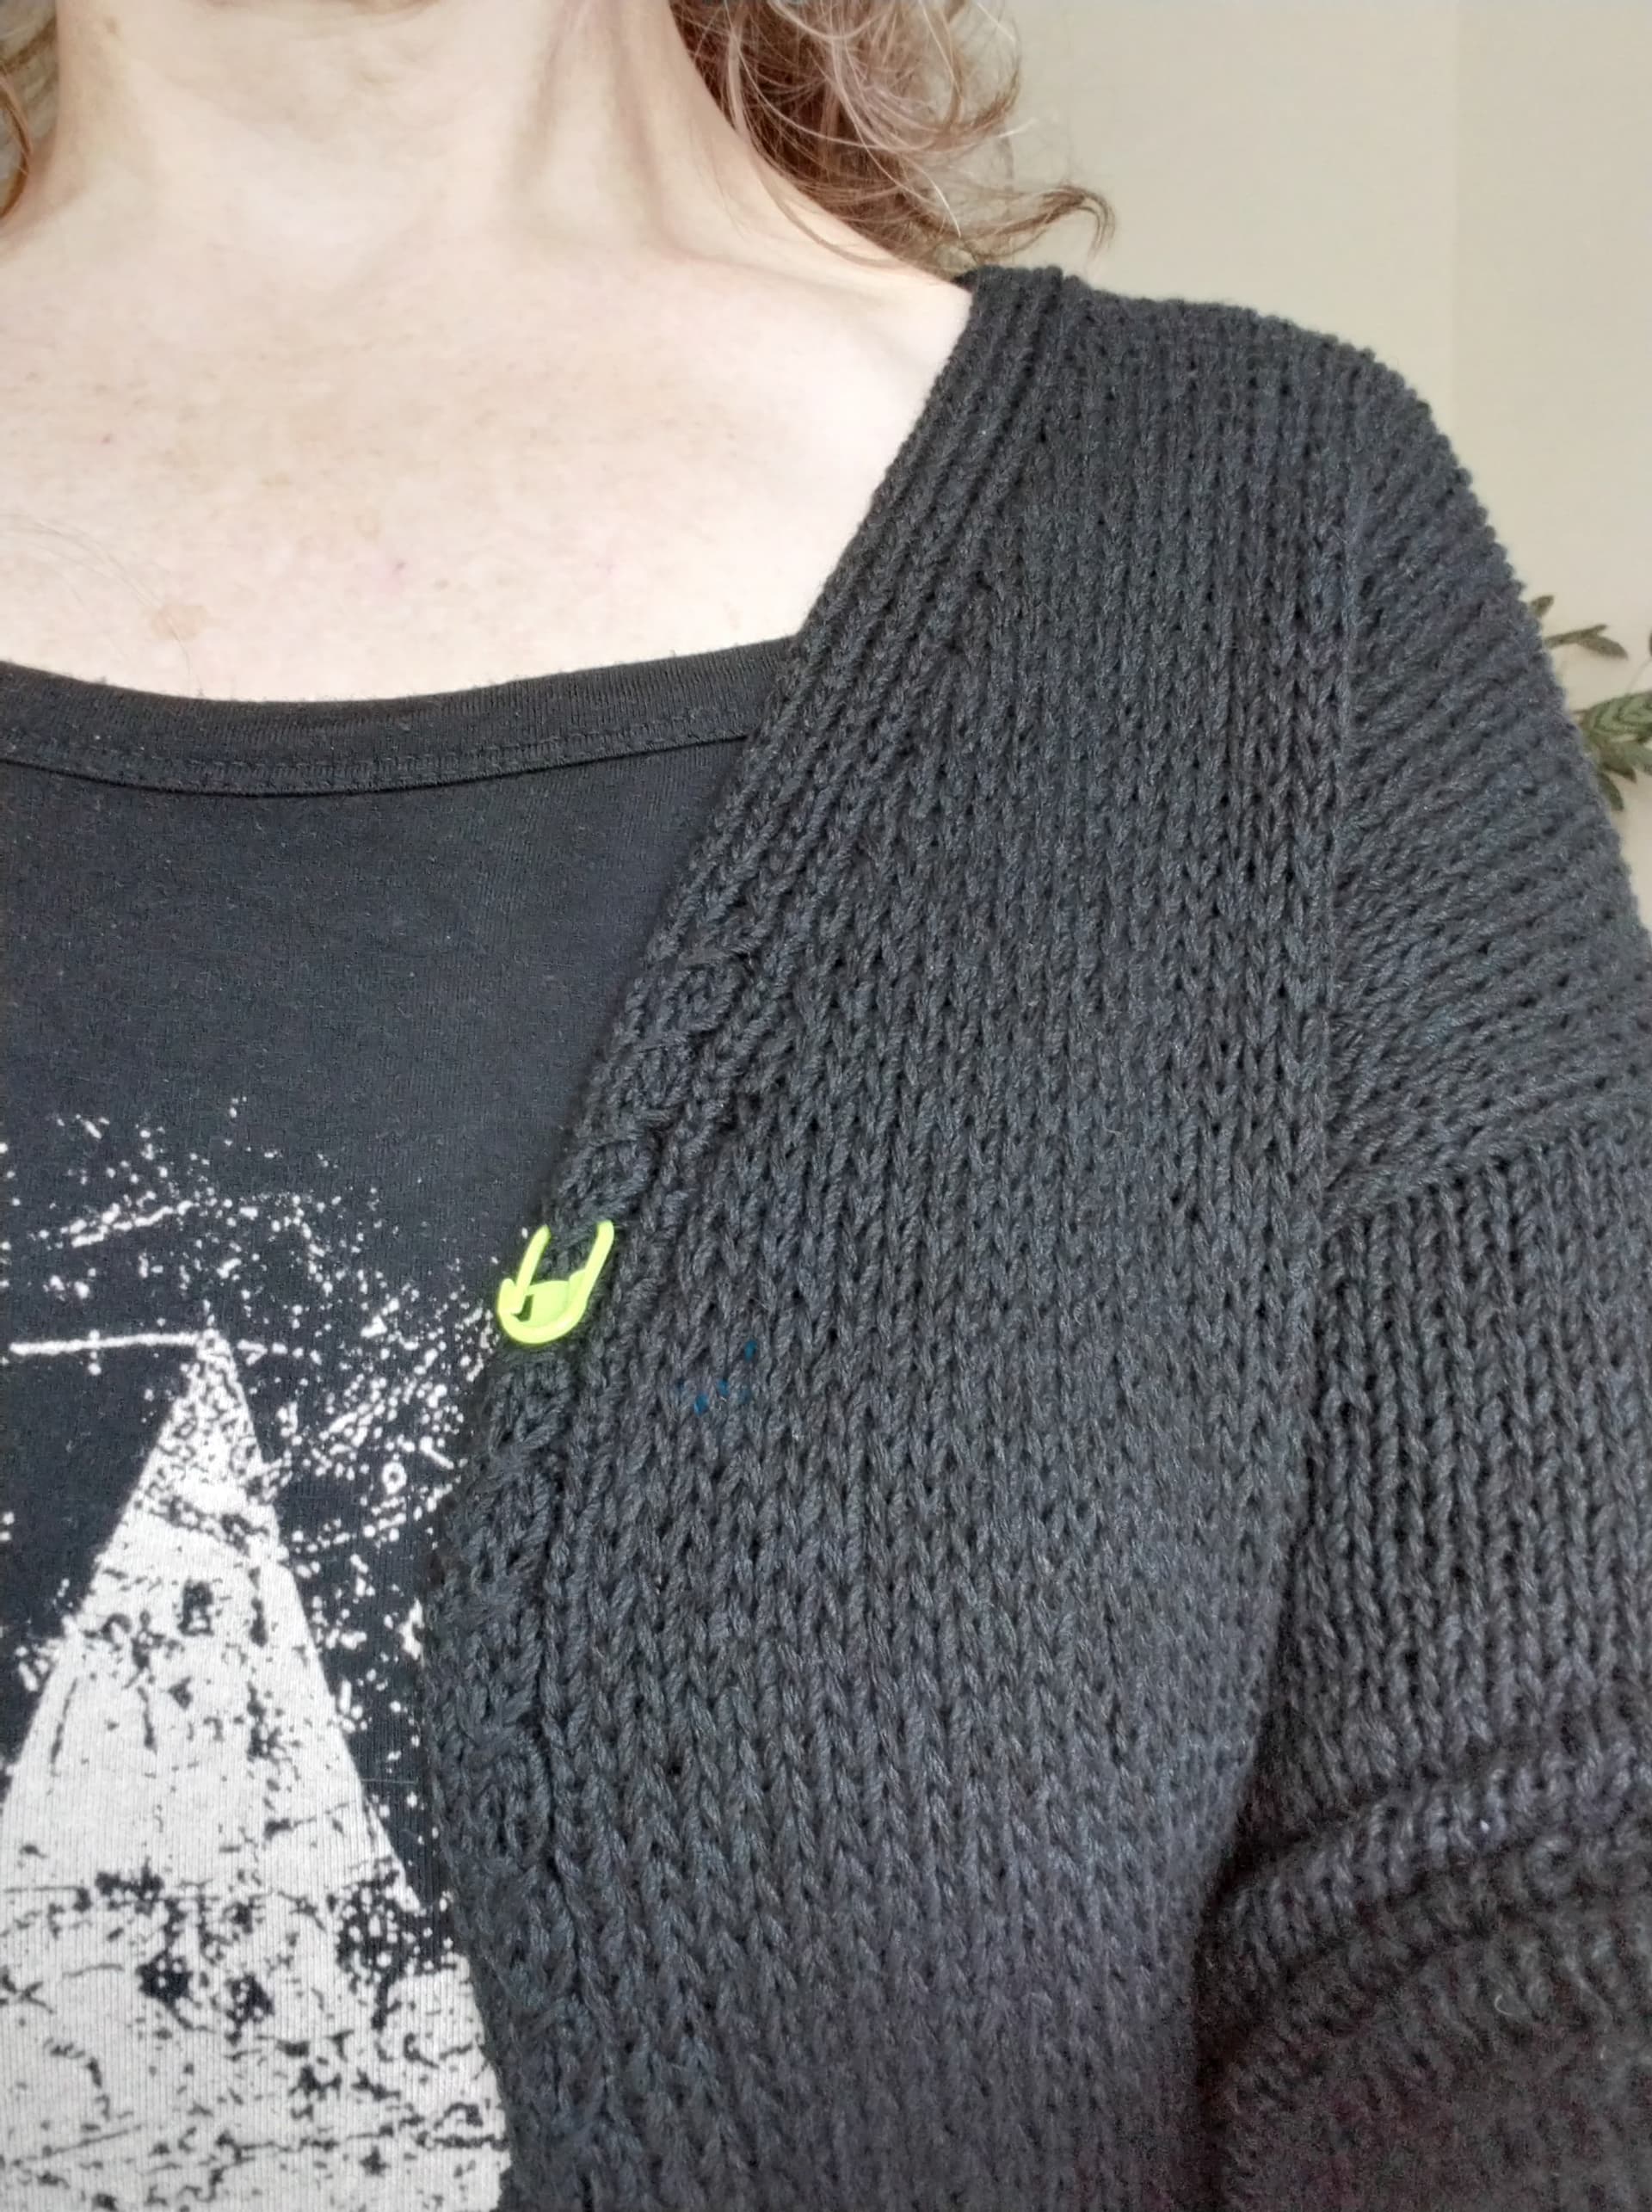
It appears i have seamed a lovely smooth band which doesn’t wiggle flap or flip. For someone like me who can’t sew this is a big acheivement. I’m not good at guessing where to seam, maths has saved me.
3 Likes
Beautifully band!
1 Like
That looks perfect! Well done, you!
1 Like
Thank you.
You know how bad i am at sewing!
I have now knitted the other half of band and started seaming, I’m just wondering if i miscalculated the row count on the second side. Working the seaming ratio has worked to make it flat but took more band rows than expected on the / of V. Too mathed out to calculate again today but i might look at it tomorrow to see where i went wrong (my guess is to do with the 2 different gauges as the eyelet is different to the rib).
This band i have designed to seam into a purl column rather than between knit columns and i like how it’s letting the knit columns breath a bit. Also 2 selvedge columns which i will sew down on the inside to cover the seam ridge, it might be called a facing or perhaps something else.